

This walkthrough follows the English Fade 1.09 from New Game to the credits. It was worked out from the game’s own data files: its scene scripts, its inventory scripts and its journal, which say what every action needs before it works and what it changes.Cette solution suit Fade 1.09 de New Game au générique. Elle a été établie à partir des fichiers de données du jeu : ses scripts de scènes, ses scripts d’inventaire et son journal, qui disent ce dont chaque action a besoin pour fonctionner et ce qu’elle change. Les noms d’actions sont ceux de la version française.Diese Komplettlösung folgt dem englischen Fade 1.09 von New Game bis zum Abspann. Sie wurde aus den Datendateien des Spiels erarbeitet: seinen Szenenskripten, seinen Inventarskripten und seinem Tagebuch, die sagen, was jede Aktion braucht, bevor sie funktioniert, und was sie verändert. Fade erschien nur auf Englisch und Französisch, daher stehen die Befehle hier wie im englischen Spiel.Questa soluzione segue Fade 1.09 inglese da New Game ai titoli di coda. È stata ricavata dai file di dati del gioco: i suoi script delle scene, i suoi script dell’inventario e il suo diario, che dicono cosa serve a ogni azione per funzionare e cosa cambia. Fade è uscito solo in inglese e francese, quindi i comandi sono scritti come nel gioco inglese.Esta guía sigue Fade 1.09 en inglés desde New Game hasta los créditos. Se ha elaborado a partir de los archivos de datos del propio juego: sus guiones de escenas, sus guiones de inventario y su diario, que dicen lo que necesita cada acción para funcionar y lo que cambia. Fade solo salió en inglés y francés, así que los comandos aparecen como en el juego inglés.
How to playComment jouerSo wird gespieltCome si giocaCómo se juega
- Tap an object, then choose an action from its popup. An action such as Inspect often opens a close-up with more objects in it.Touchez un objet, puis choisissez une action dans son menu. Une action comme Inspecter ouvre souvent un gros plan contenant d’autres objets.Tippe ein Objekt an und wähle dann eine Aktion aus seinem Menü. Eine Aktion wie Inspect öffnet oft eine Nahaufnahme mit weiteren Objekten.Tocca un oggetto, poi scegli un’azione dal suo menu. Un’azione come Inspect apre spesso un primo piano con altri oggetti.Toca un objeto y elige una acción de su menú. Una acción como Inspect suele abrir un primer plano con más objetos.
- Use with means: select an inventory item, choose that action, then tap the object in the scene. Open the close-up first when the target is inside one.Utiliser Avec signifie : sélectionnez un objet de l’inventaire, choisissez cette action, puis touchez l’objet dans la scène. Ouvrez d’abord le gros plan quand la cible se trouve dedans.Use with bedeutet: Wähle einen Gegenstand im Inventar, wähle diese Aktion und tippe dann das Objekt in der Szene an. Öffne zuerst die Nahaufnahme, wenn das Ziel darin liegt.Use with significa: seleziona un oggetto dell’inventario, scegli quell’azione, poi tocca l’oggetto nella scena. Apri prima il primo piano quando il bersaglio è al suo interno.Use with significa: selecciona un objeto del inventario, elige esa acción y toca el objeto en la escena. Abre primero el primer plano cuando el objetivo esté dentro.
- Combine with means: choose that action on one inventory item, then select the other item.Combiner Avec signifie : choisissez cette action sur un objet de l’inventaire, puis sélectionnez l’autre objet.Combine with bedeutet: Wähle diese Aktion an einem Gegenstand im Inventar, dann wähle den anderen Gegenstand.Combine with significa: scegli quell’azione su un oggetto dell’inventario, poi seleziona l’altro oggetto.Combine with significa: elige esa acción en un objeto del inventario, y luego selecciona el otro objeto.
- The red chest opens the inventory, the green book the journal, and the emblem at the bottom left the main menu.Le coffre rouge ouvre l’inventaire, le livre vert le journal, et l’emblème en bas à gauche le menu principal.Die rote Truhe öffnet das Inventar, das grüne Buch das Tagebuch und das Emblem unten links das Hauptmenü.Il baule rosso apre l’inventario, il libro verde il diario, e l’emblema in basso a sinistra il menu principale.El cofre rojo abre el inventario, el libro verde el diario, y el emblema de abajo a la izquierda el menú principal.
- Use the up and down arrows beside the text to read further pages. The down arrow also moves many story scenes on; in the opening you must press it, as waiting does nothing.Utilisez les flèches haut et bas à côté du texte pour lire les pages suivantes. La flèche du bas fait aussi avancer de nombreuses scènes ; dans l’introduction, il faut l’appuyer, attendre ne sert à rien.Benutze die Pfeile nach oben und unten neben dem Text, um weitere Seiten zu lesen. Der Pfeil nach unten bringt auch viele Szenen voran; im Intro musst du ihn drücken, Warten bringt nichts.Usa le frecce su e giù accanto al testo per leggere le pagine successive. La freccia giù fa anche avanzare molte scene; nell’introduzione devi premerla, aspettare non serve.Usa las flechas arriba y abajo junto al texto para leer más páginas. La flecha abajo también hace avanzar muchas escenas; en la introducción tienes que pulsarla, esperar no sirve.
- Dialogue choices can continue below the visible text: scroll before deciding an option is missing.Les choix de dialogue peuvent continuer sous le texte visible : faites défiler avant de conclure qu’une option manque.Dialogoptionen können unter dem sichtbaren Text weitergehen: Scrolle, bevor du entscheidest, dass eine Option fehlt.Le scelte di dialogo possono continuare sotto il testo visibile: scorri prima di concludere che manca un’opzione.Las opciones de diálogo pueden seguir por debajo del texto visible: desplázate antes de decidir que falta una opción.
- Doorways can also have an Open, Enter or Go to action. There are three save slots: save often and rotate them, so you can always go back to an earlier point.Les passages peuvent aussi avoir une action Ouvrir, Aller à ou S’approcher de. Il y a trois emplacements de sauvegarde : sauvegardez souvent et alternez-les, pour toujours pouvoir revenir à un point antérieur.Durchgänge können auch eine Aktion Open, Enter oder Go to haben. Es gibt drei Speicherplätze: Speichere oft und wechsle sie ab, damit du immer zu einem früheren Punkt zurückkannst.I passaggi possono avere anche un’azione Open, Enter o Go to. Ci sono tre slot di salvataggio: salva spesso e alternali, così puoi sempre tornare a un punto precedente.Los pasos pueden tener también una acción Open, Enter o Go to. Hay tres ranuras de guardado: guarda a menudo y altérnalas, para poder volver siempre a un punto anterior.
- Examine a clue and read its text to the end even when this guide gives you the answer. Some puzzles check that Louis has actually found it.Examinez un indice et lisez son texte jusqu’au bout même quand cette solution vous donne la réponse. Certaines énigmes vérifient que Louis l’a vraiment trouvé.Untersuche einen Hinweis und lies seinen Text bis zum Ende, auch wenn diese Lösung dir die Antwort gibt. Manche Rätsel prüfen, ob Louis ihn wirklich gefunden hat.Esamina un indizio e leggi il suo testo fino in fondo anche quando questa guida ti dà la risposta. Alcuni enigmi controllano che Louis l’abbia davvero trovato.Examina una pista y lee su texto hasta el final aunque esta guía te dé la respuesta. Algunos puzles comprueban que Louis la haya encontrado de verdad.
Get ready and meet BellevilleSe préparer et rencontrer BellevilleFertig machen und Belleville treffenPrepararsi e incontrare BellevillePrepararse y reunirse con Belleville
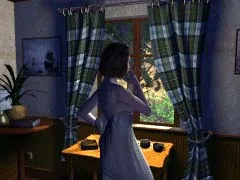
Wake up and find the pillsSe réveiller et trouver les pilulesAufwachen und die Pillen findenSvegliarsi e trovare le pilloleDespertar y encontrar las pastillas
- Start New Game. Read the bedroom introduction and press the down arrow to continue.Lancez New Game. Lisez l’introduction dans la chambre et appuyez sur la flèche du bas pour continuer.Starte New Game. Lies die Einleitung im Schlafzimmer und drück den Pfeil nach unten, um weiterzumachen.Avvia New Game. Leggi l’introduzione in camera e premi la freccia giù per continuare.Empieza New Game. Lee la introducción del dormitorio y pulsa la flecha abajo para continuar.
- When Anne Everett talks to you, choose the reply about wanting coffee before taking the pills. Carry on into the daytime bedroom.Quand Anne Everett vous parle, choisissez la réponse où vous voulez un café avant de prendre les pilules. Continuez jusqu’à la chambre de jour.Wenn Anne Everett mit dir spricht, wähle die Antwort, dass du vor den Pillen einen Kaffee willst. Mach weiter bis ins Schlafzimmer bei Tag.Quando Anne Everett ti parla, scegli la risposta in cui vuoi un caffè prima delle pillole. Prosegui fino alla camera di giorno.Cuando Anne Everett te hable, elige la respuesta de querer un café antes de las pastillas. Sigue hasta el dormitorio de día.
- Inspect the chair and search Anne’s jeans. Take the train ticket from the pocket.Inspectez la Chaise et fouillez le Jean d’Anne. Prenez le billet de train dans la poche.Untersuche den chair (Stuhl) und durchsuche Annes jeans. Nimm die Zugfahrkarte aus der Tasche.Esamina la chair (sedia) e fruga nei jeans di Anne. Prendi il biglietto del treno dalla tasca.Inspecciona la chair (silla) y registra los jeans de Anne. Coge el billete de tren del bolsillo.
- You can inspect the bedroom table, but for now the notebook only holds work papers. You’ll come back to it after Félicienne’s phone call.Vous pouvez inspecter la Table de la chambre, mais pour l’instant le carnet ne contient que des papiers de travail. Vous y reviendrez après l’appel de Félicienne.Du kannst den table im Schlafzimmer untersuchen, aber vorerst enthält das Notizbuch nur Arbeitspapiere. Du kommst nach Féliciennes Anruf darauf zurück.Puoi esaminare il table della camera, ma per ora il taccuino contiene solo carte di lavoro. Ci tornerai dopo la telefonata di Félicienne.Puedes inspeccionar la table del dormitorio, pero de momento el cuaderno solo tiene papeles de trabajo. Volverás a él tras la llamada de Félicienne.
- Leave the bedroom. Inspect the corridor’s table with the plant and take the safe key.Quittez la chambre. Inspectez la table avec la plante du couloir et prenez la clé du coffre.Verlass das Schlafzimmer. Untersuche den Tisch mit der Pflanze im Flur und nimm den Safeschlüssel.Esci dalla camera. Esamina il tavolo con la pianta del corridoio e prendi la chiave della cassaforte.Sal del dormitorio. Inspecciona la mesa con la planta del pasillo y coge la llave de la caja fuerte.
- Go through the lounge to the kitchen of the house. Drink Louis’ coffee if you haven’t yet. When Anne is in the kitchen, ask her about the pills and then, when it appears, about the safe’s code and key. She points you to your diary.Passez par le salon jusqu’à la cuisine de la maison. Buvez le café de Louis si ce n’est pas fait. Quand Anne est dans la cuisine, interrogez-la sur les pilules puis, quand le sujet apparaît, sur le code et la clé du coffre. Elle vous renvoie à votre journal.Geh durch das Wohnzimmer in die Küche des Hauses. Trink Louis’ coffee, falls noch nicht geschehen. Wenn Anne in der Küche ist, frag sie nach den Pillen und dann, sobald es erscheint, nach Code und Schlüssel des Safes. Sie verweist dich auf dein Tagebuch.Passa per il salotto fino alla cucina della casa. Bevi il coffee di Louis se non l’hai ancora fatto. Quando Anne è in cucina, chiedile delle pillole e poi, quando compare, del codice e della chiave della cassaforte. Ti rimanda al tuo diario.Pasa por el salón hasta la cocina de la casa. Bébete el coffee de Louis si aún no lo has hecho. Cuando Anne esté en la cocina, pregúntale por las pastillas y luego, cuando aparezca, por el código y la llave de la caja fuerte. Te remite a tu diario.
- Go to the bathroom. In the inventory, Examine My Diary, then Use it with the bathroom mirror. Louis reads the backwards writing: 1974.Allez à la Salle de bains. Dans l’inventaire, Examiner Mon Journal, puis Utiliser avec le Miroir de la salle de bains. Louis lit l’écriture à l’envers : 1974.Geh ins bathroom. Examine im Inventar My Diary, dann Use es mit dem mirror im Bad. Louis liest die Spiegelschrift: 1974.Vai nel bathroom. Nell’inventario, Examine su My Diary, poi Use con il mirror del bagno. Louis legge la scrittura al contrario: 1974.Ve al bathroom. En el inventario, Examine en My Diary, y luego Use con el mirror del baño. Louis lee la escritura al revés: 1974.
- Back in the bedroom, inspect the small picture of a village street and Move it to uncover the safe.De retour dans la chambre, inspectez le petit tableau d’une rue de village et Retourner pour découvrir le coffre.Zurück im Schlafzimmer: Untersuche das kleine Bild einer Dorfstraße und Move es, um den Safe freizulegen.Tornato in camera, esamina il piccolo quadro di una strada di paese e Move per scoprire la cassaforte.De vuelta en el dormitorio, inspecciona el pequeño cuadro de una calle de pueblo y Move para descubrir la caja fuerte.
- Choose Open on the safe. There is no keypad: the game only checks that you have the key and have read the code.Choisissez Ouvrir sur le coffre. Il n’y a pas de clavier : le jeu vérifie seulement que vous avez la clé et avez lu le code.Wähle Open am Safe. Es gibt kein Tastenfeld: Das Spiel prüft nur, ob du den Schlüssel hast und den Code gelesen hast.Scegli Open sulla cassaforte. Non c’è un tastierino: il gioco controlla solo che tu abbia la chiave e abbia letto il codice.Elige Open en la caja fuerte. No hay teclado: el juego solo comprueba que tienes la llave y has leído el código.
- Take the pills from the safe. Louis takes the day’s dose by himself.Prenez les pilules dans le coffre. Louis prend la dose du jour de lui-même.Nimm die Pillen aus dem Safe. Louis nimmt die Tagesdosis von selbst.Prendi le pillole dalla cassaforte. Louis prende da solo la dose del giorno.Coge las pastillas de la caja fuerte. Louis se toma la dosis del día por su cuenta.
Help Anne and prepare the fileAider Anne et préparer le dossierAnne helfen und die Akte vorbereitenAiutare Anne e preparare il fascicoloAyudar a Anne y preparar el expediente
- Back in the corridor, Anne calls from the bathroom about the blocked bath. Agree to help.De retour dans le couloir, Anne appelle depuis la salle de bains à propos de la baignoire bouchée. Acceptez de l’aider.Zurück im Flur ruft Anne aus dem Bad wegen der verstopften Wanne. Sag zu, ihr zu helfen.Tornato nel corridoio, Anne chiama dal bagno per la vasca intasata. Accetta di aiutarla.De vuelta en el pasillo, Anne llama desde el baño por la bañera atascada. Acepta ayudarla.
- In the toilet, take the plunger. This knocks your car keys into the toilet bowl.Dans les toilettes, prenez le débouche WC. Cela fait tomber vos clés de voiture dans la cuvette.Nimm in der toilet den Pömpel. Dabei fallen deine Autoschlüssel in die Kloschüssel.Nella toilet, prendi lo sturalavandini. Questo fa cadere le chiavi della macchina nella tazza.En el toilet, coge el desatascador. Eso tira tus llaves del coche a la taza.
- Use the plunger on the bathroom door in the corridor, where Anne is calling. That deals with the bath.Utilisez le débouche WC sur la Porte salle de bains du couloir, d’où Anne appelle. Cela règle le problème de la baignoire.Benutze den Pömpel an der bathroom door im Flur, wo Anne ruft. Damit ist die Wanne erledigt.Usa lo sturalavandini sulla bathroom door nel corridoio, da dove chiama Anne. Questo sistema la vasca.Usa el desatascador con la bathroom door del pasillo, desde donde llama Anne. Eso resuelve lo de la bañera.
- In the lounge, inspect the fireplace and take the poker.Dans le salon, inspectez la Cheminée et prenez le tisonnier.Untersuche im Wohnzimmer den fireplace (Kamin) und nimm den Schürhaken.In salotto, esamina il fireplace (camino) e prendi l’attizzatoio.En el salón, inspecciona la fireplace (chimenea) y coge el atizador.
- Back in the toilet, open the toilet bowl close-up and use the poker on the car keys to fish them out.De retour aux toilettes, ouvrez le gros plan de la Cuvette et utilisez le tisonnier sur les clés de voiture pour les repêcher.Zurück auf der Toilette: Öffne die Nahaufnahme der toilet bowl und benutze den Schürhaken an den car keys, um sie herauszufischen.Tornato in bagno, apri il primo piano della toilet bowl e usa l’attizzatoio sulle car keys per ripescarle.De vuelta en el aseo, abre el primer plano de la toilet bowl y usa el atizador con las car keys para pescarlas.
- Answer the hall telephone when it rings. Tell Félicienne you have the file and the photos, and hear her out about the appointment. Now go back to the bedroom table and Flip through the notebook: the call is what lets you take the Antique picture.Répondez au Téléphone de l’entrée quand il sonne. Dites à Félicienne que vous avez le dossier et les photos, et écoutez-la au sujet du rendez-vous. Retournez maintenant à la table de la chambre et Feuilleter le carnet : c’est l’appel qui vous permet de prendre la Photo Antiquité.Geh an das hall telephone, wenn es klingelt. Sag Félicienne, dass du die Akte und die Fotos hast, und hör dir an, was sie zum Termin sagt. Geh jetzt zurück zum Schlafzimmertisch und Flip through am Notizbuch: Erst der Anruf erlaubt dir, das Antique picture zu nehmen.Rispondi al hall telephone quando squilla. Di’ a Félicienne che hai il fascicolo e le foto, e ascoltala sull’appuntamento. Ora torna al tavolo della camera e Flip through sul taccuino: è la telefonata che ti permette di prendere l’Antique picture.Contesta el hall telephone cuando suene. Dile a Félicienne que tienes el expediente y las fotos, y escúchala sobre la cita. Vuelve ahora a la mesa del dormitorio y Flip through en el cuaderno: la llamada es lo que te deja coger la Antique picture.
- Leave by the front door into the garden. Inspect and open the mailbox, and take the envelope.Sortez par la porte d’entrée dans le Jardin. Inspectez et ouvrez la Boite aux lettres, et prenez l’enveloppe.Geh durch die Haustür in den garden. Untersuche und öffne den mailbox (Briefkasten) und nimm den Umschlag.Esci dalla porta d’ingresso in garden. Esamina e apri la mailbox (cassetta delle lettere), e prendi la busta.Sal por la puerta principal al garden. Inspecciona y abre el mailbox (buzón), y coge el sobre.
- In the inventory, Open the envelope to get the Incomplete file, then Combine it with the Antique picture to make File complete.Dans l’inventaire, Ouvrir l’enveloppe pour obtenir le Dossier incomplet, puis Combiner Avec la Photo Antiquité pour obtenir le Dossier complet.Open im Inventar den Umschlag, um die Incomplete file zu bekommen, dann Combine sie mit dem Antique picture zur File complete.Nell’inventario, Open sulla busta per avere l’Incomplete file, poi Combine con l’Antique picture per ottenere il File complete.En el inventario, Open en el sobre para obtener el Incomplete file, y luego Combine con la Antique picture para tener el File complete.
- Get into the car. Adjust the rear-view mirror if you like, then choose Start on the dashboard. If Louis says something is missing, finish the file first.Montez dans la Voiture. Réglez le rétroviseur si vous voulez, puis choisissez Démarrer sur le tableau de bord. Si Louis dit qu’il manque quelque chose, terminez d’abord le dossier.Steig ins car (Auto). Stell den Rückspiegel ein, wenn du willst, dann wähle Start am Armaturenbrett. Sagt Louis, dass etwas fehlt, mach zuerst die Akte fertig.Sali in car (auto). Regola lo specchietto se vuoi, poi scegli Start sul cruscotto. Se Louis dice che manca qualcosa, finisci prima il fascicolo.Sube al car (coche). Ajusta el retrovisor si quieres, y luego elige Start en el salpicadero. Si Louis dice que falta algo, termina primero el expediente.
- Agree when Anne asks for a lift, and keep talking until you reach the village.Acceptez quand Anne demande que vous la déposiez, et continuez à parler jusqu’au village.Sag zu, als Anne fragt, ob du sie mitnimmst, und red weiter, bis ihr im Dorf seid.Accetta quando Anne chiede un passaggio, e continua a parlare finché non arrivate al villaggio.Acepta cuando Anne te pida que la lleves, y sigue hablando hasta llegar al pueblo.
Meet your customerRencontrer votre clientDen Kunden treffenIncontrare il clienteReunirse con el cliente
- Go to the antiques shop. A stranger stops you outside: end the conversation with the reply telling him to leave or you’ll call the police, then go in.Allez à la boutique d’antiquités. Un inconnu vous arrête devant : terminez la conversation par la réponse qui lui dit de partir sinon vous appelez la police, puis entrez.Geh zum Antiquitätenladen. Ein Fremder hält dich draußen auf: Beende das Gespräch mit der Antwort, er solle gehen, sonst rufst du die Polizei, dann geh hinein.Vai al negozio d’antiquariato. Uno sconosciuto ti ferma fuori: chiudi la conversazione con la risposta che gli dice di andarsene o chiami la polizia, poi entra.Ve a la tienda de antigüedades. Un desconocido te para fuera: acaba la conversación con la respuesta de que se vaya o llamarás a la policía, y luego entra.
- Talk to Félicienne, who is balancing precariously above the floor, and agree to fetch something to help her.Parlez à Félicienne, en équilibre précaire au-dessus du sol, et acceptez d’aller chercher quelque chose pour l’aider.Rede mit Félicienne, die wackelig über dem Boden balanciert, und sag zu, etwas zu holen, um ihr zu helfen.Parla con Félicienne, in bilico precario sopra il pavimento, e accetta di andare a prendere qualcosa per aiutarla.Habla con Félicienne, que hace equilibrios precarios sobre el suelo, y acepta ir a buscar algo para ayudarla.
- First go to the office: inspect the electric box, Open it and Switch on the breaker, which lights the back room. In the back room take the ladder, then Use it with Félicienne. The dialogue talks about a stool, but the ladder is what she needs.Allez d’abord au Bureau : inspectez l’Armoire électrique, Ouvrir et Allumer le disjoncteur, ce qui éclaire la remise. Dans la Remise, prenez l’escabeau, puis Utiliser avec Félicienne. Le dialogue parle d’un tabouret, mais c’est l’escabeau qu’il lui faut.Geh zuerst ins office: Untersuche den electric box (Sicherungskasten), Open ihn und Switch on den Schalter, der das Hinterzimmer beleuchtet. Nimm im back room die Leiter, dann Use sie mit Félicienne. Im Dialog ist von einem Hocker die Rede, aber sie braucht die Leiter.Prima vai in office: esamina l’electric box (quadro elettrico), Open e Switch on l’interruttore, che illumina il retrobottega. Nel back room prendi la scala, poi Use con Félicienne. Il dialogo parla di uno sgabello, ma le serve la scala.Ve primero al office: inspecciona el electric box (cuadro eléctrico), Open y Switch on el interruptor, que ilumina la trastienda. En el back room coge la escalera, y luego Use con Félicienne. El diálogo habla de un taburete, pero lo que necesita es la escalera.
- Félicienne now talks at length. In the office, open the desk drawer and take the cigarettes. If the room is too dark, open the electric box and switch the power on.Félicienne parle maintenant longuement. Dans le Bureau, ouvrez le Tiroir du bureau et prenez les cigarettes. Si la pièce est trop sombre, ouvrez l’armoire électrique et remettez le courant.Félicienne redet jetzt lang und breit. Öffne im office die desk drawer (Schreibtischschublade) und nimm die Zigaretten. Ist der Raum zu dunkel, öffne den Sicherungskasten und schalte den Strom ein.Félicienne ora parla a lungo. Nell’office, apri il desk drawer (cassetto della scrivania) e prendi le sigarette. Se la stanza è troppo buia, apri il quadro elettrico e riattiva la corrente.Félicienne habla ahora largo y tendido. En el office, abre el desk drawer (cajón del escritorio) y coge los cigarrillos. Si la sala está demasiado oscura, abre el cuadro eléctrico y da la luz.
- Go back to Félicienne and choose Smoke, or use the cigarettes’ Smoke action. The smell drives her out.Retournez voir Félicienne et choisissez Fumer, ou utilisez l’action Fumer des cigarettes. L’odeur la fait fuir.Geh zurück zu Félicienne und wähle Smoke, oder benutze die Aktion Smoke der Zigaretten. Der Geruch vertreibt sie.Torna da Félicienne e scegli Smoke, o usa l’azione Smoke delle sigarette. L’odore la fa scappare.Vuelve con Félicienne y elige Smoke, o usa la acción Smoke de los cigarrillos. El olor la echa.
- Back in the office, choose Work on the desk, and read through the interruption about Belleville’s arrival.De retour dans le bureau, choisissez Travailler sur le bureau, et lisez l’interruption annonçant l’arrivée de Belleville.Zurück im Büro: Wähle Work am Schreibtisch und lies die Unterbrechung über Bellevilles Ankunft.Tornato in ufficio, scegli Work sulla scrivania, e leggi l’interruzione sull’arrivo di Belleville.De vuelta en el despacho, elige Work en el escritorio, y lee la interrupción sobre la llegada de Belleville.
- Talk to Belleville in the shop and invite him into the office. Agree to hear about his urgent job. The story moves to Paris.Parlez à Belleville dans la boutique et invitez-le dans le bureau. Acceptez d’entendre parler de son travail urgent. L’histoire se déplace à Paris.Rede im Laden mit Belleville und bitte ihn ins Büro. Sag zu, dir seinen dringenden Auftrag anzuhören. Die Geschichte wechselt nach Paris.Parla con Belleville nel negozio e invitalo in ufficio. Accetta di sentire del suo lavoro urgente. La storia si sposta a Parigi.Habla con Belleville en la tienda e invítalo al despacho. Acepta escuchar lo de su trabajo urgente. La historia pasa a París.
Return from ParisLe retour de ParisRückkehr aus ParisRitorno da ParigiRegreso de París
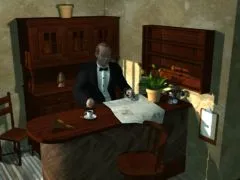
Get your wallet, coffee and pillsRécupérer portefeuille, café et pilulesBrieftasche, Kaffee und Pillen holenRecuperare portafoglio, caffè e pilloleConseguir cartera, café y pastillas
- Answer the phone in your room at the Hôtel des Lilas and finish the wake-up call.Répondez au Téléphone de votre chambre à l’Hôtel des Lilas et terminez l’appel du réveil.Geh in deinem Zimmer im Hôtel des Lilas ans phone und bring den Weckruf zu Ende.Rispondi al phone nella tua stanza all’Hôtel des Lilas e finisci la chiamata della sveglia.Contesta el phone de tu habitación en el Hôtel des Lilas y termina la llamada del despertador.
- Choose Dress on the bed, then leave the room and cross to the café across the street.Choisissez S’habiller sur le Lit, puis quittez la chambre et traversez jusqu’au café d’en face.Wähle Dress am bed, dann verlass das Zimmer und geh hinüber ins Café gegenüber.Scegli Dress sul bed, poi esci dalla stanza e attraversa fino al caffè di fronte.Elige Dress en la bed, y luego sal de la habitación y cruza al café de enfrente.
- Choose Order on a café table. Louis realises his wallet is missing, which makes searching the hotel bed worthwhile.Choisissez Commander sur une Table du café. Louis s’aperçoit que son portefeuille a disparu, ce qui rend utile de fouiller le lit de l’hôtel.Wähle Order an einem table im Café. Louis merkt, dass seine Brieftasche fehlt, und erst dann lohnt es sich, das Hotelbett zu durchsuchen.Scegli Order su un table del caffè. Louis si accorge che manca il portafoglio, il che rende utile frugare nel letto dell’albergo.Elige Order en una table del café. Louis se da cuenta de que le falta la cartera, y entonces sí vale la pena registrar la cama del hotel.
- Back at the hotel, take the Room315 key from the key shelf at reception when you can.De retour à l’hôtel, prenez la Clef chambre sur l’Armoire à clés de la réception dès que possible.Zurück im Hotel: Nimm den Room315 key vom Schlüsselbrett an der Rezeption, sobald du kannst.Tornato in albergo, prendi la Room315 key dalla bacheca delle chiavi alla reception appena puoi.De vuelta en el hotel, coge la Room315 key del casillero de llaves de recepción cuando puedas.
- If the maid won’t let you back upstairs, talk to the nervous man at the café about his relationship, admit that Anne proposed to you, and encourage him to go and see his girlfriend. That clears the maid out of the way.Si la femme de chambre ne vous laisse pas remonter, parlez à l’homme nerveux du café de sa relation, avouez que c’est Anne qui vous a demandé en mariage, et encouragez-le à aller voir sa petite amie. Cela écarte la femme de chambre.Lässt dich das Zimmermädchen nicht wieder nach oben, rede mit dem nervösen Mann im Café über seine Beziehung, gib zu, dass Anne dir den Antrag gemacht hat, und ermutige ihn, zu seiner Freundin zu gehen. Damit ist das Zimmermädchen aus dem Weg.Se la cameriera non ti lascia risalire, parla con l’uomo nervoso del caffè della sua relazione, ammetti che è stata Anne a chiederti di sposarla, e incoraggialo ad andare dalla sua ragazza. Questo toglie di mezzo la cameriera.Si la camarera no te deja volver a subir, habla con el hombre nervioso del café de su relación, admite que fue Anne quien te pidió matrimonio, y anímalo a ir a ver a su novia. Eso aparta a la camarera.
- At your door, use the Room315 key if it’s locked, and go in.À votre porte, utilisez la clef de chambre si elle est fermée, et entrez.Benutze an deiner Tür den Zimmerschlüssel, falls abgeschlossen ist, und geh hinein.Alla tua porta, usa la chiave della camera se è chiusa, ed entra.En tu puerta, usa la llave de la habitación si está cerrada, y entra.
- Search the bed and take the wallet.Fouiller le Lit et prenez le portefeuille.Search am bed und nimm die Brieftasche.Search sul bed e prendi il portafoglio.Search en la bed y coge la cartera.
- Go back to the café and Order again. Louis has his coffee and remembers his pills in the hotel bathroom.Retournez au café et Commander de nouveau. Louis prend son café et se souvient de ses pilules dans la salle de bains de l’hôtel.Geh zurück ins Café und noch einmal Order. Louis trinkt seinen Kaffee und erinnert sich an seine Pillen im Hotelbad.Torna al caffè e di nuovo Order. Louis beve il caffè e si ricorda delle pillole nel bagno dell’albergo.Vuelve al café y otra vez Order. Louis se toma su café y recuerda sus pastillas en el baño del hotel.
- Upstairs in the hotel bathroom, Take the pills. Louis takes a dose by himself.En haut, dans la salle de bains de l’hôtel, Prendre les pilules. Louis prend une dose de lui-même.Take oben im Hotelbad: die Pillen. Louis nimmt von selbst eine Dosis.Di sopra, nel bagno dell’albergo, Take le pillole. Louis prende una dose da solo.Arriba, en el baño del hotel, Take las pastillas. Louis se toma una dosis por su cuenta.
- Talk to the café customer who knows about transport. Ask about a taxi, then about the nearest metro station. This opens the way to the station.Parlez au client du café qui s’y connaît en transports. Demandez un taxi, puis la station de métro la plus proche. Cela ouvre le chemin de la gare.Rede mit dem Café-Gast, der sich mit Verkehrsmitteln auskennt. Frag nach einem Taxi, dann nach der nächsten Metrostation. Das öffnet den Weg zum Bahnhof.Parla con il cliente del caffè che sa dei trasporti. Chiedi di un taxi, poi della stazione della metro più vicina. Questo apre la strada verso la stazione.Habla con el cliente del café que sabe de transportes. Pregunta por un taxi y luego por la estación de metro más cercana. Eso abre el camino a la estación.
Buy a ticketAcheter un billetEine Fahrkarte kaufenComprare un bigliettoComprar un billete
- At the station, go to ticket desk 3. Ask for a ticket to Robertville sur Angeais and read through the reply sending you to another desk.À la gare, allez au guichet 3. Demandez un billet pour Robertville sur Angeais et lisez la réponse qui vous envoie à un autre guichet.Geh im Bahnhof zum Schalter 3. Verlange eine Fahrkarte nach Robertville sur Angeais und lies die Antwort, die dich zu einem anderen Schalter schickt.Alla stazione, vai allo sportello 3. Chiedi un biglietto per Robertville sur Angeais e leggi la risposta che ti manda a un altro sportello.En la estación, ve a la taquilla 3. Pide un billete a Robertville sur Angeais y lee la respuesta que te manda a otra taquilla.
- At desk 6, ask to join the waiting list, and keep going until the clerk sends you to desk 8.Au guichet 6, demandez à être inscrit sur la liste d’attente, et continuez jusqu’à ce que le guichetier vous envoie au guichet 8.Bitte an Schalter 6 darum, auf die Warteliste zu kommen, und mach weiter, bis der Angestellte dich zu Schalter 8 schickt.Allo sportello 6, chiedi di entrare in lista d’attesa, e continua finché l’impiegato non ti manda allo sportello 8.En la taquilla 6, pide entrar en la lista de espera, y sigue hasta que el taquillero te mande a la taquilla 8.
- At desk 8, say you want to get to Robertville sur Angeais. When asked about a discount card, choose the reply about having a slight disability but forgetting the card. That gets you the ticket; a plain No sends you back round the desks.Au guichet 8, dites que vous voulez aller à Robertville sur Angeais. Quand on vous demande une carte de réduction, choisissez la réponse sur un léger handicap dont vous avez oublié la carte. Cela vous donne le billet ; un simple Non vous renvoie faire le tour des guichets.Sag an Schalter 8, dass du nach Robertville sur Angeais willst. Auf die Frage nach einer Rabattkarte wähle die Antwort, dass du eine leichte Behinderung hast, aber den Ausweis vergessen hast. So bekommst du die Fahrkarte; ein bloßes Nein schickt dich wieder durch die Schalter.Allo sportello 8, di’ che vuoi andare a Robertville sur Angeais. Quando ti chiedono una carta sconto, scegli la risposta su un leggero handicap ma la tessera dimenticata. Così ottieni il biglietto; un semplice No ti rimanda in giro per gli sportelli.En la taquilla 8, di que quieres ir a Robertville sur Angeais. Cuando te pregunten por una tarjeta de descuento, elige la respuesta de tener una leve discapacidad pero haber olvidado la tarjeta. Así consigues el billete; un simple No te devuelve a dar vueltas por las taquillas.
- Board the train. In the carriage corridor, open the compartment door.Entrer dans le train. Dans le couloir de la voiture, ouvrez la porte du compartiment.Board: Steig in den Zug. Öffne im Wagengang die Abteiltür.Board: sali sul treno. Nel corridoio della carrozza, apri la porta dello scompartimento.Board: sube al tren. En el pasillo del vagón, abre la puerta del compartimento.
- Talk to the young woman. Keep going until she asks for a cigarette and the inspector comes along, then follow the conversation about the missing ticket and hiding in the toilet.Parlez à la jeune femme. Continuez jusqu’à ce qu’elle demande une cigarette et que le contrôleur arrive, puis suivez la conversation sur le billet perdu et la cachette dans les toilettes.Rede mit der jungen Frau. Mach weiter, bis sie nach einer Zigarette fragt und der Schaffner kommt, dann folge dem Gespräch über die fehlende Fahrkarte und das Verstecken in der Toilette.Parla con la giovane donna. Continua finché non chiede una sigaretta e arriva il controllore, poi segui la conversazione sul biglietto mancante e sul nascondersi in bagno.Habla con la joven. Sigue hasta que pida un cigarrillo y llegue el revisor, y luego sigue la conversación sobre el billete perdido y esconderse en el aseo.
- Read on through the scene in the train’s toilet. Louis passes out and wakes up in Jean’s bathroom.Lisez la scène dans les toilettes du train. Louis s’évanouit et se réveille dans la salle de bains de Jean.Lies die Szene in der Zugtoilette weiter. Louis wird ohnmächtig und wacht in Jeans Bad auf.Prosegui con la scena nel bagno del treno. Louis sviene e si sveglia nel bagno di Jean.Sigue leyendo la escena del aseo del tren. Louis se desmaya y despierta en el baño de Jean.
Find evidence of Anne’s disappearanceTrouver des preuves de la disparition d’AnneBeweise für Annes Verschwinden findenTrovare prove della scomparsa di AnneEncontrar pruebas de la desaparición de Anne
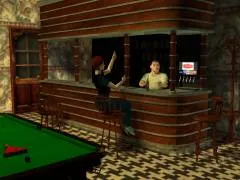
Get the power back on at homeRétablir le courant à la maisonZu Hause den Strom wiederherstellenFar tornare la corrente a casaDevolver la luz a casa
- Leave Jean’s bathroom, talk to Jean in his living room, then leave his house for your own garden.Quittez la salle de bains de Jean, parlez à Jean dans son salon, puis quittez sa maison pour votre jardin.Verlass Jeans Bad, rede in seinem Wohnzimmer mit Jean und geh dann aus seinem Haus in deinen eigenen Garten.Esci dal bagno di Jean, parla con Jean nel suo salotto, poi lascia casa sua per il tuo giardino.Sal del baño de Jean, habla con Jean en su salón, y luego sal de su casa hacia tu jardín.
- Go into your house. The electricity is off. Make your way through the dark lounge and corridor to the bedroom.Entrez dans votre maison. Le courant est coupé. Traversez le salon et le couloir plongés dans le noir jusqu’à la chambre.Geh in dein Haus. Der Strom ist weg. Geh durch das dunkle Wohnzimmer und den Flur ins Schlafzimmer.Entra in casa tua. Manca la corrente. Attraversa il salotto e il corridoio bui fino alla camera.Entra en tu casa. No hay luz. Atraviesa el salón y el pasillo a oscuras hasta el dormitorio.
- Inspect the alarm clock on the bedside table, Open it and Take the batteries.Inspectez le Réveil sur la table de chevet, Ouvrir et Prendre les piles.Untersuche den alarm clock auf dem Nachttisch, Open ihn und Take die Batterien.Esamina l’alarm clock sul comodino, Open e Take le pile.Inspecciona el alarm clock de la mesilla, Open y Take las pilas.
- Inspect the other bedroom table and take the battery-powered lamp.Inspectez l’autre Table de la chambre et prenez la lampe à piles.Untersuche den anderen table im Schlafzimmer und nimm die batteriebetriebene Lampe.Esamina l’altro table della camera e prendi la lampada a pile.Inspecciona la otra table del dormitorio y coge la lámpara de pilas.
- In the inventory, Combine the battery with the lamp.Dans l’inventaire, Combiner Avec : la pile avec la lampe.Combine im Inventar die Batterie mit der Lampe.Nell’inventario, Combine la pila con la lampada.En el inventario, Combine la pila con la lámpara.
- In the dark lounge, Use the lamp on the Wallpaper. It needs a flat surface, and the room lights up.Dans le salon plongé dans le noir, Utiliser la lampe sur la Tapisserie. Il lui faut une surface plane, et la pièce s’éclaire.Use im dunklen Wohnzimmer die Lampe an der Wallpaper. Sie braucht eine ebene Fläche, und der Raum wird hell.Nel salotto buio, Use la lampada sulla Wallpaper. Le serve una superficie piana, e la stanza si illumina.En el salón a oscuras, Use la lámpara en el Wallpaper. Necesita una superficie plana, y la habitación se ilumina.
- Inspect the fireplace, Move what’s in the hearth, and Take the shining object: the cellar key.Inspectez la Cheminée, Retourner ce qu’il y a dans l’âtre, et Prendre l’objet brillant : la clé de la cave.Untersuche den fireplace, Move was im Kamin liegt, und Take den glänzenden Gegenstand: den Kellerschlüssel.Esamina il fireplace, Move ciò che c’è nel focolare, e Take l’oggetto luccicante: la chiave della cantina.Inspecciona la fireplace, Move lo que hay en el hogar, y Take el objeto brillante: la llave del sótano.
- Outside, go up to the cellar door, use the cellar key on it and go down the cellar stairs.Dehors, approchez-vous de la Porte cave, utilisez la clé de la cave dessus et descendez l’escalier de la cave.Geh draußen zur cellar door, benutze den Kellerschlüssel daran und geh die Kellertreppe hinunter.Fuori, avvicinati alla cellar door, usaci la chiave della cantina e scendi le scale della cantina.Fuera, acércate a la cellar door, usa en ella la llave del sótano y baja la escalera del sótano.
- Inspect the circuit breaker, choose Think, and take the burnt fuse. Thinking it over is what lets you ask Jean for help.Inspectez le Disjoncteur, choisissez Réfléchir, et prenez le fusible grillé. C’est en y réfléchissant que vous pourrez demander de l’aide à Jean.Untersuche den circuit breaker, wähle Think und nimm die durchgebrannte Sicherung. Erst das Nachdenken erlaubt dir, Jean um Hilfe zu bitten.Esamina il circuit breaker, scegli Think, e prendi il fusibile bruciato. È ragionandoci sopra che potrai chiedere aiuto a Jean.Inspecciona el circuit breaker, elige Think y coge el fusible fundido. Pensarlo es lo que te permite pedirle ayuda a Jean.
- At Jean’s front door, inspect the flower pot and take the hidden Jean’s key. Use it on the door and go in.À l’Entrée Jean, inspectez le Pot à fleurs et prenez la Clef Jean cachée. Utilisez-la sur la porte et entrez.Untersuche an Jean’s front door den flower pot und nimm den versteckten Jean’s key. Benutze ihn an der Tür und geh hinein.Alla Jean’s front door, esamina il flower pot e prendi la Jean’s key nascosta. Usala sulla porta ed entra.En la Jean’s front door, inspecciona el flower pot y coge la Jean’s key escondida. Úsala en la puerta y entra.
- In the bedroom stacked with cigarette cartons, inspect a carton and take a pack of cigarettes.Dans la chambre remplie de cartouches de cigarettes, inspectez une cartouche et prenez un paquet de cigarettes.Untersuche im Schlafzimmer voller Zigarettenstangen eine Stange und nimm eine Schachtel Zigaretten.Nella camera piena di stecche di sigarette, esamina una stecca e prendi un pacchetto di sigarette.En el dormitorio lleno de cartones de tabaco, inspecciona un cartón y coge un paquete de cigarrillos.
- In the inventory, Open the pack to get Aluminium, then Combine it with the fuse to make a Repaired fuse.Dans l’inventaire, Ouvrir le paquet pour obtenir l’Aluminium, puis Combiner Avec le fusible pour obtenir un Fusible de fortune.Open im Inventar die Schachtel, um Aluminium zu bekommen, dann Combine es mit der Sicherung zur Repaired fuse.Nell’inventario, Open sul pacchetto per avere l’Aluminium, poi Combine con il fusibile per ottenere un Repaired fuse.En el inventario, Open en el paquete para obtener Aluminium, y luego Combine con el fusible para tener un Repaired fuse.
- Back on your cellar stairs, open the breaker close-up, Use the repaired fuse on the fuse’s slot, and Turn on the breaker.De retour dans l’escalier de votre cave, ouvrez le gros plan du disjoncteur, Utiliser le fusible de fortune sur l’emplacement du fusible, et Allumer le disjoncteur.Zurück auf deiner Kellertreppe: Öffne die Nahaufnahme des Sicherungskastens, Use die reparierte Sicherung am Steckplatz und Turn on den Schalter.Di nuovo sulle scale della cantina, apri il primo piano dell’interruttore, Use il fusibile riparato sul suo alloggiamento, e Turn on l’interruttore.De vuelta en la escalera del sótano, abre el primer plano del cuadro, Use el fusible reparado en su hueco, y Turn on el interruptor.
Collect the camera and fix the darkroomRécupérer l’appareil photo et réparer la chambre noireDie Kamera holen und die Dunkelkammer reparierenPrendere la macchina fotografica e sistemare la camera oscuraRecoger la cámara y arreglar el cuarto oscuro
- Go to the village centre and into your ransacked antiques shop.Allez à la Place Village et entrez dans votre boutique d’antiquités saccagée.Geh ins village centre und in deinen verwüsteten Antiquitätenladen.Vai al village centre ed entra nel tuo negozio d’antiquariato saccheggiato.Ve al village centre y entra en tu tienda de antigüedades saqueada.
- In the back room, Shake Félicienne to get her attention, and hear out her account of the burglary. She gives you your camera, with the film she shot of the damage.Dans la Remise, Secouer Félicienne pour attirer son attention, et écoutez son récit du cambriolage. Elle vous rend votre appareil photo, avec la pellicule qu’elle a prise des dégâts.Shake im back room Félicienne, um ihre Aufmerksamkeit zu bekommen, und hör dir ihren Bericht vom Einbruch an. Sie gibt dir deine Kamera mit dem Film, den sie von den Schäden gemacht hat.Nel back room, Shake Félicienne per attirare la sua attenzione, e ascolta il suo racconto del furto. Ti dà la tua macchina fotografica, con il rullino che ha scattato dei danni.En el back room, Shake a Félicienne para llamar su atención, y escucha su relato del robo. Te da tu cámara, con el carrete que ha hecho de los daños.
- In your office, inspect the handbag on the desk and take the Trankill 2000.Dans votre Bureau, inspectez le Sac à main posé sur le bureau et prenez le Trankill 2000.Untersuche in deinem office die handbag (Handtasche) auf dem Schreibtisch und nimm das Trankill 2000.Nel tuo office, esamina la handbag (borsetta) sulla scrivania e prendi il Trankill 2000.En tu office, inspecciona el handbag (bolso) del escritorio y coge el Trankill 2000.
- Go to the bar and talk to the bartender. Ask about Xavier, which opens up the back alley.Allez au bar et parlez au barman. Interrogez-le sur Xavier, ce qui ouvre la ruelle de derrière.Geh in die Bar und rede mit dem Barkeeper. Frag nach Xavier, das öffnet die Gasse dahinter.Vai al bar e parla con il barista. Chiedi di Xavier, il che apre il vicolo sul retro.Ve al bar y habla con el camarero. Pregunta por Xavier, lo que abre el callejón de atrás.
- In the bartender close-up, Use the Trankill 2000 on his beer. He falls asleep.Dans le gros plan du barman, Utiliser le Trankill 2000 sur sa bière. Il s’endort.Use in der Nahaufnahme des Barkeepers das Trankill 2000 mit seinem Bier. Er schläft ein.Nel primo piano del barista, Use il Trankill 2000 sulla sua birra. Si addormenta.En el primer plano del camarero, Use el Trankill 2000 con su cerveza. Se queda dormido.
- Outside the bar, inspect the decorative lights and take the red bulb. If he told you off earlier, try again now that he’s asleep.Devant le bar, inspectez les Ampoules décoratives et prenez l’ampoule rouge. S’il vous a sermonné plus tôt, réessayez maintenant qu’il dort.Untersuche vor der Bar die Lichterkette und nimm die rote Glühbirne. Hat er dich vorhin zurechtgewiesen, versuch es jetzt noch einmal, wo er schläft.Fuori dal bar, esamina le luci decorative e prendi la lampadina rossa. Se prima ti ha rimproverato, riprova ora che dorme.Fuera del bar, inspecciona las luces decorativas y coge la bombilla roja. Si antes te regañó, vuelve a intentarlo ahora que duerme.
- At home, go down to the cellar and up to the darkroom. Try the safelight to find that its bulb is broken, then Use the red bulb on it. Switch it on and go into the working darkroom.À la maison, descendez à la cave et montez au Labo. Essayez la Lampe rouge pour découvrir que son ampoule est cassée, puis Utiliser l’ampoule rouge dessus. Allumez-la et entrez dans le labo en état de marche.Geh zu Hause in den Keller und hinauf in die Dunkelkammer. Probier das safelight (Rotlicht), um festzustellen, dass seine Birne kaputt ist, dann Use die rote Glühbirne damit. Schalte es ein und geh in die funktionierende Dunkelkammer.A casa, scendi in cantina e sali alla camera oscura. Prova la safelight (luce rossa) per scoprire che la sua lampadina è rotta, poi Use la lampadina rossa su di essa. Accendila ed entra nella camera oscura funzionante.En casa, baja al sótano y sube al cuarto oscuro. Prueba la safelight (luz roja) para descubrir que su bombilla está rota, y luego Use la bombilla roja con ella. Enciéndela y entra en el cuarto oscuro ya en marcha.
- In the inventory, Open the camera. You get the Robbery film and the empty camera.Dans l’inventaire, Ouvrir l’appareil photo. Vous obtenez la Pellicule Cambriolage et l’appareil vide.Open im Inventar die Kamera. Du bekommst den Robbery film und die leere Kamera.Nell’inventario, Open sulla macchina fotografica. Ottieni il Robbery film e la macchina vuota.En el inventario, Open en la cámara. Obtienes el Robbery film y la cámara vacía.
- In the darkroom, Use the Robbery film on the Tray. You get three Picture evidence items. Keep all three, even the blurred one.Dans le labo, Utiliser la Pellicule Cambriolage sur le Bac. Vous obtenez trois Photo preuve. Gardez les trois, même la floue.Use in der Dunkelkammer den Robbery film mit dem Tray (Schale). Du bekommst drei Picture evidence. Behalte alle drei, auch das unscharfe.Nella camera oscura, Use il Robbery film sulla Tray (bacinella). Ottieni tre Picture evidence. Tienile tutte e tre, anche quella sfocata.En el cuarto oscuro, Use el Robbery film con la Tray (cubeta). Obtienes tres Picture evidence. Quédate las tres, incluso la borrosa.
Find Anne’s recording and photograph the graffitiTrouver l’enregistrement d’Anne et photographier les graffitisAnnes Aufnahme finden und die Graffiti fotografierenTrovare la registrazione di Anne e fotografare i graffitiEncontrar la grabación de Anne y fotografiar las pintadas
- In the bar’s back alley, inspect the garbage and take the crowbar.Dans la ruelle derrière le bar, inspectez les Débris et prenez le pied de biche.Untersuche in der Gasse hinter der Bar den garbage (Müll) und nimm das Brecheisen.Nel vicolo dietro il bar, esamina la garbage (spazzatura) e prendi il piede di porco.En el callejón de detrás del bar, inspecciona la garbage (basura) y coge la palanca.
- Visit Astrid, the clairvoyant: go up to her door in the dark alley and use the door knocker.Rendez visite à Astrid, la voyante : approchez-vous de sa porte dans la ruelle sombre et choisissez Frapper.Besuche Astrid, die Hellseherin: Geh in der dunklen Gasse zu ihrer Tür und benutze den door knocker (Türklopfer).Fai visita ad Astrid, la veggente: avvicinati alla sua porta nel vicolo buio e usa il door knocker (batacchio).Visita a Astrid, la vidente: acércate a su puerta en el callejón oscuro y usa el door knocker (aldaba).
- Tell her your wife has disappeared. Accept the card reading and read every page of it. She gives you the Dairy key.Dites-lui que votre femme a disparu. Acceptez le tirage des cartes et lisez-en chaque page. Elle vous donne la Clef Crémerie.Sag ihr, dass deine Frau verschwunden ist. Nimm die Kartenlegung an und lies jede Seite davon. Sie gibt dir den Dairy key.Dille che tua moglie è scomparsa. Accetta la lettura delle carte e leggine ogni pagina. Ti dà la Dairy key.Dile que tu mujer ha desaparecido. Acepta la lectura de cartas y lee cada página. Te da la Dairy key.
- At the village dairy, Use the Dairy key on the door and go in.À la crémerie du village, Utiliser la Clef Crémerie sur la porte et entrez.Use an der Molkerei des Dorfs den Dairy key an der Tür und geh hinein.Alla latteria del villaggio, Use la Dairy key sulla porta ed entra.En la lechería del pueblo, Use la Dairy key en la puerta y entra.
- Inspect the cashbox, then Use the crowbar on its drawer in the close-up. Inspect the open drawer and take Anne’s tape recorder.Inspectez la Caisse, puis Utiliser le pied de biche sur son tiroir dans le gros plan. Inspectez le tiroir ouvert et prenez le dictaphone d’Anne.Untersuche den cashbox (Kasse), dann Use in der Nahaufnahme das Brecheisen an seiner Schublade. Untersuche die offene Schublade und nimm Annes Diktiergerät.Esamina la cashbox (cassa), poi Use il piede di porco sul suo cassetto nel primo piano. Esamina il cassetto aperto e prendi il registratore di Anne.Inspecciona la cashbox (caja registradora), y luego Use la palanca en su cajón en el primer plano. Inspecciona el cajón abierto y coge la grabadora de Anne.
- In your house’s hall, listen to the strange noise on the phone, then Use the tape recorder on the Phone. Louis records it.Dans l’Entrée de votre maison, écoutez le bruit étrange au téléphone, puis Utiliser le dictaphone sur le Téléphone. Louis l’enregistre.Hör dir in der hall deines Hauses das seltsame Geräusch am Telefon an, dann Use das Diktiergerät mit dem Phone. Louis nimmt es auf.Nella hall di casa tua, ascolta lo strano rumore al telefono, poi Use il registratore sul Phone. Louis lo registra.En el hall de tu casa, escucha el ruido extraño del teléfono, y luego Use la grabadora con el Phone. Louis lo graba.
- Go to the bus stop. Inspect the abandoned bag, Search the camera inside it, and take the Empty film.Allez à l’Arrêt bus. Inspectez le sac abandonné, Fouiller l’appareil photo qu’il contient, et prenez la Pellicule Vierge.Geh zur bus stop (Bushaltestelle). Untersuche die zurückgelassene Tasche, Search die Kamera darin und nimm den Empty film.Vai alla bus stop (fermata dell’autobus). Esamina la borsa abbandonata, Search la macchina fotografica al suo interno, e prendi l’Empty film.Ve a la bus stop (parada de autobús). Inspecciona la bolsa abandonada, Search en la cámara que hay dentro, y coge el Empty film.
- Combine the Empty film with your empty camera.Combiner Avec : la Pellicule Vierge avec votre appareil photo vide.Combine den Empty film mit deiner leeren Kamera.Combine l’Empty film con la tua macchina vuota.Combine el Empty film con tu cámara vacía.
- At your garden mailbox, open its close-up and choose Take a picture on the graffiti.À la Boite aux lettres de votre jardin, ouvrez son gros plan et choisissez Photographier sur le graffiti.Öffne an deinem mailbox im Garten die Nahaufnahme und wähle Take a picture am Graffiti.Alla mailbox del tuo giardino, apri il primo piano e scegli Take a picture sul graffito.En el mailbox de tu jardín, abre su primer plano y elige Take a picture en la pintada.
- In your lounge, inspect the globe and choose Take picture on its symbol.Dans votre Salon, inspectez la Mappemonde et choisissez Photographier sur son symbole.Untersuche in deinem lounge den globe (Globus) und wähle Take picture an seinem Symbol.Nel tuo lounge, esamina il globe (mappamondo) e scegli Take picture sul suo simbolo.En tu lounge, inspecciona el globe (globo terráqueo) y elige Take picture en su símbolo.
- Only now Open the loaded camera in the inventory. Louis takes out the Roll of film with both pictures; it won’t do any good until both are taken.C’est seulement maintenant qu’il faut Ouvrir l’appareil chargé dans l’inventaire. Louis en sort la Pellicule Tag avec les deux photos ; cela ne sert à rien tant que les deux ne sont pas prises.Open erst jetzt die geladene Kamera im Inventar. Louis nimmt die Roll of film mit beiden Bildern heraus; das bringt nichts, solange nicht beide gemacht sind.Solo ora, Open sulla macchina carica nell’inventario. Louis tira fuori il Roll of film con entrambe le foto; non serve a nulla finché non le hai scattate tutte e due.Solo ahora, Open en la cámara cargada del inventario. Louis saca el Roll of film con las dos fotos; no sirve de nada hasta que estén hechas las dos.
- In the darkroom, Use the Roll of film on the Tray. The mailbox and globe photographs are developed.Dans le labo, Utiliser la Pellicule Tag sur le Bac. Les photos de la boite aux lettres et de la mappemonde sont développées.Use in der Dunkelkammer die Roll of film mit dem Tray. Die Fotos vom Briefkasten und vom Globus werden entwickelt.Nella camera oscura, Use il Roll of film sulla Tray. Le foto della cassetta delle lettere e del mappamondo vengono sviluppate.En el cuarto oscuro, Use el Roll of film con la Tray. Se revelan las fotos del buzón y del globo.
- Go to the police station and Open the front door. Read through the conversation with the officers and the disturbing scene that follows.Allez au commissariat et Ouvrir la porte d’entrée. Lisez la conversation avec les policiers et la scène troublante qui suit.Geh zur Polizeiwache und Open die Eingangstür. Lies das Gespräch mit den Polizisten und die verstörende Szene danach.Vai alla stazione di polizia e Open la porta d’ingresso. Leggi la conversazione con gli agenti e l’inquietante scena che segue.Ve a la comisaría y Open la puerta principal. Lee la conversación con los agentes y la inquietante escena que sigue.
Escape the asylumS’évader de l’asileAus der Anstalt fliehenFuggire dal manicomioEscapar del manicomio
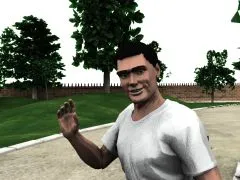
The first night, and the patientsLa première nuit, et les patientsDie erste Nacht und die PatientenLa prima notte e i pazientiLa primera noche y los pacientes
- Hear out the singing stranger in the park, then head for the main building of the San Lazzaro institute.Écoutez l’inconnu qui chante dans le parc, puis dirigez-vous vers le bâtiment principal de l’institut San Lazzaro.Hör dir den singenden Fremden im Park an, dann geh zum Hauptgebäude des Instituts San Lazzaro.Ascolta lo sconosciuto che canta nel parco, poi dirigiti verso l’edificio principale dell’istituto San Lazzaro.Escucha a el desconocido que canta en el parque, y luego dirígete al edificio principal del instituto San Lazzaro.
- Go in to reception. Ask where you are and insist on leaving. Zampano takes you to your cell.Entrez à la réception. Demandez où vous êtes et insistez pour partir. Zampano vous emmène à votre cellule.Geh hinein zur Rezeption. Frag, wo du bist, und bestehe darauf zu gehen. Zampano bringt dich in deine Zelle.Entra alla reception. Chiedi dove sei e insisti per andartene. Zampano ti porta nella tua cella.Entra en recepción. Pregunta dónde estás e insiste en marcharte. Zampano te lleva a tu celda.
- In My Cell, choose Sleep on the bed and read on until morning.Dans la Cellule, choisissez Dormir sur le lit et lisez jusqu’au matin.Wähle in My Cell am Bett Sleep und lies weiter bis zum Morgen.In My Cell, scegli Sleep sul letto e leggi fino al mattino.En My Cell, elige Sleep en la cama y sigue leyendo hasta la mañana.
- Go to the refectory and talk to the patient with the conspicuous shoes, who doesn’t trust the food. Keep going until he asks to meet at the feeding mother: the she-wolf statue.Allez au Réfectoire et parlez au patient aux chaussures voyantes, qui se méfie de la nourriture. Continuez jusqu’à ce qu’il vous donne rendez-vous devant la mère nourricière : la statue de la louve.Geh in den refectory (Speisesaal) und rede mit dem Patienten mit den auffälligen Schuhen, der dem Essen nicht traut. Mach weiter, bis er ein Treffen an der nährenden Mutter vorschlägt: der Wölfin-Statue.Vai nel refectory (refettorio) e parla con il paziente dalle scarpe vistose, che non si fida del cibo. Continua finché non ti dà appuntamento davanti alla madre nutrice: la statua della lupa.Ve al refectory (comedor) y habla con el paciente de los zapatos llamativos, que no se fía de la comida. Sigue hasta que te cite junto a la madre nutricia: la estatua de la loba.
- After the meal, talk to him at the she-wolf statue. Ask about getting out and about what he eats. He wants insects, and Parx has escaped before.Après le repas, parlez-lui près de la Statue louve. Demandez-lui comment sortir et ce qu’il mange. Il veut des insectes, et Parx s’est déjà évadé.Rede nach dem Essen an der She-wolf statue mit ihm. Frag, wie man rauskommt und was er isst. Er will Insekten, und Parx ist schon einmal ausgebrochen.Dopo il pasto, parlagli alla She-wolf statue. Chiedigli come uscire e cosa mangia. Vuole insetti, e Parx è già evaso una volta.Después de comer, habla con él junto a la She-wolf statue. Pregúntale cómo salir y qué come. Quiere insectos, y Parx ya se ha escapado antes.
- Go to the infirmary and tell the nurse you feel really sick. He gives you a sample container, the Bowl, and sends you back to your cell.Allez à l’Infirmerie et dites à l’infirmier que vous avez très mal au ventre. Il vous donne un récipient pour échantillon, le Bocal, et vous renvoie dans votre cellule.Geh in die infirmary (Krankenstation) und sag dem Pfleger, dass dir richtig schlecht ist. Er gibt dir einen Probenbehälter, die Bowl, und schickt dich zurück in deine Zelle.Vai in infirmary (infermeria) e di’ a l’infermiere che stai davvero male. Ti dà un contenitore per campioni, il Bowl, e ti rimanda in cella.Ve a la infirmary (enfermería) y dile a el enfermero que te encuentras muy mal. Te da un recipiente para muestras, el Bowl, y te manda de vuelta a tu celda.
- In your cell, inspect all four places: the wash basin, bucket, shelf and floor. In each close-up, Take the bug.Dans votre cellule, inspectez les quatre endroits : le lavabo, le seau, l’étagère et le sol. Dans chaque gros plan, Prendre le Cafard.Untersuche in deiner Zelle alle vier Stellen: Waschbecken, Eimer, Regal und Boden. Take in jeder Nahaufnahme den bug (Käfer).Nella tua cella, esamina tutti e quattro i punti: lavandino, secchio, mensola e pavimento. In ogni primo piano, Take il bug (insetto).En tu celda, inspecciona los cuatro sitios: el lavabo, el cubo, la estantería y el suelo. En cada primer plano, Take el bug (bicho).
- Back at the she-wolf statue, Use the bowl of insects on the patient. You need all four bugs. He gives you a Denture.De retour à la statue de la louve, Utiliser le bocal d’insectes sur le patient. Il vous faut les quatre cafards. Il vous donne un Dentier.Use zurück an der Wölfin-Statue die Schale mit Insekten am Patienten. Du brauchst alle vier Käfer. Er gibt dir ein Denture (Gebiss).Tornato alla statua della lupa, Use il contenitore di insetti sul paziente. Ti servono tutti e quattro gli insetti. Ti dà una Denture (dentiera).De vuelta en la estatua de la loba, Use el recipiente de insectos con el paciente. Necesitas los cuatro bichos. Te da una Denture (dentadura).
The treasure, and ZampanoLe trésor, et ZampanoDer Schatz und ZampanoIl tesoro e ZampanoEl tesoro y Zampano
- At the chapel entrance, talk to the other patient. Ask about his tricks and keep going until he tells you about a hidden treasure and the poem, Panting stars crying with spleen.À l’Entrée Chapelle, parlez à l’autre patient. Interrogez-le sur ses combines et continuez jusqu’à ce qu’il vous parle d’un trésor caché et du poème, Les étoiles haletantes pleurent d’ennui.Rede am chapel entrance (Kapelleneingang) mit dem anderen Patienten. Frag nach seinen Tricks und mach weiter, bis er dir von einem versteckten Schatz und dem Gedicht erzählt: Panting stars crying with spleen.All’chapel entrance (ingresso della cappella), parla con l’altro paziente. Chiedigli dei suoi trucchi e continua finché non ti parla di un tesoro nascosto e della poesia, Panting stars crying with spleen.En la chapel entrance (entrada de la capilla), habla con el otro paciente. Pregúntale por sus trucos y sigue hasta que te hable de un tesoro escondido y del poema, Panting stars crying with spleen.
- In the library, ask the librarian about that phrase and hear her out. This lets you search the treasure’s hiding place.À la Bibliothèque, interrogez la bibliothécaire sur cette phrase et écoutez-la. Cela vous permet de fouiller la cachette du trésor.Frag in der library (Bibliothek) die Bibliothekarin nach diesem Satz und hör sie an. Damit kannst du das Versteck des Schatzes durchsuchen.In library (biblioteca), chiedi a la bibliotecaria di quella frase e ascoltala. Questo ti permette di frugare nel nascondiglio del tesoro.En la library (biblioteca), pregunta a la bibliotecaria por esa frase y escúchala. Eso te permite registrar el escondite del tesoro.
- Before you leave the library, inspect the register and Read its page: the cook keeps borrowing Terrestrial Feeds by Gides. Remember it for the kitchen.Avant de quitter la bibliothèque, inspectez le Registre et Lire sa page : le cuisinier n’arrête pas d’emprunter Les nourritures terrestres de Gides. Retenez-le pour la cuisine.Untersuche, bevor du die Bibliothek verlässt, das register (Ausleihbuch) und Read seine Seite: Der Koch leiht ständig Terrestrial Feeds by Gides aus. Merk es dir für die Küche.Prima di lasciare la biblioteca, esamina il register (registro) e Read la sua pagina: il cuoco continua a prendere in prestito Terrestrial Feeds by Gides. Ricordatelo per la cucina.Antes de salir de la biblioteca, inspecciona el register (registro) y Read su página: el cocinero no para de tomar prestado Terrestrial Feeds by Gides. Recuérdalo para la cocina.
- On the park’s left path, inspect the tree stump and Use the denture on the stones in the close-up. You find a Flask of white wine and a small key.Sur le chemin de gauche du parc, inspectez la Souche et Utiliser le dentier sur les Pierres dans le gros plan. Vous trouvez une Flasque de vin blanc et une petite clé.Untersuche auf dem linken Weg des Parks den tree stump (Baumstumpf) und Use in der Nahaufnahme das Gebiss mit den stones (Steinen). Du findest einen Flask Weißwein und einen kleinen Schlüssel.Sul sentiero di sinistra del parco, esamina il tree stump (ceppo) e Use la dentiera sulle stones (pietre) nel primo piano. Trovi una Flask di vino bianco e una chiavetta.En el camino de la izquierda del parque, inspecciona el tree stump (tocón) y Use la dentadura con las stones (piedras) del primer plano. Encuentras una Flask de vino blanco y una llave pequeña.
- In the chapel, talk to the priest and offer him white wine. He wants kir: white wine and blackcurrant.Dans la Chapelle, parlez au curé et offrez-lui du vin blanc. Il veut du kir : du vin blanc et du cassis.Rede in der chapel (Kapelle) mit dem Priester und biete ihm Weißwein an. Er will Kir: Weißwein mit Johannisbeerlikör.Nella chapel (cappella), parla con il prete e offrigli del vino bianco. Vuole il kir: vino bianco e cassis.En la chapel (capilla), habla con el cura y ofrécele vino blanco. Quiere kir: vino blanco y casis.
- Go into the kitchen from the refectory. Tell Mario that someone is about to borrow Terrestrial Feeds. He leaves to guard his favourite book.Entrez dans la cuisine depuis le réfectoire. Dites à Mario que quelqu’un veut emprunter les Nourritures terrestres. Il part surveiller son livre préféré.Geh vom Speisesaal in die Küche. Sag Mario, dass gleich jemand Terrestrial Feeds ausleihen will. Er geht, um sein Lieblingsbuch zu bewachen.Entra in cucina dal refettorio. Di’ a Mario che qualcuno sta per prendere in prestito Terrestrial Feeds. Se ne va a sorvegliare il suo libro preferito.Entra en la cocina desde el comedor. Dile a Mario que alguien va a tomar prestado Terrestrial Feeds. Se va a vigilar su libro favorito.
- Inspect the kitchen bottles and Use the flask on the blackcurrant bottle. You now have Kir.Inspectez les Bouteilles de la cuisine et Utiliser la flasque sur la bouteille de cassis. Vous avez maintenant une Flasque kir.Untersuche die bottles (Flaschen) in der Küche und Use den Flask mit der Johannisbeerlikörflasche. Jetzt hast du Kir.Esamina le bottles (bottiglie) della cucina e Use la fiaschetta sulla bottiglia di cassis. Ora hai il Kir.Inspecciona las bottles (botellas) de la cocina y Use la petaca con la botella de casis. Ahora tienes Kir.
- Back with the priest, offer him the kir and keep him company. He gives you a Bible.De retour auprès du curé, offrez-lui le kir et tenez-lui compagnie. Il vous donne une Bible.Biete zurück beim Priester ihm den Kir an und leiste ihm Gesellschaft. Er gibt dir eine Bibel.Tornato dal prete, offrigli il kir e fagli compagnia. Ti dà una Bibbia.De vuelta con el cura, ofrécele el kir y hazle compañía. Te da una Biblia.
- At the toolshed, Use the Bible on the meditating patient. He swaps it for his Playman magazine.À la Cabane, Utiliser la Bible sur le patient qui médite. Il l’échange contre son magazine PlayMan.Use am toolshed (Geräteschuppen) die Bibel mit dem meditierenden Patienten. Er tauscht sie gegen sein Magazin Playman.Al toolshed (capanno degli attrezzi), Use la Bibbia con il paziente che medita. La scambia con la sua rivista Playman.En el toolshed (cobertizo), Use la Biblia con el paciente que medita. La cambia por su revista Playman.
- In front of the main building, Use the Playman on Zampano. He heads off to the staff toilets, and you can talk to reception properly.Devant le bâtiment principal, Utiliser le PlayMan sur Zampano. Il part aux toilettes du personnel, et vous pouvez parler correctement à la réception.Use vor dem Hauptgebäude den Playman mit Zampano. Er verschwindet in die Personaltoiletten, und du kannst richtig mit der Rezeption reden.Davanti all’edificio principale, Use il Playman con Zampano. Se ne va nei bagni del personale, e puoi parlare come si deve con la reception.Delante del edificio principal, Use el Playman con Zampano. Se va a los aseos del personal, y puedes hablar como es debido con recepción.
- Tell Gelsomina at reception you want to see the doctor. She takes you to him.Dites à Gelsomina à la réception que vous voulez voir le docteur. Elle vous conduit à lui.Sag Gelsomina an der Rezeption, dass du den Arzt sehen willst. Sie bringt dich zu ihm.Di’ a Gelsomina alla reception che vuoi vedere il dottore. Ti accompagna da lui.Dile a Gelsomina en recepción que quieres ver al doctor. Te lleva hasta él.
The doctor’s two testsLes deux tests du docteurDie beiden Tests des DoktorsI due test del dottoreLas dos pruebas del doctor
- Ask the doctor about the formalities for leaving, and answer the first five questions with real answers rather than asking him to explain.Interrogez le docteur sur les formalités qui permettraient de sortir, et répondez aux cinq premières questions par de vraies réponses plutôt que de lui demander d’expliquer.Frag den Arzt nach den Formalitäten für die Entlassung und beantworte die ersten fünf Fragen mit echten Antworten, statt ihn um Erklärungen zu bitten.Chiedi a il dottore delle formalità per uscire, e rispondi alle prime cinque domande con risposte vere invece di chiedergli di spiegare.Pregunta a el doctor por las formalidades para salir, y responde a las cinco primeras preguntas con respuestas de verdad en vez de pedirle que te explique.
- The first test always ends in failure. That’s expected: it opens up clues around the grounds, and no combination of answers sets you free.Le premier test se termine toujours par un échec. C’est normal : il fait apparaître des indices dans le parc, et aucune combinaison de réponses ne vous libère.Der erste Test endet immer mit einem Misserfolg. Das ist so gewollt: Er öffnet Hinweise auf dem Gelände, und keine Kombination von Antworten bringt dich frei.Il primo test finisce sempre con un fallimento. È previsto: fa comparire indizi in giro per il parco, e nessuna combinazione di risposte ti libera.La primera prueba siempre acaba en fracaso. Es lo esperado: abre pistas por el recinto, y ninguna combinación de respuestas te deja libre.
- You can look at the new clues if you like: the fountain says 1924, and the librarian names Antonio Guiseppe as the author. They are story clues; the doctor’s next test changes the answers anyway.Vous pouvez regarder les nouveaux indices si vous voulez : la fontaine indique 1924, et la bibliothécaire nomme Antonio Guiseppe comme auteur. Ce sont des indices de l’histoire ; le test suivant du docteur change de toute façon les réponses.Du kannst dir die neuen Hinweise ansehen, wenn du willst: Der Brunnen sagt 1924, und die Bibliothekarin nennt Antonio Guiseppe als Autor. Es sind Hinweise der Geschichte; der nächste Test des Arztes ändert die Antworten ohnehin.Puoi guardare i nuovi indizi se vuoi: la fontana dice 1924, e la bibliotecaria nomina Antonio Guiseppe come autore. Sono indizi della storia; il test successivo del dottore cambia comunque le risposte.Puedes mirar las nuevas pistas si quieres: la fuente dice 1924, y la bibliotecaria nombra a Antonio Guiseppe como autor. Son pistas de la historia; la siguiente prueba del doctor cambia las respuestas de todos modos.
- Go back to the doctor and agree to the second test. Answer all four questions. You fail this one too and are taken back to your cell, which is how the story moves on.Retournez voir le docteur et acceptez le second test. Répondez aux quatre questions. Vous échouez aussi à celui-ci et êtes ramené dans votre cellule, et c’est ainsi que l’histoire avance.Geh zurück zum Arzt und stimme dem zweiten Test zu. Beantworte alle vier Fragen. Auch diesen bestehst du nicht und wirst in deine Zelle zurückgebracht, und genau so geht die Geschichte weiter.Torna dal dottore e accetta il secondo test. Rispondi a tutte e quattro le domande. Fallisci anche questo e vieni riportato in cella, ed è così che la storia va avanti.Vuelve con el doctor y acepta la segunda prueba. Responde a las cuatro preguntas. También suspendes esta y te llevan de vuelta a tu celda, y así es como avanza la historia.
- Sleep on the bed. In the morning, go to the refectory and read through the scene with the choking patient. New rooms and conversations open up.Dormir sur le lit. Au matin, allez au Réfectoire et lisez la scène du patient qui s’étouffe. De nouvelles pièces et conversations s’ouvrent.Sleep am Bett. Geh am Morgen in den refectory und lies die Szene mit dem Patienten, der erstickt. Neue Räume und Gespräche öffnen sich.Sleep sul letto. Al mattino, vai nel refectory e leggi la scena del paziente che soffoca. Si aprono nuove stanze e conversazioni.Sleep en la cama. Por la mañana, ve al refectory y lee la escena del paciente que se atraganta. Se abren nuevas salas y conversaciones.
Parx’s fireLe feu de ParxParx’ FeuerIl fuoco di ParxEl fuego de Parx
- Upstairs, visit Parx in Cell 3 and ask him to help you escape. He wants the gardening hut burnt down.À l’étage, rendez visite à Parx dans la Cellule 3 et demandez-lui de vous aider à vous évader. Il veut que la cabane de jardin brûle.Besuche oben Parx in Cell 3 und bitte ihn, dir bei der Flucht zu helfen. Er will, dass die Gartenhütte abbrennt.Al piano di sopra, fai visita a Parx nella Cell 3 e chiedigli di aiutarti a fuggire. Vuole che il capanno da giardino bruci.Arriba, visita a Parx en la Cell 3 y pídele que te ayude a escapar. Quiere que la caseta del jardín arda.
- To get the doctor out of the morgue, set the two quarrelling patients on each other: the patient in Cell 1 and Salvatore in Cell 4.Pour faire sortir le docteur de la morgue, montez l’un contre l’autre les deux patients qui se disputent : le patient de la Cellule 1 et Salvatore dans la Cellule 4.Um den Arzt aus der Leichenhalle zu holen, hetz die beiden streitenden Patienten gegeneinander auf: den Patienten in Cell 1 und Salvatore in Cell 4.Per far uscire il dottore dall’obitorio, metti l’uno contro l’altro i due pazienti che litigano: il paziente della Cell 1 e Salvatore nella Cell 4.Para sacar al doctor de la morgue, enfrenta a los dos pacientes que se pelean: el paciente de la Cell 1 y Salvatore en la Cell 4.
- Start with Cell 1’s message calling Salvatore a Terrone. Tell it to Salvatore, take his reply back to Cell 1, and keep carrying each new insult to the other man until both are threatening violence.Commencez par le message de la Cellule 1 qui traite Salvatore de Terrone. Répétez-le à Salvatore, rapportez sa réponse à la Cellule 1, et continuez à porter chaque nouvelle insulte à l’autre jusqu’à ce que tous deux menacent d’en venir aux mains.Fang mit der Nachricht aus Cell 1 an, die Salvatore einen Terrone nennt. Sag sie Salvatore, bring seine Antwort zurück zu Cell 1 und trag jede neue Beleidigung zum anderen, bis beide mit Gewalt drohen.Comincia dal messaggio della Cell 1 che dà del Terrone a Salvatore. Riferiscilo a Salvatore, riporta la sua risposta alla Cell 1, e continua a portare ogni nuovo insulto all’altro finché entrambi non minacciano di venire alle mani.Empieza con el mensaje de la Cell 1 que llama a Salvatore Terrone. Díselo a Salvatore, lleva su respuesta a la Cell 1, y sigue llevando cada nuevo insulto al otro hasta que los dos amenacen con llegar a las manos.
- At reception, tell Zampano about the trouble upstairs. He sends you to the doctor in the autopsy room.À la réception, parlez à Zampano des ennuis à l’étage. Il vous envoie voir le docteur dans la salle d’autopsie.Erzähl Zampano an der Rezeption vom Ärger oben. Er schickt dich zum Arzt im Obduktionsraum.Alla reception, racconta a Zampano dei guai al piano di sopra. Ti manda dal dottore nella sala autopsie.En recepción, cuéntale a Zampano el lío de arriba. Te manda con el doctor a la sala de autopsias.
- In the morgue, tell the doctor the patients are fighting, and let him go. Inspect the table and take the M-Oroid instant camera.Dans la Morgue, dites au docteur que les patients se battent, et laissez-le partir. Inspectez la Table et prenez l’appareil instantané M-Oroid.Sag in der morgue (Leichenhalle) dem Arzt, dass die Patienten sich prügeln, und lass ihn gehen. Untersuche den table und nimm die Sofortbildkamera M-Oroid.Nella morgue (obitorio), di’ al dottore che i pazienti si stanno picchiando, e lascialo andare. Esamina il table e prendi la macchina istantanea M-Oroid.En la morgue, dile al doctor que los pacientes se están peleando, y deja que se vaya. Inspecciona la table y coge la cámara instantánea M-Oroid.
- In the laundry in the basement, take the broom, then inspect the table and take the two clothespins.Dans la Buanderie au sous-sol, prenez le balai, puis inspectez la table et prenez les deux pinces à linge.Nimm in der laundry (Wäscherei) im Keller den Besen, dann untersuche den Tisch und nimm die zwei Wäscheklammern.Nella laundry (lavanderia) nel seminterrato, prendi la scopa, poi esamina il tavolo e prendi le due mollette.En la laundry (lavandería) del sótano, coge la escoba, y luego inspecciona la mesa y coge las dos pinzas de la ropa.
- Upstairs, Use the broom on the attic trapdoor at the dead end of the third corridor, and climb into the attic.À l’étage, Utiliser le balai sur la Trappe du grenier au fond du cul-de-sac du troisième couloir, et montez au grenier.Use oben den Besen an der Dachbodenluke am Ende des dritten Flurs und klettere auf den Dachboden.Al piano di sopra, Use la scopa sulla botola della soffitta in fondo al terzo corridoio, e sali in soffitta.Arriba, Use la escoba con la trampilla del desván al fondo sin salida del tercer pasillo, y sube al desván.
- Talk to the silent man if you like; what matters is Search on the crate he points at. Take the matches.Parlez à l’homme silencieux si vous voulez ; ce qui compte, c’est Fouiller le Carton qu’il désigne. Prenez les allumettes.Rede mit dem schweigenden Mann, wenn du willst; wichtig ist Search an der crate (Kiste), auf die er zeigt. Nimm die Streichhölzer.Parla con l’uomo silenzioso se vuoi; ciò che conta è Search sulla crate (cassa) che indica. Prendi i fiammiferi.Habla con el hombre silencioso si quieres; lo que importa es Search en la crate (caja) que señala. Coge las cerillas.
- Go back to Gelsomina and tell her about the man in the attic with a cloth over his head. Keep going until Louis gives up explaining: this sets up the next distraction.Retournez voir Gelsomina et parlez-lui de l’homme du grenier avec un tissu sur la tête. Continuez jusqu’à ce que Louis renonce à s’expliquer : cela prépare la diversion suivante.Geh zurück zu Gelsomina und erzähl ihr vom Mann auf dem Dachboden mit einem Tuch über dem Kopf. Mach weiter, bis Louis das Erklären aufgibt: Das bereitet die nächste Ablenkung vor.Torna da Gelsomina e parlale dell’uomo in soffitta con un panno sulla testa. Continua finché Louis non rinuncia a spiegarsi: questo prepara il diversivo successivo.Vuelve con Gelsomina y háblale del hombre del desván con un trapo en la cabeza. Sigue hasta que Louis se rinda en sus explicaciones: eso prepara la siguiente distracción.
- Go to the staff toilets, choose Talk to on the occupied toilet door, and tell Zampano that Gelsomina likes him. He leaves to see her.Allez aux toilettes du personnel, choisissez Parler sur la porte des WC occupée, et dites à Zampano que Gelsomina l’aime bien. Il part la voir.Geh zu den Personaltoiletten, wähle Talk to an der besetzten toilet door und sag Zampano, dass Gelsomina ihn mag. Er geht zu ihr.Vai ai bagni del personale, scegli Talk to sulla toilet door occupata, e di’ a Zampano che piace a Gelsomina. Se ne va a trovarla.Ve a los aseos del personal, elige Talk to en la toilet door ocupada, y dile a Zampano que le gusta a Gelsomina. Se va a verla.
- Go into the toilets and take the toilet paper.Entrez dans les toilettes et prenez le papier hygiénique.Geh in die Toiletten und nimm das Toilettenpapier.Entra nei bagni e prendi la carta igienica.Entra en los aseos y coge el papel higiénico.
- In the back room off the lobby, Take a bottle from the crates: the White-spirit.Dans la remise attenante au Hall entrée, Prendre une bouteille dans les caisses : le White-spirit.Take im Nebenraum der Eingangshalle eine Flasche aus den Kisten: das White-spirit.Nel retro accanto all’atrio, Take una bottiglia dalle casse: il White-spirit.En el cuarto junto al vestíbulo, Take una botella de las cajas: el White-spirit.
- At the toolshed, choose Photograph on the hut, or Use the M-Oroid on it. You get a Picture of the shed in one piece.À la Cabane, choisissez Photographier sur la cabane, ou Utiliser le M-Oroid dessus. Vous obtenez une photo de la cabane intacte.Wähle am toolshed an der Hütte Photograph, oder Use die M-Oroid damit. Du bekommst ein Picture vom unversehrten Schuppen.Al toolshed, scegli Photograph sul capanno, o Use la M-Oroid su di esso. Ottieni una Picture del capanno intatto.En el toolshed, elige Photograph en la caseta, o Use la M-Oroid con ella. Obtienes una Picture de la caseta intacta.
- Combine the picture with the clothespins.Combinez la photo avec les pinces à linge.Kombiniere das Foto mit den Wäscheklammern.Combina la foto con le mollette.Combina la foto con las pinzas.
- At the entrance gate, inspect the security camera and Use the picture with the clothespins on it. The camera now sees the shed undamaged.À la Grille entrée, inspectez la Caméra de surveillance et Utiliser dessus la photo avec les pinces à linge. La caméra voit désormais la cabane intacte.Untersuche am entrance gate (Eingangstor) die security camera (Überwachungskamera) und Use das Bild mit den Wäscheklammern daran. Die Kamera sieht den Schuppen jetzt unbeschädigt.All’entrance gate (cancello d’ingresso), esamina la security camera (telecamera) e Use la foto con le mollette su di essa. Ora la telecamera vede il capanno intatto.En la entrance gate (verja de entrada), inspecciona la security camera (cámara de seguridad) y Use la foto con las pinzas en ella. Ahora la cámara ve la caseta intacta.
- Combine the white-spirit with the toilet paper to make a Cocktail, then the cocktail with the matches to make a Burning cocktail.Combiner Avec : le white-spirit avec le papier hygiénique pour obtenir un Cocktail, puis le cocktail avec les allumettes pour obtenir un Cocktail enflammé.Combine das White-spirit mit dem Toilettenpapier zu einem Cocktail, dann den Cocktail mit den Streichhölzern zu einem Burning cocktail.Combine il white-spirit con la carta igienica per ottenere un Cocktail, poi il cocktail con i fiammiferi per ottenere un Burning cocktail.Combine el white-spirit con el papel higiénico para hacer un Cocktail, y luego el cóctel con las cerillas para hacer un Burning cocktail.
- At the toolshed, Use the burning cocktail on the hut. If Louis mentions the camera, do the photograph trick first.À la cabane, Utiliser le cocktail enflammé sur la cabane. Si Louis parle de la caméra, faites d’abord le tour de la photo.Use am Geräteschuppen den Burning cocktail mit der hut (Hütte). Erwähnt Louis die Kamera, mach zuerst den Trick mit dem Foto.Al capanno, Use il burning cocktail sulla hut (capanna). Se Louis parla della telecamera, fai prima il trucco della foto.En el cobertizo, Use el burning cocktail con la hut (caseta). Si Louis menciona la cámara, haz primero el truco de la foto.
- Choose Think on the burning shed to leave.Choisissez Réfléchir sur la cabane en feu pour partir.Wähle Nachdenken am brennenden Schuppen, um zu gehen.Scegli Pensa sul capanno in fiamme per andartene.Elige Pensar en el cobertizo en llamas para irte.
- Go back to Parx. He tells you to hide in the laundry going to the village.Retournez voir Parx. Il vous dit de vous cacher dans le linge qui part au village.Geh zurück zu Parx. Er sagt dir, du sollst dich in der Wäsche verstecken, die ins Dorf geht.Torna da Parx. Ti dice di nasconderti nella biancheria che va al villaggio.Vuelve con Parx. Te dice que te escondas en la ropa sucia que va al pueblo.
- In the laundry, choose Hide in on the pile of laundry, and read on.Dans la Buanderie, choisissez Se cacher dans sur le tas de linge, et lisez la suite.Wähle in der laundry am Wäschehaufen Hide in und lies weiter.Nella laundry, scegli Hide in sul mucchio di biancheria, e continua a leggere.En la laundry, elige Hide in en el montón de ropa, y sigue leyendo.
The way out undergroundLa sortie souterraineDer unterirdische AuswegL’uscita sotterraneaLa salida subterránea
- After the failed escape, read through the doctor’s talk and the scene of writing all over your cell. You’re put in a padded cell.Après l’évasion ratée, lisez le discours du docteur et la scène où vous couvrez votre cellule d’écritures. Vous êtes placé dans une cellule capitonnée.Lies nach der gescheiterten Flucht die Rede des Arztes und die Szene, in der du deine ganze Zelle vollschreibst. Du kommst in eine Gummizelle.Dopo la fuga fallita, leggi il discorso del dottore e la scena in cui riempi di scritte la tua cella. Vieni messo in una cella imbottita.Tras la fuga fallida, lee la charla del doctor y la escena en que llenas de escritos tu celda. Te meten en una celda acolchada.
- Choose Call on the cell door three times, reading each answer. The third time you hear it unlock: choose Open and go out.Choisissez Appeler sur la porte de la cellule trois fois, en lisant chaque réponse. La troisième fois, vous l’entendez se déverrouiller : choisissez Ouvrir et sortez.Wähle an der Zellentür dreimal Call und lies jede Antwort. Beim dritten Mal hörst du, wie sie aufgeschlossen wird: Wähle Open und geh hinaus.Scegli Call sulla porta della cella tre volte, leggendo ogni risposta. La terza volta la senti sbloccarsi: scegli Open ed esci.Elige Call en la puerta de la celda tres veces, leyendo cada respuesta. La tercera vez oyes que se abre el cerrojo: elige Open y sal.
- While the strange sound plays, go to the empty reception. Inspect the table, then its drawer, and take the Envelope.Pendant que le son étrange se fait entendre, allez à la réception déserte. Inspectez la Table, puis son Tiroir, et prenez l’Enveloppe.Geh, während das seltsame Geräusch läuft, zur leeren Rezeption. Untersuche den table, dann seine drawer (Schublade), und nimm den Envelope.Mentre suona lo strano rumore, vai alla reception deserta. Esamina il table, poi il suo drawer (cassetto), e prendi l’Envelope.Mientras suena el extraño ruido, ve a la recepción vacía. Inspecciona la table, luego su drawer (cajón), y coge el Envelope.
- In the same close-up, choose Turn off on the Tape Recorder. The hospital sound stops and the clues work normally again; do this before trying to read the fountain statues.Dans le même gros plan, choisissez Eteindre sur l’Enregistrement Dictaphone. Le bruit de l’hôpital s’arrête et les indices fonctionnent à nouveau normalement ; faites-le avant d’essayer de lire les statues de la fontaine.Wähle in derselben Nahaufnahme Turn off am Tape Recorder. Das Krankenhausgeräusch hört auf und die Hinweise funktionieren wieder normal; mach das, bevor du versuchst, die Brunnenstatuen zu lesen.Nello stesso primo piano, scegli Turn off sul Tape Recorder. Il rumore dell’ospedale si ferma e gli indizi tornano a funzionare normalmente; fallo prima di provare a leggere le statue della fontana.En el mismo primer plano, elige Turn off en el Tape Recorder. El ruido del hospital se detiene y las pistas vuelven a funcionar con normalidad; hazlo antes de intentar leer las estatuas de la fuente.
- Go upstairs to your old cell and Inspect the bed to get back the small key found with the wine; your inventory was emptied when you went into the padded cell.Montez à votre ancienne cellule et Inspecter le Lit pour récupérer la petite clé trouvée avec le vin ; votre inventaire a été vidé quand vous êtes entré dans la cellule capitonnée.Geh hinauf in deine alte Zelle und Inspect das bed, um den kleinen Schlüssel zurückzubekommen, den du beim Wein gefunden hast; dein Inventar wurde geleert, als du in die Gummizelle kamst.Sali alla tua vecchia cella e Inspect il bed per riprendere la chiavetta trovata con il vino; l’inventario è stato svuotato quando sei entrato nella cella imbottita.Sube a tu antigua celda e Inspect la bed para recuperar la llave pequeña que encontraste con el vino; tu inventario se vació al entrar en la celda acolchada.
- At the burnt toolshed, Search what’s left of it and take the wrench.À la cabane incendiée, Fouiller ce qu’il en reste et prenez la clé à molette.Search am abgebrannten Geräteschuppen die Überreste und nimm den Schraubenschlüssel.Al capanno bruciato, Search tra ciò che resta e prendi la chiave inglese.En el cobertizo quemado, Search en lo que queda y coge la llave inglesa.
- At the she-wolf statue, inspect the panel, Use the small key on the lock, then inspect the opened section and Use the wrench on the pipes. The well drains.À la Statue louve, inspectez le Panneau, Utiliser la petite clé sur la Serrure, puis inspectez la partie ouverte et Utiliser la clé à molette sur la Canalisation. Le puits se vide.Untersuche an der She-wolf statue das panel (Verkleidung), Use den kleinen Schlüssel am lock (Schloss), dann untersuche den geöffneten Teil und Use den Schraubenschlüssel an den pipes (Rohren). Der Brunnen läuft leer.Alla She-wolf statue, esamina il panel (pannello), Use la chiavetta sulla lock (serratura), poi esamina la parte aperta e Use la chiave inglese sui pipes (tubi). Il pozzo si svuota.En la She-wolf statue, inspecciona el panel, Use la llave pequeña en la lock (cerradura), y luego inspecciona la parte abierta y Use la llave inglesa con las pipes (tuberías). El pozo se vacía.
- In the inventory, Open the reception envelope to get a Sheet, and Use the sheet on the embers of the burnt shed. The heat brings out a Letter. Read it: the fourth sign is Cancer, and the signs must follow the order of the zodiac.Dans l’inventaire, Ouvrir l’enveloppe de la réception pour obtenir une Feuille, et Utiliser la feuille sur les braises de la cabane incendiée. La chaleur fait apparaître une Lettre. Lire : le quatrième signe est le Cancer, et les signes doivent suivre l’ordre du zodiaque.Open im Inventar den Umschlag von der Rezeption, um ein Sheet (Blatt) zu bekommen, und Use das Blatt an der Glut des abgebrannten Schuppens. Die Hitze bringt einen Letter zum Vorschein. Read ihn: Das vierte Zeichen ist Krebs (Cancer), und die Zeichen müssen der Reihenfolge des Tierkreises folgen.Nell’inventario, Open sulla busta della reception per avere uno Sheet (foglio), e Use il foglio sulle braci del capanno bruciato. Il calore fa apparire una Letter. Read: il quarto segno è il Cancro (Cancer), e i segni devono seguire l’ordine dello zodiaco.En el inventario, Open en el sobre de recepción para obtener una Sheet (hoja), y Use la hoja con las brasas del cobertizo quemado. El calor hace aparecer una Letter. Read: el cuarto signo es Cáncer, y los signos deben seguir el orden del zodiaco.
- At the fountain, inspect and Examine the three statues with signs: Libra, Leo (called Lion in the game) and Gemini. The fourth statue has no useful sign.À la Fontaine, inspectez et Examiner les trois statues qui portent un signe : la Balance, le Lion et les Gémeaux. La quatrième statue n’a pas de signe utile.Untersuche am fountain (Brunnen) die drei Statuen mit Zeichen und Examine sie: Waage (Libra), Löwe (im Spiel Lion) und Zwillinge (Gemini). Die vierte Statue hat kein nützliches Zeichen.Alla fountain (fontana), esamina e Examine le tre statue con i segni: Bilancia (Libra), Leone (nel gioco Lion) e Gemelli (Gemini). La quarta statua non ha un segno utile.En la fountain (fuente), inspecciona y Examine las tres estatuas con signos: Libra, Leo (en el juego Lion) y Géminis (Gemini). La cuarta estatua no tiene un signo útil.
- Go to the well, inspect it, and Go down the drained shaft.Allez au Puits, inspectez-le, et Descendre dans le puits vidé.Geh zum well (Brunnenschacht), untersuche ihn und Go down in den geleerten Schacht.Vai al well (pozzo), esaminalo, e Go down nel pozzo svuotato.Ve al well (pozo), inspecciónalo, y Go down por el pozo vacío.
- At the bronze door, Push GEMINI → CANCER → LION → LIBRA, then Push the central button. Open each symbol’s popup and choose Push; just reading it doesn’t enter it.À la Porte de bronze, Appuyer GEMINI → CANCER → LION → LIBRA (Gémeaux, Cancer, Lion, Balance), puis Appuyer sur le Bouton central. Ouvrez le menu de chaque symbole et choisissez Appuyer ; le lire ne suffit pas à le saisir.Push an der bronzenen door GEMINI → CANCER → LION → LIBRA, dann Push den central button. Öffne das Menü jedes Symbols und wähle Push; es nur zu lesen gibt es nicht ein.Alla door di bronzo, Push GEMINI → CANCER → LION → LIBRA, poi Push sul central button. Apri il menu di ogni simbolo e scegli Push; leggerlo soltanto non lo inserisce.En la door de bronce, Push GEMINI → CANCER → LION → LIBRA, y luego Push en el central button. Abre el menú de cada símbolo y elige Push; solo leerlo no lo introduce.
- Follow the tunnel and the slope into the cave, and read through the ritual and the sacrifice until Louis wakes up at home.Suivez le tunnel et la pente jusque dans la grotte, et lisez le rituel et le sacrifice jusqu’à ce que Louis se réveille chez lui.Folge dem Tunnel und dem Hang hinab in die Höhle und lies das Ritual und das Opfer, bis Louis zu Hause aufwacht.Segui il tunnel e la discesa fino alla grotta, e leggi il rituale e il sacrificio finché Louis non si sveglia a casa.Sigue el túnel y la pendiente hasta la cueva, y lee el ritual y el sacrificio hasta que Louis despierte en casa.
Follow Anne’s trail in ParisSuivre la piste d’Anne à ParisAnnes Spur in Paris folgenSeguire le tracce di Anne a ParigiSeguir la pista de Anne en París
Anne’s hidden messageLe message caché d’AnneAnnes versteckte NachrichtIl messaggio nascosto di AnneEl mensaje oculto de Anne
- Leave the bedroom and answer the hall telephone. Say you’re Louis and hear the police out: they want you at the Love Woods.Quittez la chambre et répondez au Téléphone de l’entrée. Dites que vous êtes Louis et écoutez la police : elle vous attend au Bois d’Amour.Verlass das Schlafzimmer und geh an das hall telephone. Sag, dass du Louis bist, und hör die Polizei an: Sie wollen dich im Liebeswald.Esci dalla camera e rispondi al hall telephone. Di’ che sei Louis e ascolta la polizia: ti vogliono al Bosco dell’Amore.Sal del dormitorio y contesta el hall telephone. Di que eres Louis y escucha a la policía: te quieren en el Bosque del Amor.
- Back in the bedroom, inspect the chair and choose Wear it on the jeans. Louis takes his pills and gets dressed.De retour dans la chambre, inspectez la Chaise et choisissez Mettre sur le Jean. Louis prend ses pilules et s’habille.Untersuche zurück im Schlafzimmer den chair und wähle Wear it an der jeans. Louis nimmt seine Pillen und zieht sich an.Tornato in camera, esamina la chair e scegli Wear it sui jeans. Louis prende le pillole e si veste.De vuelta en el dormitorio, inspecciona la chair y elige Wear it en los jeans. Louis se toma las pastillas y se viste.
- Leave by the front door for the glade. Examine the body, then Turn it to see the face.Sortez par la porte d’entrée vers la Clairière. Examiner le cadavre, puis Tourner pour voir le visage.Geh durch die Haustür zur glade (Lichtung). Examine die Leiche, dann Turn sie, um das Gesicht zu sehen.Esci dalla porta d’ingresso verso la glade (radura). Examine il cadavere, poi Turn per vederne il volto.Sal por la puerta principal hacia el glade (claro). Examine el cadáver, y luego Turn para ver la cara.
- Read through the funeral and the gathering at the church. At the gathering, talk to Belleville and Félicienne, then to Jean when his second conversation appears.Lisez l’enterrement et la réunion à l’église. À la réunion, parlez à Belleville et à Félicienne, puis à Jean quand sa deuxième conversation apparaît.Lies die Beerdigung und das Beisammensein in der Kirche. Rede beim Beisammensein mit Belleville und Félicienne, dann mit Jean, wenn sein zweites Gespräch erscheint.Leggi il funerale e il ritrovo nella chiesa. Al ritrovo, parla con Belleville e Félicienne, poi con Jean quando compare la sua seconda conversazione.Lee el funeral y la reunión en la iglesia. En la reunión, habla con Belleville y Félicienne, y luego con Jean cuando aparezca su segunda conversación.
- After the flashbacks, examine and turn the body again. Choose No, it’s not her, I’m sure of it for the clearest account of what Louis noticed; all three answers lead on to the same scene.Après les flashbacks, examinez et retournez de nouveau le cadavre. Choisissez Non, ce n’est pas elle. J’en suis certain. pour le récit le plus clair de ce que Louis a remarqué ; les trois réponses mènent à la même scène.Untersuche und dreh die Leiche nach den Rückblenden noch einmal um. Wähle No, it’s not her, I’m sure of it für den klarsten Bericht darüber, was Louis bemerkt hat; alle drei Antworten führen zur selben Szene.Dopo i flashback, esamina e gira di nuovo il cadavere. Scegli No, it’s not her, I’m sure of it per il resoconto più chiaro di ciò che Louis ha notato; tutte e tre le risposte portano alla stessa scena.Tras los flashbacks, examina y da la vuelta otra vez al cadáver. Elige No, it’s not her, I’m sure of it para el relato más claro de lo que notó Louis; las tres respuestas llevan a la misma escena.
- At home, go to the toilet and choose Fix on the flusher. Try to Open the water tank: Louis says he must turn the water off first.À la maison, allez aux toilettes et choisissez Réparer sur la Chasse d’eau. Essayez d’Ouvrir le Réservoir : Louis dit qu’il doit d’abord couper l’eau.Geh zu Hause auf die toilet und wähle Fix an der flusher (Spülung). Versuch, den water tank (Spülkasten) zu Open: Louis sagt, er muss zuerst das Wasser abdrehen.A casa, vai in toilet e scegli Fix sullo flusher (sciacquone). Prova a Open il water tank (cassetta): Louis dice che deve prima chiudere l’acqua.En casa, ve al toilet y elige Fix en el flusher (cisterna). Intenta Open el water tank (depósito): Louis dice que primero tiene que cortar el agua.
- In the kitchen, choose Turn valves off on the plumbing under the sink.Dans la Cuisine, choisissez Fermer tuyaux sur la plomberie sous l’évier.Wähle in der kitchen an den Rohren unter der Spüle Turn valves off.In kitchen, scegli Turn valves off sulle tubature sotto il lavello.En la kitchen, elige Turn valves off en las tuberías de debajo del fregadero.
- Back in the toilet, Open the water tank and take the Plastic bag of photographs.De retour aux toilettes, Ouvrir le Réservoir et prenez le Sachet de photos.Open zurück auf der Toilette den water tank und nimm die Plastic bag mit Fotos.Tornato in bagno, Open il water tank e prendi la Plastic bag di fotografie.De vuelta en el aseo, Open el water tank y coge la Plastic bag de fotos.
- Read through the three photographs. They point to Louis’ mother’s apartment in Paris, and the journey there follows.Lisez les trois photos. Elles mènent à l’appartement de la mère de Louis à Paris, et le voyage jusque-là suit.Lies die drei Fotos. Sie führen zur Wohnung von Louis’ Mutter in Paris, und die Reise dorthin folgt.Leggi le tre fotografie. Portano all’appartamento della madre di Louis a Parigi, e segue il viaggio fin lì.Lee las tres fotos. Apuntan al piso de la madre de Louis en París, y sigue el viaje hasta allí.
Your mother’s apartmentL’appartement de votre mèreDie Wohnung deiner MutterL’appartamento di tua madreEl piso de tu madre
- In the apartment at 45 rue de Haxo, go into the bedroom and choose Sit on the bed. The grating sound gives you Look under: open that close-up and take the Key A.S. from the springs.Dans l’appartement du 45 rue de Haxo, entrez dans la Chambre et choisissez S’asseoir sur le Lit. Le grincement vous donne Soulever : ouvrez ce gros plan et prenez la Clef A.S. dans les ressorts.Geh in der Wohnung in der 45 rue de Haxo ins bedroom und wähle Sit on am bed. Das Kratzgeräusch gibt dir Look under: Öffne diese Nahaufnahme und nimm den Key A.S. aus den Federn.Nell’appartamento al 45 rue de Haxo, entra nella bedroom e scegli Sit on sul bed. Il cigolio ti dà Look under: apri quel primo piano e prendi la Key A.S. dalle molle.En el piso del 45 rue de Haxo, entra en el bedroom y elige Sit on en la bed. El chirrido te da Look under: abre ese primer plano y coge la Key A.S. de los muelles.
- Open the armoire. Take the Coathanger; Louis also packs the clothes into Anne’s Briefcase.Ouvrir l’Armoire. Prenez le Cintre ; Louis range aussi les vêtements dans l’Attaché-case d’Anne.Open die armoire (Kleiderschrank). Nimm den Coathanger; Louis packt auch die Kleider in Annes Briefcase.Open l’armoire (armadio). Prendi il Coathanger; Louis mette anche i vestiti nella Briefcase di Anne.Open el armoire (armario). Coge la Coathanger; Louis también mete la ropa en el Briefcase de Anne.
- In the bathroom, choose Refresh yourself at the wash basin. It doesn’t drain.Dans la Salle de bains, choisissez Se rafraichir au Lavabo. L’eau ne s’écoule pas.Wähle im bathroom am wash basin Refresh yourself. Es läuft nicht ab.Nel bathroom, scegli Refresh yourself al wash basin. Non scarica.En el bathroom, elige Refresh yourself en el wash basin. No desagua.
- Use the coathanger on the wash basin to fish out the music-box key. You keep the bent coathanger for later.Utiliser le cintre sur le Lavabo pour repêcher la clé de la boite à musique. Vous gardez le cintre tordu pour plus tard.Use den Kleiderbügel am wash basin, um den Spieluhrschlüssel herauszufischen. Den verbogenen Bügel behältst du für später.Use la gruccia sul wash basin per ripescare la chiave del carillon. Tieni la gruccia piegata per dopo.Use la percha con el wash basin para pescar la llave de la caja de música. Te quedas la percha doblada para más tarde.
- In the foyer, inspect the music box and Use its key on it. Take the Notebook from the box.Dans l’Entrée, inspectez la Boite à musique et Utiliser sa clé dessus. Prenez l’Agenda dans la boite.Untersuche im foyer die music box (Spieluhr) und Use ihren Schlüssel daran. Nimm das Notebook aus der Dose.Nel foyer (ingresso), esamina il music box (carillon) e Use la sua chiave su di esso. Prendi il Notebook dalla scatola.En el foyer (recibidor), inspecciona la music box (caja de música) y Use su llave en ella. Coge el Notebook de la caja.
- In the inventory, Read every Notebook page: 2, 5, 7, 10 and 12. They give you the names and the phone choices that go with them.Dans l’inventaire, lisez chaque page de l’Agenda : 2, 5, 7, 10 et 12. Elles vous donnent les noms et les choix de téléphone qui vont avec.Lies im Inventar jede Seite des Notebook: 2, 5, 7, 10 und 12. Sie geben dir die Namen und die Telefonoptionen dazu.Nell’inventario, leggi ogni pagina del Notebook: 2, 5, 7, 10 e 12. Ti danno i nomi e le scelte telefoniche che li accompagnano.En el inventario, lee cada página del Notebook: 2, 5, 7, 10 y 12. Te dan los nombres y las opciones de teléfono que van con ellos.
- In the living room, Search the closet, then Take the bottle: Trankill 6000.Dans le salon, Fouiller l’Armoire, puis Prendre le flacon : le Tranquill 6000.Search im Wohnzimmer den closet (Schrank), dann Take die Flasche: Trankill 6000.In soggiorno, Search nel closet (armadio), poi Take il flacone: Trankill 6000.En el salón, Search en el closet (armario), y luego Take el frasco: Trankill 6000.
- Use the telephone in the foyer to Call Montfort. Gisèle hangs up, but now you can visit her. You can leave the apartment once you also have the Key A.S. and the Trankill 6000.Utilisez le Téléphone de l’entrée pour Tél. Montfort. Gisèle raccroche, mais vous pouvez maintenant aller la voir. Vous pourrez quitter l’appartement une fois que vous aurez aussi la Clef A.S. et le Tranquill 6000.Benutze das telephone im Foyer für Call Montfort. Gisèle legt auf, aber jetzt kannst du sie besuchen. Du kannst die Wohnung verlassen, sobald du auch den Key A.S. und das Trankill 6000 hast.Usa il telephone nel foyer per Call Montfort. Gisèle riattacca, ma ora puoi andare a trovarla. Puoi lasciare l’appartamento quando hai anche la Key A.S. e il Trankill 6000.Usa el telephone del recibidor para Call Montfort. Gisèle cuelga, pero ahora puedes ir a verla. Podrás salir del piso cuando tengas también la Key A.S. y el Trankill 6000.
Into Gisèle’s buildingDans l’immeuble de GisèleIn Gisèles HausNel palazzo di GisèleEn el edificio de Gisèle
- At Gisèle’s building, inspect the intercom and read the names by the buttons.À l’immeuble de Gisèle, inspectez l’Interphone et lisez les noms à côté des boutons.Untersuche am Haus von Gisèle die intercom (Gegensprechanlage) und lies die Namen neben den Knöpfen.Al palazzo di Gisèle, esamina l’intercom (citofono) e leggi i nomi accanto ai pulsanti.En el edificio de Gisèle, inspecciona el intercom (portero automático) y lee los nombres junto a los botones.
- Ring Gradoux twice. Her second answer tells you about Ramon and his other relationship.Sonnez deux fois chez les Epoux Gradoux. La deuxième réponse vous parle de Ramon et de son autre liaison.Klingle zweimal bei Gradoux. Ihre zweite Antwort erzählt dir von Ramon und seiner anderen Beziehung.Suona due volte a Gradoux. La sua seconda risposta ti parla di Ramon e della sua altra relazione.Llama dos veces a Gradoux. Su segunda respuesta te habla de Ramon y de su otra relación.
- Ring Josephine Petipas twice. The second call reveals that Ramon drinks with the doctor.Sonnez deux fois chez Joséphine Petipas. Le deuxième appel révèle que Ramon boit avec le docteur.Klingle zweimal bei Josephine Petipas. Beim zweiten Mal erfährst du, dass Ramon mit dem Doktor trinkt.Suona due volte a Josephine Petipas. La seconda chiamata rivela che Ramon beve con il dottore.Llama dos veces a Josephine Petipas. La segunda llamada revela que Ramon bebe con el doctor.
- Ring Doctor Ali Kafour once, then again after hearing the neighbours. Louis pretends to be Ramon, and the doctor lets him in.Sonnez une fois chez le Docteur Ali Kafour, puis de nouveau après avoir entendu les voisins. Louis se fait passer pour Ramon, et le docteur le laisse entrer.Klingle einmal bei Doctor Ali Kafour, dann noch einmal, nachdem du die Nachbarn gehört hast. Louis gibt sich als Ramon aus, und der Doktor lässt ihn herein.Suona una volta a Doctor Ali Kafour, poi di nuovo dopo aver sentito i vicini. Louis si spaccia per Ramon, e il dottore lo fa entrare.Llama una vez a Doctor Ali Kafour, y otra vez después de oír a los vecinos. Louis se hace pasar por Ramon, y el doctor le deja entrar.
- In the conversation with Gisèle, choose the forceful third reply that tells her to listen. Hear out her account of Anne’s childhood, the accident, and her visits to the EXIT.Dans la conversation avec Gisèle, choisissez la troisième réponse, ferme, qui lui dit d’écouter. Écoutez son récit de l’enfance d’Anne, de l’accident et de ses visites à l’EXIT.Wähle im Gespräch mit Gisèle die energische dritte Antwort, die ihr sagt, sie solle zuhören. Hör dir ihren Bericht über Annes Kindheit, den Unfall und ihre Besuche im EXIT an.Nella conversazione con Gisèle, scegli la terza risposta, decisa, che le dice di ascoltare. Ascolta il suo racconto dell’infanzia di Anne, dell’incidente e delle sue visite all’EXIT.En la conversación con Gisèle, elige la tercera respuesta, la contundente, que le dice que escuche. Escucha su relato de la infancia de Anne, el accidente y sus visitas al EXIT.
A night at the EXITUne nuit à l’EXITEine Nacht im EXITUna notte all’EXITUna noche en el EXIT
- Outside the EXIT, talk politely to the streetsweeper: ask for information, then about the club’s special features. You learn you need to come as a couple, suitably dressed.Devant l’EXIT, parlez poliment au balayeur : demandez des renseignements, puis les particularités du club. Vous apprenez qu’il faut venir en couple, avec une tenue adaptée.Rede vor dem EXIT höflich mit dem Straßenkehrer: Frag nach Informationen, dann nach den Besonderheiten des Clubs. Du erfährst, dass man als Paar und passend gekleidet kommen muss.Fuori dall’EXIT, parla educatamente con lo spazzino: chiedi informazioni, poi delle particolarità del locale. Scopri che bisogna venire in coppia, vestiti in modo adatto.Fuera del EXIT, habla con educación con el barrendero: pide información, y luego pregunta por las particularidades del club. Te enteras de que hay que ir en pareja y vestido para la ocasión.
- At the hotel reception, ask the clerk about couples who aren’t married, about the couple with a red-haired woman and a man with a ponytail, and whether they’ve been in lately. When he asks whether you’re an investigator, say Yes, something like that. Hear him out as he names Saint Arman. This opens up the visit to Félicienne upstairs.À la réception de l’hôtel, interrogez le réceptionniste sur les couples non mariés, sur le couple formé d’une rousse et d’un homme à queue de cheval, et demandez s’ils sont venus récemment. Quand il vous demande si vous êtes enquêteur, répondez Oui, quelque chose comme ça. Écoutez-le nommer Saint Arman. Cela ouvre la visite à Félicienne à l’étage.Frag an der Rezeption des Hotels den Portier nach unverheirateten Paaren, nach dem Paar mit einer Rothaarigen und einem Mann mit Pferdeschwanz und ob sie in letzter Zeit da waren. Wenn er fragt, ob du Ermittler bist, sag Yes, something like that. Hör ihn an, als er Saint Arman nennt. Das öffnet den Besuch bei Félicienne oben.Alla reception dell’albergo, chiedi a il portiere delle coppie non sposate, della coppia con una donna rossa e un uomo col codino, e se sono passati di recente. Quando ti chiede se sei un investigatore, rispondi Yes, something like that. Ascoltalo mentre nomina Saint Arman. Questo apre la visita a Félicienne al piano di sopra.En la recepción del hotel, pregunta a el recepcionista por las parejas que no están casadas, por la pareja de una pelirroja y un hombre con coleta, y si han venido últimamente. Cuando te pregunte si eres investigador, di Yes, something like that. Escúchale mientras nombra a Saint Arman. Eso abre la visita a Félicienne arriba.
- In room 315, inspect the poster and read the handwritten clue. It is worded differently from the journal, so take it as a story clue; the keypad later uses 2319.Dans la chambre 315, inspectez le Poster et lisez l’indice manuscrit. Il est formulé autrement que dans le journal, prenez-le donc comme un indice de l’histoire ; le digicode utilise plus tard 2319.Untersuche in Zimmer 315 das poster und lies den handschriftlichen Hinweis. Er ist anders formuliert als im Tagebuch, also nimm ihn als Hinweis der Geschichte; das Tastenfeld verwendet später 2319.Nella stanza 315, esamina il poster e leggi l’indizio scritto a mano. È formulato diversamente dal diario, quindi prendilo come un indizio della storia; il tastierino più avanti usa 2319.En la habitación 315, inspecciona el poster y lee la pista manuscrita. Está redactada de otra forma que en el diario, así que tómala como una pista de la historia; el teclado usa más tarde 2319.
- Talk to Félicienne and invite her to dinner and a nightclub. When you’re ready, choose OK, let’s go.Parlez à Félicienne et invitez-la à dîner et en boite de nuit. Quand vous êtes prêt, choisissez OK, on y va.Rede mit Félicienne und lade sie zum Abendessen und in einen Nachtclub ein. Wenn du so weit bist, wähle OK, let’s go.Parla con Félicienne e invitala a cena e in discoteca. Quando sei pronto, scegli OK, let’s go.Habla con Félicienne e invítala a cenar y a una discoteca. Cuando estés listo, elige OK, let’s go.
- At dinner at the Tour d’Ivoire, explain that the club is the kind you need a couple for. She refuses. Hear her out, which makes Spill appear on the right glass.Au dîner à la Tour d’Ivoire, expliquez que le club est du genre où il faut venir en couple. Elle refuse. Écoutez-la, ce qui fait apparaître Renverser sur le bon Verre.Erklär beim Abendessen im Tour d’Ivoire, dass man in diesen Club nur als Paar kommt. Sie lehnt ab. Hör sie an, dann erscheint Spill am rechten glass.A cena alla Tour d’Ivoire, spiega che il locale è di quelli in cui serve una coppia. Lei rifiuta. Ascoltala, così compare Spill sul glass giusto.En la cena en la Tour d’Ivoire, explica que el club es de los que exigen ir en pareja. Se niega. Escúchala, y así aparece Spill en el glass correcto.
- Spill the glass. She goes to clean her dress.Renverser le verre. Elle part nettoyer sa robe.Spill das Glas. Sie geht ihr Kleid säubern.Spill il bicchiere. Va a pulirsi il vestito.Spill el vaso. Se va a limpiarse el vestido.
- While she’s gone, Use the Trankill 6000 on her Trankill 2000 on the table, swapping her usual medicine. The target is the medicine, not her drink.Pendant son absence, Utiliser le Tranquill 6000 sur son Trankill 2000 posé sur la table, pour remplacer son médicament habituel. La cible est le médicament, pas sa boisson.Use, während sie weg ist, das Trankill 6000 mit ihrem Trankill 2000 auf dem Tisch und tausch so ihr übliches Medikament aus. Ziel ist das Medikament, nicht ihr Getränk.Mentre è via, Use il Trankill 6000 sul suo Trankill 2000 sul tavolo, scambiando il suo solito farmaco. Il bersaglio è il farmaco, non la sua bevanda.Mientras no está, Use el Trankill 6000 con su Trankill 2000 de la mesa, cambiando su medicina habitual. El objetivo es la medicina, no su bebida.
- When she’s back, ask whether she’s still taking her medication, then suggest the club again. She agrees.Quand elle revient, demandez-lui si elle prend toujours son médicament, puis proposez de nouveau le club. Elle accepte.Wenn sie zurück ist, frag, ob sie ihre Medikamente noch nimmt, dann schlag noch einmal den Club vor. Sie willigt ein.Quando torna, chiedile se prende ancora il suo farmaco, poi proponi di nuovo il locale. Accetta.Cuando vuelva, pregúntale si sigue tomando su medicación, y luego vuelve a proponer el club. Acepta.
- Outside the EXIT, the bouncer turns your clothes away. In the inventory, choose the new Wear action on the Briefcase to put on the club clothes.Devant l’EXIT, le videur refuse vos vêtements. Dans l’inventaire, choisissez la nouvelle action Mettre sur l’Attaché-case pour enfiler la tenue de club.Vor dem EXIT weist der Türsteher deine Kleidung ab. Wähle im Inventar die neue Aktion Wear am Briefcase, um die Clubkleidung anzuziehen.Fuori dall’EXIT, il buttafuori rifiuta i tuoi vestiti. Nell’inventario, scegli la nuova azione Wear sulla Briefcase per indossare i vestiti da locale.Fuera del EXIT, el portero rechaza tu ropa. En el inventario, elige la nueva acción Wear en el Briefcase para ponerte la ropa del club.
- Talk to the bouncer again. He lets you and Félicienne in.Parlez de nouveau au videur. Il vous laisse entrer, Félicienne et vous.Rede noch einmal mit dem Türsteher. Er lässt dich und Félicienne hinein.Parla di nuovo con il buttafuori. Fa entrare te e Félicienne.Habla otra vez con el portero. Os deja entrar a ti y a Félicienne.
Christine, and the way outChristine, et la sortieChristine und der AuswegChristine e l’uscitaChristine y la salida
- At the bar, talk to the man trying to pick up Félicienne and ask him to take your friend for a walk along the Seine. That keeps her busy.Au Bar, parlez à l’homme qui drague Félicienne et demandez-lui d’emmener votre amie faire une promenade en bord de Seine. Cela l’occupe.Rede an der bar mit dem Mann, der Félicienne anbaggert, und bitte ihn, mit deiner Freundin einen Spaziergang an der Seine zu machen. Das hält sie beschäftigt.Al bar, parla con l’uomo che ci prova con Félicienne e chiedigli di portare la tua amica a fare una passeggiata lungo la Senna. Questo la tiene occupata.En la barra, habla con el hombre que intenta ligar con Félicienne y pídele que lleve a tu amiga a dar un paseo por el Sena. Así la mantiene ocupada.
- Take the Napkins from the bar.Prenez les Serviettes sur le bar.Nimm die Napkins von der Bar.Prendi i Napkins dal bancone.Coge las Napkins de la barra.
- On the couches, talk to the man about dancing. Say no; he gives you his Glass of alcohol.Sur les Canapés, parlez à l’homme de danse. Dites non ; il vous donne son Verre d’alcool.Rede auf den couches (Sofas) mit dem Mann übers Tanzen. Sag nein; er gibt dir sein Glass mit Alkohol.Sui couches (divani), parla con l’uomo del ballare. Di’ di no; ti dà il suo Glass di alcol.En los couches (sofás), habla con el hombre sobre bailar. Di que no; te da su Glass de alcohol.
- Combine the glass with the napkins to soak them in alcohol. You’ll need them to get out quietly.Combiner Avec : le verre avec les serviettes pour les imbiber d’alcool. Il vous les faudra pour sortir discrètement.Combine das Glas mit den Servietten, um sie mit Alkohol zu tränken. Du brauchst sie, um leise hinauszukommen.Combine il bicchiere con i tovaglioli per imbeverli di alcol. Ti serviranno per uscire senza rumore.Combine el vaso con las servilletas para empaparlas de alcohol. Las necesitarás para salir sin hacer ruido.
- Ask the woman on the couches who knows Christine where she is. Move around the club and ask again until she says Christine is by the restrooms.Demandez à la femme sur les canapés qui connaît Christine où elle se trouve. Déplacez-vous dans le club et redemandez-lui jusqu’à ce qu’elle dise que Christine est près des toilettes.Frag die Frau auf den Sofas, die Christine kennt, wo sie ist. Geh im Club herum und frag erneut, bis sie sagt, dass Christine bei den Toiletten ist.Chiedi a la donna sui divani che conosce Christine dove si trova. Muoviti per il locale e chiedi di nuovo finché non dice che Christine è vicino ai bagni.Pregunta a la mujer de los sofás que conoce a Christine dónde está. Muévete por el club y vuelve a preguntar hasta que diga que Christine está junto a los aseos.
- In the restrooms, talk to Christine Leather about Anne, then about Saint Arman, and read on until he arrives.Aux toilettes, parlez à Christine Leather d’Anne, puis de Saint Arman, et lisez jusqu’à son arrivée.Rede in den Toiletten mit Christine Leather über Anne, dann über Saint Arman, und lies weiter, bis er kommt.Nei bagni, parla con Christine Leather di Anne, poi di Saint Arman, e leggi finché non arriva lui.En los aseos, habla con Christine Leather de Anne, luego de Saint Arman, y sigue leyendo hasta que llegue él.
- Louis hides in the bathroom. Unscrew the wash basin’s pipes, then Take the loose PVC pipe.Louis se cache dans les toilettes. Dévisser la Canalisation du lavabo, puis Prendre le tuyau PVC détaché.Louis versteckt sich im Bad. Unscrew die pipes des Waschbeckens, dann Take das lose PVC-Rohr.Louis si nasconde in bagno. Unscrew i pipes del lavandino, poi Take il tubo in PVC staccato.Louis se esconde en el baño. Unscrew las pipes del lavabo, y luego Take el tubo de PVC suelto.
- Go to the window. Use the alcohol-soaked napkins on it, then Use the pipe on the covered window to break it quietly.Approchez-vous de la Fenêtre. Utiliser les serviettes imbibées d’alcool dessus, puis Utiliser le tuyau sur la fenêtre couverte pour la briser sans bruit.Geh zum window (Fenster). Use die mit Alkohol getränkten Servietten daran, dann Use das Rohr am abgedeckten Fenster, um es leise einzuschlagen.Avvicinati alla window (finestra). Use i tovaglioli imbevuti di alcol su di essa, poi Use il tubo sulla finestra coperta per romperla senza rumore.Acércate a la window (ventana). Use las servilletas empapadas en alcohol con ella, y luego Use el tubo con la ventana cubierta para romperla sin ruido.
- Try Go through on the broken window. Louis won’t leave in club clothes: change back with the Briefcase, then choose Go through again.Essayez Fouiller sur la fenêtre brisée. Louis ne partira pas en tenue de club : changez-vous avec l’Attaché-case, puis choisissez de nouveau Fouiller.Versuch Go through am zerbrochenen Fenster. Louis geht nicht in Clubkleidung: Zieh dich mit dem Briefcase wieder um, dann wähle noch einmal Go through.Prova Go through sulla finestra rotta. Louis non se ne va con i vestiti da locale: cambiati di nuovo con la Briefcase, poi scegli di nuovo Go through.Prueba Go through en la ventana rota. Louis no se irá con la ropa del club: vuelve a cambiarte con el Briefcase, y luego elige otra vez Go through.
Saint Arman’s apartmentL’appartement de Saint ArmanSaint Armans WohnungL’appartamento di Saint ArmanEl piso de Saint Arman
- At Saint Arman’s building, Open the door and get into the lift.À l’immeuble de Saint Arman, Ouvrir la porte et entrez dans l’ascenseur.Open am Haus von Saint Arman die Tür und steig in den Aufzug.Al palazzo di Saint Arman, Open la porta e sali nell’ascensore.En el edificio de Saint Arman, Open la puerta y sube al ascensor.
- Inspect and Open the toolbox, and Take what’s in it: a Screwdriver and a Hammer.Inspectez et Ouvrir la boite à Outils, et Prendre ce qu’elle contient : un Tournevis et un Marteau.Untersuche den toolbox (Werkzeugkasten), Open ihn und Take den Inhalt: einen Screwdriver und einen Hammer.Esamina e Open la toolbox (cassetta degli attrezzi), e Take ciò che contiene: un Screwdriver e un Hammer.Inspecciona y Open la toolbox (caja de herramientas), y Take lo que hay dentro: un Screwdriver y un Hammer.
- Use the Key A.S. on the lift’s lock and Turn it. The key sticks, but you can get into the apartment.Utiliser la Clef A.S. sur la Serrure de l’ascenseur et Tourner. La clé reste coincée, mais vous pouvez entrer dans l’appartement.Use den Key A.S. am lock des Aufzugs und Turn ihn. Der Schlüssel klemmt, aber du kommst in die Wohnung.Use la Key A.S. sulla lock dell’ascensore e Turn. La chiave si incastra, ma puoi entrare nell’appartamento.Use la Key A.S. en la lock del ascensor y Turn. La llave se queda atascada, pero puedes entrar en el piso.
- In the entrance hall, inspect the statue and take its Lance.Dans l’Entrée, inspectez la Statue et prenez sa Lance.Untersuche in der entrance hall (Eingangshalle) die Statue und nimm ihre Lance.Nell’entrance hall (ingresso), esamina la statua e prendi la sua Lance.En la entrance hall (entrada), inspecciona la estatua y coge su Lance.
- In the kitchen, inspect and open the cupboard and take the Flour.Dans la Cuisine, inspectez et ouvrez le Placard et prenez la Farine.Untersuche und öffne in der kitchen den cupboard (Schrank) und nimm das Flour.In kitchen, esamina e apri il cupboard (credenza) e prendi la Flour.En la kitchen, inspecciona y abre el cupboard (armario) y coge la Flour.
- In the bathroom, inspect the big mirror and Use the screwdriver on it. You get a Mirror and the Piece of paper with 2319 on it.Dans la Salle de bains, inspectez le grand Miroir et Utiliser le tournevis dessus. Vous obtenez un Miroir et le Bout de papier portant 2319.Untersuche im bathroom den großen mirror und Use den Schraubenzieher daran. Du bekommst einen Mirror und das Piece of paper mit 2319 darauf.Nel bathroom, esamina il grande mirror e Use il cacciavite su di esso. Ottieni un Mirror e il Piece of paper con scritto 2319.En el bathroom, inspecciona el gran mirror y Use el destornillador con él. Obtienes un Mirror y el Piece of paper con 2319 escrito.
- In the lounge, inspect the window and take the Musket. Inspect the wine glass on the table and note the fingerprints.Dans le Salon, inspectez la fenêtre et prenez le Mousquet. Inspectez le verre de vin sur la table et remarquez les empreintes.Untersuche im lounge das Fenster und nimm die Musket. Untersuche das Weinglas auf dem Tisch und achte auf die Fingerabdrücke.Nel lounge, esamina la finestra e prendi il Musket. Esamina il bicchiere di vino sul tavolo e nota le impronte.En el lounge, inspecciona la ventana y coge el Musket. Inspecciona la copa de vino de la mesa y fíjate en las huellas.
- Open the corridor door and Use the flour on the Sides of the corridor. The flour shows up the laser beams.Ouvrez la porte du couloir et Utiliser la farine sur les Pans du couloir. La farine fait apparaître les rayons laser.Öffne die Flurtür und Use das Mehl an den Sides (Wänden) des Flurs. Das Mehl macht die Laserstrahlen sichtbar.Apri la porta del corridoio e Use la farina sui Sides (lati) del corridoio. La farina rivela i raggi laser.Abre la puerta del pasillo y Use la harina con los Sides (laterales) del pasillo. La harina deja ver los rayos láser.
- In the bedroom off the corridor, inspect the dressing table and take the Hand mirror.Dans la Chambre donnant sur le couloir, inspectez la Coiffeuse et prenez le Miroir à main.Untersuche im bedroom am Flur die dressing table (Frisierkommode) und nimm den Hand mirror.Nella bedroom sul corridoio, esamina la dressing table (toeletta) e prendi lo Hand mirror.En el bedroom que da al pasillo, inspecciona el dressing table (tocador) y coge el Hand mirror.
- In the bloodstained room across the corridor, inspect the table and take the Roll of tape. Watch the camcorder tape if you want the story.Dans la pièce tachée de sang de l’autre côté du couloir, inspectez la Table et prenez le Shatterton. Regardez la cassette du caméscope si vous voulez l’histoire.Untersuche im blutverschmierten Zimmer gegenüber den table und nimm die Roll of tape. Sieh dir das Camcorderband an, wenn du die Geschichte willst.Nella stanza macchiata di sangue dall’altra parte del corridoio, esamina il table e prendi il Roll of tape. Guarda il nastro della videocamera se vuoi la storia.En la habitación manchada de sangre al otro lado del pasillo, inspecciona la table y coge el Roll of tape. Mira la cinta de la videocámara si quieres la historia.
- Combine the mirror with the hand mirror to get Mirrors.Combiner Avec : le miroir avec le miroir à main pour obtenir des Miroirs.Combine den Spiegel mit dem Handspiegel zu Mirrors.Combine lo specchio con lo specchietto per ottenere i Mirrors.Combine el espejo con el espejo de mano para obtener Mirrors.
- Combine the lance with the roll of tape to wrap it. You keep the roll.Combiner Avec : la lance avec le shatterton pour l’entourer. Vous gardez le rouleau.Combine die Lanze mit dem Klebeband, um sie zu umwickeln. Die Rolle behältst du.Combine la lancia con il nastro per avvolgerla. Il rotolo lo tieni.Combine la lanza con la cinta para envolverla. Te quedas con el rollo.
- Combine the wrapped lance with the mirrors.Combinez la lance entourée de chatterton avec les miroirs.Kombiniere die umwickelte Lanze mit den Spiegeln.Combina la lancia avvolta con gli specchi.Combina la lanza envuelta con los espejos.
- In the corridor with the laser beams, Use the lance with its mirrors on the Sides. That gets you past the beams; crawling or jumping won’t.Dans le couloir aux rayons laser, Utiliser la lance avec ses miroirs sur les Pans. C’est ainsi que vous passez les rayons ; ramper ou sauter ne marche pas.Use im Flur mit den Laserstrahlen die Lanze mit ihren Spiegeln an den Sides. So kommst du an den Strahlen vorbei; Kriechen oder Springen klappt nicht.Nel corridoio con i raggi laser, Use la lancia con i suoi specchi sui Sides. Così superi i raggi; strisciare o saltare non funziona.En el pasillo de los rayos láser, Use la lanza con sus espejos en los Sides. Así pasas los rayos; arrastrarte o saltar no sirve.
- Go to the far door and Open it into the office.Approchez-vous de la porte du fond et Ouvrir pour entrer dans le Bureau.Geh zur hinteren Tür und Open sie ins office.Avvicinati alla porta in fondo e Open per entrare nell’office.Acércate a la puerta del fondo y Open para entrar en el office.
- Inspect the desk. Tear a blank page from the Notebook, then Read the notebook to learn Belleville’s address.Inspectez le Bureau. Arracher une page blanche de l’Agenda, puis Lire l’agenda pour apprendre l’adresse de Belleville.Untersuche den desk (Schreibtisch). Tear eine leere Seite aus dem Notebook, dann Read das Notizbuch, um Bellevilles Adresse zu erfahren.Esamina il desk (scrivania). Tear una pagina bianca dal Notebook, poi Read il taccuino per scoprire l’indirizzo di Belleville.Inspecciona el desk (escritorio). Tear una página en blanco del Notebook, y luego Read el cuaderno para saber la dirección de Belleville.
- Inspect all four photographs on the desk. Each one counts towards being allowed through the secret passage, so don’t skip any.Inspectez les quatre photos sur le bureau. Chacune compte pour être autorisé à passer par le passage secret, n’en sautez donc aucune.Untersuche alle vier Fotos auf dem Schreibtisch. Jedes zählt dafür, durch den Geheimgang gelassen zu werden, also lass keines aus.Esamina tutte e quattro le fotografie sulla scrivania. Ognuna conta per poter passare dal passaggio segreto, quindi non saltarne nessuna.Inspecciona las cuatro fotos del escritorio. Cada una cuenta para que te dejen pasar por el pasadizo secreto, así que no te saltes ninguna.
- In the inventory, Open the musket while you have the blank page. Louis catches the Gunpowder in the page.Dans l’inventaire, Ouvrir le mousquet pendant que vous avez la Page blanche. Louis recueille la Poudre dans la page.Open im Inventar die Muskete, während du die leere Seite hast. Louis fängt das Gunpowder mit der Seite auf.Nell’inventario, Open sul moschetto mentre hai la pagina bianca. Louis raccoglie la Gunpowder nella pagina.En el inventario, Open en el mosquete mientras tienes la página en blanco. Louis recoge la Gunpowder en la página.
- In the lounge’s wine glass close-up, Use the gunpowder on the glass to bring out the fingerprints.Dans le gros plan du verre de vin du salon, Utiliser la poudre sur le verre pour faire ressortir les empreintes.Use in der Nahaufnahme des Weinglases im Wohnzimmer das Pulver am Glas, um die Fingerabdrücke sichtbar zu machen.Nel primo piano del bicchiere di vino del soggiorno, Use la polvere sul bicchiere per far risaltare le impronte.En el primer plano de la copa de vino del salón, Use la pólvora con la copa para que se vean las huellas.
- Choose Cut on the roll of tape, then Use the Piece of tape on the powdered glass. You now have tape with Saint Arman’s fingerprint, and the paper from the powder, which you’ll need later.Choisissez Couper sur le shatterton, puis Utiliser le Morceau de shatterton sur le verre poudré. Vous avez maintenant l’empreinte de Saint Arman sur le ruban, et le papier de la poudre, dont vous aurez besoin plus tard.Wähle Cut an der Klebebandrolle, dann Use das Piece of tape am eingestäubten Glas. Jetzt hast du Klebeband mit Saint Armans Fingerabdruck und das Papier vom Pulver, das du später brauchst.Scegli Cut sul rotolo di nastro, poi Use il Piece of tape sul bicchiere impolverato. Ora hai il nastro con l’impronta di Saint Arman, e la carta della polvere, che ti servirà più avanti.Elige Cut en el rollo de cinta, y luego Use el Piece of tape con la copa empolvada. Ahora tienes cinta con la huella de Saint Arman, y el papel de la pólvora, que necesitarás más adelante.
- Back in the office, inspect the bookcase’s digital scanner and Use the fingerprint tape on it. The bookcase opens onto a secret passage.De retour dans le Bureau, inspectez le Scanner Digital de la bibliothèque et Utiliser le ruban à empreinte dessus. La bibliothèque s’ouvre sur un passage secret.Untersuche zurück im office den digital scanner (Fingerabdruckscanner) des Bücherregals und Use das Klebeband mit dem Abdruck daran. Das Regal öffnet sich zu einem Geheimgang.Tornato nell’office, esamina il digital scanner della libreria e Use il nastro con l’impronta su di esso. La libreria si apre su un passaggio segreto.De vuelta en el office, inspecciona el digital scanner de la estantería y Use la cinta con la huella en él. La estantería se abre a un pasadizo secreto.
- Go through and Climb down the ladder. If Louis says he’s forgotten something, go back, Read the notebook and Inspect all four photographs.Passez et Descendre l’échelle. Si Louis dit qu’il a oublié quelque chose, revenez, Lire l’agenda et Inspecter les quatre photos.Geh hindurch und Climb down die Leiter. Sagt Louis, er habe etwas vergessen, geh zurück, Read das Notizbuch und Inspect alle vier Fotos.Passa e Climb down la scala. Se Louis dice di aver dimenticato qualcosa, torna indietro, Read il taccuino e Inspect tutte e quattro le foto.Pasa y Climb down por la escalera. Si Louis dice que ha olvidado algo, vuelve, Read el cuaderno e Inspect las cuatro fotos.
Belleville’s garage, and the bank papersLe garage de Belleville, et les papiers de la banqueBellevilles Garage und die BankpapiereIl garage di Belleville e i documenti della bancaEl garaje de Belleville y los papeles del banco
- Go to Belleville’s house, at the address from the notebook. Break in at the garage door twice: the first time loosens it, the second opens it.Allez à la maison de Belleville, à l’adresse de l’agenda. Défoncer la Porte garage deux fois : la première fois l’ébranle, la seconde l’ouvre.Geh zum Haus von Belleville, unter der Adresse aus dem Notizbuch. Break in am garage door zweimal: Beim ersten Mal lockert es sich, beim zweiten geht es auf.Vai alla casa di Belleville, all’indirizzo del taccuino. Break in sulla garage door due volte: la prima volta la allenta, la seconda la apre.Ve a la casa de Belleville, en la dirección del cuaderno. Break in en la garage door dos veces: la primera la afloja, la segunda la abre.
- At the back of the garage, inspect the cupboard and take the Acid.Au fond du garage, inspectez le Placard et prenez l’Acide.Untersuche hinten in der Garage den cupboard und nimm die Acid.In fondo al garage, esamina il cupboard e prendi l’Acid.Al fondo del garaje, inspecciona el cupboard y coge el Acid.
- Inspect the Digicode and push 2 → 3 → 1 → 9, then the confirm button at the bottom middle (the one that validates the code, not the hash or star).Inspectez le Digicode et appuyez sur 2 → 3 → 1 → 9, puis sur le bouton de validation en bas au milieu (celui qui valide le code, pas le dièse ni l’étoile).Untersuche den Digicode und drück 2 → 3 → 1 → 9, dann den Bestätigungsknopf unten in der Mitte (den, der den Code bestätigt, nicht Raute oder Stern).Esamina il Digicode e premi 2 → 3 → 1 → 9, poi il pulsante di conferma in basso al centro (quello che convalida il codice, non il cancelletto né l’asterisco).Inspecciona el Digicode y pulsa 2 → 3 → 1 → 9, y luego el botón de confirmar abajo en el centro (el que valida el código, no la almohadilla ni el asterisco).
- The car’s trunk can now be opened. Open it and Take the Painting and the notes.Le coffre de la voiture peut maintenant s’ouvrir. Ouvrir et Prendre le Tableau et les notes.Der Kofferraum des Autos lässt sich jetzt öffnen. Open ihn und Take das Painting und die Notizen.Ora il bagagliaio dell’auto si può aprire. Open e Take il Painting e gli appunti.Ahora se puede abrir el maletero del coche. Open y Take el Painting y las notas.
- Search Anne’s shoes in the trunk. You find the Attorney paper, her authorisation for the bank.Fouiller les chaussures d’Anne dans le coffre. Vous trouvez la Procuration, son autorisation pour la banque.Search Annes Schuhe im Kofferraum. Du findest das Attorney paper, ihre Vollmacht für die Bank.Search sulle scarpe di Anne nel bagagliaio. Trovi l’Attorney paper, la sua delega per la banca.Search en los zapatos de Anne en el maletero. Encuentras el Attorney paper, su autorización para el banco.
- In the garage, Use the bent coathanger on the car door, and Open the car.Dans le garage, Utiliser le cintre tordu sur la portière, et Ouvrir la voiture.Use in der Garage den verbogenen Kleiderbügel an der car door (Autotür) und Open das Auto.Nel garage, Use la gruccia piegata sulla car door (portiera), e Open l’auto.En el garaje, Use la percha doblada con la car door (puerta del coche), y Open el coche.
- Inside, Open the glove compartment and take the Note reporting on Anne.À l’intérieur, Ouvrir la Boite à gants et prenez la Note qui rend compte d’Anne.Open drinnen das glove compartment (Handschuhfach) und nimm die Note, die über Anne berichtet.Dentro, Open il glove compartment (cruscotto) e prendi la Note che riferisce su Anne.Dentro, Open la glove compartment (guantera) y coge la Note que informa sobre Anne.
- Leave the garage once you have the Attorney paper, the Note Belleville and the Note from the glove compartment: those three are what the game checks.Quittez le garage une fois que vous avez la Procuration, les Notes Belleville et la Note de la boite à gants : ce sont ces trois objets que le jeu vérifie.Verlass die Garage, sobald du das Attorney paper, die Note Belleville und die Note aus dem Handschuhfach hast: Diese drei prüft das Spiel.Lascia il garage quando hai l’Attorney paper, la Note Belleville e la Note del cruscotto: sono queste tre le cose che il gioco controlla.Sal del garaje cuando tengas el Attorney paper, la Note Belleville y la Note de la guantera: son las tres cosas que comprueba el juego.
Anne’s safe-deposit boxLe coffre d’Anne à la banqueAnnes SchließfachLa cassetta di sicurezza di AnneLa caja de seguridad de Anne
- Read through the argument with Félicienne at your mother’s apartment, and the phone call with Alex Eytellat. Ask where he lives, and you go to his apartment.Lisez la dispute avec Félicienne dans l’appartement de votre mère, et le coup de fil avec Alex Eytellat. Demandez-lui où il habite, et vous allez à son appartement.Lies den Streit mit Félicienne in der Wohnung deiner Mutter und das Telefonat mit Alex Eytellat. Frag, wo er wohnt, und du gehst zu seiner Wohnung.Leggi la lite con Félicienne nell’appartamento di tua madre, e la telefonata con Alex Eytellat. Chiedigli dove abita, e vai al suo appartamento.Lee la discusión con Félicienne en el piso de tu madre, y la llamada con Alex Eytellat. Pregúntale dónde vive, y vas a su piso.
- Open Alex’s door. Inspect the floor and Open the cigarette pack to get a Lighter.Ouvrir la porte d’Alex. Inspectez le sol et Ouvrir le paquet de cigarettes pour obtenir un Briquet.Open Alex’ Tür. Untersuche den Boden und Open die Zigarettenschachtel, um ein Lighter zu bekommen.Open la porta di Alex. Esamina il pavimento e Open il pacchetto di sigarette per avere un Lighter.Open la puerta de Alex. Inspecciona el suelo y Open el paquete de tabaco para obtener un Lighter.
- Inspect Alex’s body and Search him for a Key. With both, the story moves on to the hotel and the bank.Inspectez le corps d’Alex et Fouiller-le pour trouver une Clef. Avec les deux, l’histoire passe à l’hôtel et à la banque.Untersuche Alex’ Leiche und Search sie nach einem Key. Mit beidem geht die Geschichte im Hotel und in der Bank weiter.Esamina il corpo di Alex e Search per trovare una Key. Con entrambi, la storia passa all’albergo e alla banca.Inspecciona el cuerpo de Alex y Search para encontrar una Key. Con las dos cosas, la historia pasa al hotel y al banco.
- At the bank, go up to the banker. In the conversation about the authorisation, ask whether you have to come back with your lawyer. He takes you to the vault.À la banque, approchez-vous du banquier. Dans la conversation sur la procuration, demandez si vous devez revenir avec votre avocat. Il vous conduit à la salle des coffres.Geh in der Bank zu dem Bankier. Frag im Gespräch über die Vollmacht, ob du mit deinem Anwalt wiederkommen musst. Er bringt dich in den Tresorraum.Alla banca, avvicinati a il banchiere. Nella conversazione sulla delega, chiedi se devi tornare con il tuo avvocato. Ti porta al caveau.En el banco, acércate a el banquero. En la conversación sobre la autorización, pregunta si tienes que volver con tu abogado. Te lleva a la cámara acorazada.
- Use Alex’s key on the box’s Lock, and take the Bible from it.Utiliser la clé d’Alex sur la Serrure du coffre, et prenez-y la Bible.Use Alex’ Schlüssel am Lock des Schließfachs und nimm die Bibel heraus.Use la chiave di Alex sulla Lock della cassetta, e prendi la Bibbia.Use la llave de Alex en la Lock de la caja, y coge la Biblia.
- In the inventory, Open the Bible. It holds an M-Oroid photo: choose Look at back to read the invitation, which sends you back to the EXIT.Dans l’inventaire, Ouvrir la Bible. Elle contient une Photo polaroid : choisissez Retourner pour lire l’invitation, qui vous renvoie à l’EXIT.Open im Inventar die Bibel. Darin ist ein M-Oroid photo: Wähle Look at back, um die Einladung zu lesen, die dich zurück ins EXIT schickt.Nell’inventario, Open la Bibbia. Contiene una M-Oroid photo: scegli Look at back per leggere l’invito, che ti rimanda all’EXIT.En el inventario, Open la Biblia. Contiene una M-Oroid photo: elige Look at back para leer la invitación, que te devuelve al EXIT.
Complete the ritualAccomplir le rituelDas Ritual vollendenCompletare il ritualeCompletar el ritual

- At the EXIT, knock. Tell the bouncer you know Saint Arman and your name is Louis Everett. He lets you in.À l’EXIT, frappez. Dites au videur que vous connaissez Saint Arman et que vous vous appelez Louis Everett. Il vous laisse entrer.Klopf am EXIT. Sag dem Türsteher, dass du Saint Arman kennst und Louis Everett heißt. Er lässt dich hinein.All’EXIT, bussa. Di’ al buttafuori che conosci Saint Arman e ti chiami Louis Everett. Ti fa entrare.En el EXIT, llama. Dile al portero que conoces a Saint Arman y te llamas Louis Everett. Te deja entrar.
- Talk to the cult member and ask to see Saint Arman. Follow the conversations down the stairs.Parlez au membre de la secte et demandez à voir Saint Arman. Suivez les conversations jusqu’en bas de l’escalier.Rede mit dem Sektenmitglied und bitte darum, Saint Arman zu sehen. Folge den Gesprächen die Treppe hinunter.Parla con il membro della setta e chiedi di vedere Saint Arman. Segui le conversazioni giù per le scale.Habla con el miembro de la secta y pide ver a Saint Arman. Sigue las conversaciones escaleras abajo.
- In the crowd, ask the cult member to lead you to Saint Arman, then Go closer to Saint Arman at the altar.Dans la foule, demandez au membre de la secte de vous conduire à Saint Arman, puis S’approcher de Saint Arman à l’autel.Bitte in der Menge das Sektenmitglied, dich zu Saint Arman zu führen, dann Go closer zu Saint Arman am Altar.Tra la folla, chiedi al membro della setta di portarti da Saint Arman, poi Go closer a Saint Arman all’altare.Entre la multitud, pide al miembro de la secta que te lleve con Saint Arman, y luego Go closer a Saint Arman en el altar.
- Ask Saint Arman all five main questions: Anne, Alex, the asylum ritual and Jean, Christine, and the tobacco. The next scene waits until you’ve covered all five.Posez à Saint Arman les cinq questions principales : Anne, Alex, le rituel de l’asile et Jean, Christine, et le tabac. La scène suivante attend que vous ayez fait le tour des cinq.Stell Saint Arman alle fünf Hauptfragen: Anne, Alex, das Ritual im Asyl und Jean, Christine und den Tabak. Die nächste Szene wartet, bis du alle fünf durch hast.Fai a Saint Arman tutte e cinque le domande principali: Anne, Alex, il rituale del manicomio e Jean, Christine, e il tabacco. La scena successiva aspetta che tu le abbia fatte tutte e cinque.Hazle a Saint Arman las cinco preguntas principales: Anne, Alex, el ritual del manicomio y Jean, Christine, y el tabaco. La siguiente escena espera a que hayas hecho las cinco.
- Read on through Belleville’s arrival and the fire. Choose Flee when it appears on the cultists.Lisez l’arrivée de Belleville et l’incendie. Choisissez Fuir quand l’action apparaît sur les membres de la secte.Lies Bellevilles Ankunft und das Feuer weiter. Wähle Flee, wenn es an den Sektenmitgliedern erscheint.Leggi l’arrivo di Belleville e l’incendio. Scegli Flee quando compare sui membri della setta.Sigue leyendo la llegada de Belleville y el incendio. Elige Flee cuando aparezca en los miembros de la secta.
- At the burning altar, Talk to Saint Arman, then Take the Painting he tells you to use. You’re taken back to your mother’s apartment.À l’autel en flammes, Parler à Saint Arman, puis Prendre le Tableau qu’il vous dit d’utiliser. Vous êtes ramené à l’appartement de votre mère.Talk to am brennenden Altar Saint Arman, dann Take das Painting, das du laut ihm benutzen sollst. Du wirst zurück in die Wohnung deiner Mutter gebracht.All’altare in fiamme, Talk to Saint Arman, poi Take il Painting che ti dice di usare. Vieni riportato all’appartamento di tua madre.En el altar en llamas, Talk to Saint Arman, y luego Take el Painting que te dice que uses. Te llevan de vuelta al piso de tu madre.
- Use the lighter on the room’s Candles. The room lights up, and the lighter can now be used on the braziers.Utiliser le briquet sur les Bougies de la pièce. La pièce s’éclaire, et le briquet peut maintenant servir sur les braseros.Use das Feuerzeug an den Candles (Kerzen) im Zimmer. Der Raum wird hell, und das Feuerzeug lässt sich jetzt an den Kohlebecken benutzen.Use l’accendino sulle Candles (candele) della stanza. La stanza si illumina, e l’accendino ora si può usare sui bracieri.Use el mechero con las Candles (velas) de la habitación. La habitación se ilumina, y ahora el mechero se puede usar con los braseros.
- In the bathroom, look at the bank Bible under the ultraviolet light. The hidden writing appears; read the ritual through.Dans la salle de bains, regardez la Bible de la banque sous les Lampes ultraviolettes. L’écriture cachée apparaît ; lisez le rituel jusqu’au bout.Sieh dir im Bad die Bibel aus der Bank unter dem ultraviolet light (UV-Licht) an. Die verborgene Schrift erscheint; lies das Ritual durch.In bagno, guarda la Bibbia della banca sotto la ultraviolet light (luce ultravioletta). Appare la scritta nascosta; leggi tutto il rituale.En el baño, mira la Biblia del banco bajo la ultraviolet light (luz ultravioleta). Aparece la escritura oculta; lee el ritual entero.
- Inspect the plants in the bath and Pick some Tobacco. Lighting the candles is what lets you pick it.Inspectez les Plantes dans la baignoire et Cueillir du Tabac. C’est d’avoir allumé les bougies qui vous permet de le cueillir.Untersuche die Pflanzen in der Wanne und Pick etwas Tobacco. Erst die angezündeten Kerzen erlauben dir, ihn zu pflücken.Esamina le piante nella vasca e Pick un po’ di Tobacco. È accendere le candele che ti permette di coglierlo.Inspecciona las plantas de la bañera y Pick algo de Tobacco. Encender las velas es lo que te permite cogerlo.
- Combine the tobacco with the paper to make Incense. Use the paper from the fingerprint work, not the note with the keypad code.Combiner Avec : le tabac avec le papier pour obtenir de l’encens. Utilisez le papier des empreintes, pas la note avec le code du digicode.Combine den Tabak mit dem Papier zu Incense. Nimm das Papier von den Fingerabdrücken, nicht den Zettel mit dem Code fürs Tastenfeld.Combine il tabacco con la carta per ottenere l’Incense. Usa la carta del lavoro sulle impronte, non il biglietto con il codice del tastierino.Combine el tabaco con el papel para hacer Incense. Usa el papel de las huellas, no la nota con el código del teclado.
- In the living room, Use the painting from Saint Arman’s altar on the Spot where it belongs.Dans le salon, Utiliser le tableau de l’autel de Saint Arman sur l’Emplacement qui lui revient.Use im Wohnzimmer das Gemälde vom Altar Saint Armans am Spot, an den es gehört.In soggiorno, Use il quadro dell’altare di Saint Arman sullo Spot dove va messo.En el salón, Use el cuadro del altar de Saint Arman en el Spot donde va.
- Use the incense on the Brazier, then Use the lighter on the brazier to light it.Utiliser l’encens sur le Brasero, puis Utiliser le briquet sur le brasero pour l’allumer.Use den Weihrauch am Brazier (Kohlebecken), dann Use das Feuerzeug daran, um es anzuzünden.Use l’incenso sul Brazier (braciere), poi Use l’accendino sul braciere per accenderlo.Use el incienso con el Brazier (brasero), y luego Use el mechero con el brasero para encenderlo.
- Read through the smoke, the raid and the escape. You arrive beside Astrid’s boat.Lisez la fumée, l’assaut et la fuite. Vous arrivez à côté de la barque d’Astrid.Lies den Rauch, die Razzia und die Flucht. Du kommst neben Astrids Boot an.Leggi il fumo, l’irruzione e la fuga. Arrivi accanto alla barca di Astrid.Lee el humo, el asalto y la huida. Llegas junto a la barca de Astrid.
Solve the Isle of the DeadRésoudre l’Île des mortsDie Toteninsel lösenRisolvere l’Isola dei mortiResolver la Isla de los Muertos
Arrive, and find Alex’s miniatureArriver, et trouver la miniature d’AlexAnkommen und Alex’ Miniatur findenArrivare e trovare la statuetta di AlexLlegar y encontrar la estatuilla de Alex
- Talk to Astrid by the boat and hear out her request for proof that your eyes are open.Parlez à Astrid près de la barque et écoutez-la vous demander la preuve que vos yeux sont ouverts.Rede beim Boot mit Astrid und hör dir ihre Bitte um einen Beweis an, dass deine Augen offen sind.Parla con Astrid vicino alla barca e ascolta la sua richiesta di una prova che i tuoi occhi sono aperti.Habla con Astrid junto a la barca y escucha su petición de una prueba de que tienes los ojos abiertos.
- Use the Denarius on Astrid; it was added to your inventory as you arrived. Board the boat.Utiliser les Pièces sur Astrid ; elles ont été ajoutées à votre inventaire à votre arrivée. Entrer dans la barque.Use den Denarius mit Astrid; er kam bei deiner Ankunft ins Inventar. Board: Steig ins Boot.Use il Denarius con Astrid; è stato aggiunto all’inventario al tuo arrivo. Board: sali sulla barca.Use el Denarius con Astrid; se añadió a tu inventario al llegar. Board: sube a la barca.
- Read through the recap of the journey and Astrid’s farewell on the island.Lisez le récapitulatif du voyage et les adieux d’Astrid sur l’île.Lies die Zusammenfassung der Reise und Astrids Abschied auf der Insel.Leggi il riepilogo del viaggio e l’addio di Astrid sull’isola.Lee el resumen del viaje y la despedida de Astrid en la isla.
- Search the small boat and take the Boat hook. In the inventory, choose separate to get a Hook and a Staff.Fouiller la Barque et prenez la Gaffe. Dans l’inventaire, choisissez Démonter pour obtenir un Crochet et un Manche.Search das kleine Boot und nimm den Boat hook. Wähle im Inventar separate, um einen Hook und einen Staff zu bekommen.Search sulla barchetta e prendi il Boat hook. Nell’inventario, scegli separate per avere un Hook e uno Staff.Search en la barca pequeña y coge el Boat hook. En el inventario, elige separate para obtener un Hook y un Staff.
- Climb the landing steps and follow the path to the Fountain. From here the right-hand path leads to the house, the left-hand one to the temple, and the mountain steps to the astrolab.Montez les marches du débarcadère et suivez le chemin jusqu’à la Fontaine. De là, le chemin de droite mène à la maison, celui de gauche au temple, et les marches de la montagne à l’astrolab.Steig die Stufen der Anlegestelle hinauf und folge dem Weg zum Fountain. Von hier führt der rechte Weg zum Haus, der linke zum Tempel und die Bergstufen zum Astrolab.Sali i gradini dell’approdo e segui il sentiero fino alla Fountain. Da qui il sentiero di destra porta alla casa, quello di sinistra al tempio, e i gradini della montagna all’astrolab.Sube los escalones del embarcadero y sigue el camino hasta la Fountain. Desde aquí, el camino de la derecha lleva a la casa, el de la izquierda al templo, y los escalones de la montaña al astrolab.
- Climb the mountain steps to the Astrolab. Inspect the bowl holding a small statue and take the Alex statue; you can also reach it from the close-up by the central hole.Montez les marches de la montagne jusqu’à l’Astrolab. Inspectez la vasque qui contient une petite statue et prenez la Statue Alex ; vous pouvez aussi l’atteindre depuis le gros plan du trou central.Steig die Bergstufen hinauf zum Astrolab. Untersuche die Schale mit einer kleinen Statue und nimm die Alex statue; du erreichst sie auch aus der Nahaufnahme am mittleren Loch.Sali i gradini della montagna fino all’Astrolab. Esamina la vasca con dentro una piccola statua e prendi la Alex statue; puoi raggiungerla anche dal primo piano del foro centrale.Sube los escalones de la montaña hasta el Astrolab. Inspecciona el cuenco con una pequeña estatua y coge la Alex statue; también puedes alcanzarla desde el primer plano del agujero central.
- Back at the fountain, take the path past the house to the bridge. Follow it to the rock entrance called Tartar, open its door and go into the Amphitheater.De retour à la fontaine, prenez le chemin qui passe devant la Maison jusqu’au Pont. Suivez-le jusqu’à l’entrée dans la roche appelée Tartare, ouvrez sa porte et entrez dans l’Amphithéatre.Nimm zurück am Brunnen den Weg am house vorbei zur bridge (Brücke). Folge ihm zum Felseneingang namens Tartar, öffne seine Tür und geh ins Amphitheater.Tornato alla fontana, prendi il sentiero che passa davanti alla house fino al bridge (ponte). Seguilo fino all’ingresso nella roccia chiamato Tartar, apri la sua porta ed entra nell’Amphitheater.De vuelta en la fuente, toma el camino que pasa junto a la house hasta el bridge (puente). Síguelo hasta la entrada en la roca llamada Tartar, abre su puerta y entra en el Amphitheater.
Alex’s memory, and the fountainLe souvenir d’Alex, et la fontaineAlex’ Erinnerung und der BrunnenIl ricordo di Alex e la fontanaEl recuerdo de Alex y la fuente
- Examine the Alex statue in the amphitheatre and Use the miniature Alex statue on the Pedestal under the full-size one.Examiner la statue d’Alex dans l’amphithéâtre et Utiliser la Statue Alex miniature sur le Socle sous la grande.Examine die Statue von Alex im Amphitheater und Use die Miniatur-Alex statue am Pedestal unter der großen.Examine la statua di Alex nell’anfiteatro e Use la Alex statue in miniatura sul Pedestal sotto quella grande.Examine la estatua de Alex en el anfiteatro y Use la Alex statue en miniatura en el Pedestal bajo la grande.
- In the memory of the village square, greet Alex as someone you remember, then ask him for a drink. Hear out the conversation at the bar. You return to the island, and Alex’s box is open.Dans le souvenir de la place du village, saluez Alex comme quelqu’un dont vous vous souvenez, puis demandez-lui à boire. Écoutez la conversation au bar. Vous revenez sur l’île, et la boite d’Alex est ouverte.Begrüße in der Erinnerung am Dorfplatz Alex als jemanden, an den du dich erinnerst, dann bitte ihn um einen Drink. Hör dir das Gespräch an der Bar an. Du kehrst auf die Insel zurück, und Alex’ Dose ist offen.Nel ricordo della piazza del villaggio, saluta Alex come qualcuno che ricordi, poi chiedigli da bere. Ascolta la conversazione al bar. Torni sull’isola, e la scatola di Alex è aperta.En el recuerdo de la plaza del pueblo, saluda a Alex como alguien a quien recuerdas, y luego pídele una copa. Escucha la conversación en el bar. Vuelves a la isla, y la caja de Alex está abierta.
- Inspect the open music box by Alex’s statue and take the Spike Roll.Inspectez la Boite à musique ouverte près de la statue d’Alex et prenez le Rouleau denté.Untersuche die offene music box bei Alex’ Statue und nimm die Spike Roll.Esamina il music box aperto vicino alla statua di Alex e prendi lo Spike Roll.Inspecciona la music box abierta junto a la estatua de Alex y coge el Spike Roll.
- Examine the Empty Pedestal in the amphitheatre and Use the spike roll on its broken Music box. You hear water start to move.Examiner le Socle vide de l’amphithéâtre et Utiliser le rouleau denté sur sa Boite à musique cassée. Vous entendez l’eau se mettre en mouvement.Examine das Empty Pedestal im Amphitheater und Use die Stiftwalze an seiner kaputten Music box. Du hörst, wie Wasser in Bewegung kommt.Examine l’Empty Pedestal nell’anfiteatro e Use il rullo dentato sul suo Music box rotto. Senti l’acqua che comincia a muoversi.Examine el Empty Pedestal del anfiteatro y Use el rodillo de púas con su Music box rota. Oyes que el agua empieza a moverse.
- At the Fountain, inspect the drained basin and take the Christine statue.À la Fontaine, inspectez le bassin vidé et prenez la Statue Christine.Untersuche am Fountain das geleerte Becken und nimm die Christine statue.Alla Fountain, esamina la vasca svuotata e prendi la Christine statue.En la Fountain, inspecciona el pilón vacío y coge la Christine statue.
- In the amphitheatre, Examine Christine’s statue and Use the miniature on its Pedestal.Dans l’amphithéâtre, Examiner la statue de Christine et Utiliser la miniature sur son Socle.Examine im Amphitheater Christines Statue und Use die Miniatur an ihrem Pedestal.Nell’anfiteatro, Examine la statua di Christine e Use la miniatura sul suo Pedestal.En el anfiteatro, Examine la estatua de Christine y Use la miniatura en su Pedestal.
- In the memory on the train, Talk to Christine and accept her offer to help with the ticket. She pays the inspector, and you return to her open box.Dans le souvenir du train, Parler à Christine et acceptez son offre de vous aider pour le billet. Elle paie le contrôleur, et vous revenez à sa boite ouverte.Talk to in der Erinnerung im Zug Christine und nimm ihr Angebot an, dir mit der Fahrkarte zu helfen. Sie bezahlt den Schaffner, und du kehrst zu ihrer offenen Dose zurück.Nel ricordo del treno, Talk to Christine e accetta la sua offerta di aiutarti con il biglietto. Paga lei il controllore, e torni alla sua scatola aperta.En el recuerdo del tren, Talk to Christine y acepta su oferta de ayudarte con el billete. Ella paga al revisor, y vuelves a su caja abierta.
- Take the Babylon battery from Christine’s music box.Prenez la Pile de Babylone dans la Boite à musique de Christine.Nimm die Babylon battery aus Christines music box.Prendi la Babylon battery dal music box di Christine.Coge la Babylon battery de la music box de Christine.
Power the device, and the temple disksAlimenter le mécanisme, et les disques du templeDie Vorrichtung mit Strom versorgen und die TempelscheibenAlimentare il congegno e i dischi del tempioDar energía al mecanismo y los discos del templo
- Go to the house off the fountain’s right-hand path, go in, and go up to the Device.Allez à la Maison sur le chemin de droite de la fontaine, entrez, et approchez-vous de la Machine.Geh zum house am rechten Weg vom Brunnen, geh hinein und zur Device (Maschine).Vai alla house sul sentiero di destra della fontana, entra, e avvicinati al Device (macchina).Ve a la house del camino de la derecha de la fuente, entra, y acércate al Device (máquina).
- Inspect its Power source and Use the Babylon battery on the Empty hole. The two indicator symbols light up, and the temple’s central buttons start to work.Inspectez son Accumulateur et Utiliser la Pile de Babylone sur l’Espace vide. Les deux symboles témoins s’allument, et les boutons centraux du temple se mettent à fonctionner.Untersuche ihre Power source und Use die Babylon battery am Empty hole. Die beiden Anzeigesymbole leuchten auf, und die mittleren Knöpfe im Tempel funktionieren.Esamina la sua Power source e Use la Babylon battery sull’Empty hole. I due simboli spia si accendono, e i pulsanti centrali del tempio cominciano a funzionare.Inspecciona su Power source y Use la Babylon battery en el Empty hole. Los dos símbolos indicadores se encienden, y los botones centrales del templo empiezan a funcionar.
- Back at the fountain, take the left-hand path to the Temple. Inspect its entrance, Enter, and go up to the structure in the middle, the Heart.De retour à la fontaine, prenez le chemin de gauche jusqu’au Temple. Inspectez son entrée, Aller à, et approchez-vous de la structure au centre, le Coeur.Nimm zurück am Brunnen den linken Weg zum Temple. Untersuche seinen Eingang, Enter, und geh zum Bau in der Mitte, dem Heart.Tornato alla fontana, prendi il sentiero di sinistra fino al Temple. Esamina il suo ingresso, Enter, e avvicinati alla struttura al centro, l’Heart.De vuelta en la fuente, toma el camino de la izquierda hasta el Temple. Inspecciona su entrada, Enter, y acércate a la estructura del centro, el Heart.
- Inspect the disk under Isis. Touch the symbol just left of the centre, at about 9 o’clock, and leave the other five alone. Then Touch the central Button once.Inspectez le disque sous Isis. Toucher le symbole juste à gauche du centre, vers 9 heures, et laissez les cinq autres. Puis Toucher une fois le Bouton central.Untersuche die Scheibe unter Isis. Touch das Symbol gleich links von der Mitte, etwa bei 9 Uhr, und lass die anderen fünf in Ruhe. Dann Touch einmal den mittleren Button.Esamina il disco sotto Isis. Touch il simbolo subito a sinistra del centro, verso le ore 9, e lascia stare gli altri cinque. Poi Touch una volta il Button centrale.Inspecciona el disco bajo Isis. Touch el símbolo justo a la izquierda del centro, hacia las 9 en punto, y deja los otros cinco. Luego Touch una vez el Button central.
- Inspect the disk under Mnemosis. Touch the symbol at the upper right, at about 1 to 2 o’clock, and leave the other five alone. Then Touch the central Button once.Inspectez le disque sous Mnemosis. Toucher le symbole en haut à droite, vers 1 ou 2 heures, et laissez les cinq autres. Puis Toucher une fois le Bouton central.Untersuche die Scheibe unter Mnemosis. Touch das Symbol oben rechts, etwa bei 1 bis 2 Uhr, und lass die anderen fünf in Ruhe. Dann Touch einmal den mittleren Button.Esamina il disco sotto Mnemosis. Touch il simbolo in alto a destra, verso l’una o le due, e lascia stare gli altri cinque. Poi Touch una volta il Button centrale.Inspecciona el disco bajo Mnemosis. Touch el símbolo de arriba a la derecha, hacia la 1 o las 2, y deja los otros cinco. Luego Touch una vez el Button central.
- The female sarcophagus opens. Inspect it and Search inside to take the Jean statue.Le sarcophage féminin s’ouvre. Inspectez-le et Fouiller à l’intérieur pour prendre la Statue Jean.Der weibliche Sarkophag öffnet sich. Untersuche ihn und Search darin, um die Jean statue zu nehmen.Il sarcofago femminile si apre. Esaminalo e Search all’interno per prendere la Jean statue.El sarcófago femenino se abre. Inspecciónalo y Search dentro para coger la Jean statue.
Jean’s memory, and the second sarcophagusLe souvenir de Jean, et le second sarcophageJeans Erinnerung und der zweite SarkophagIl ricordo di Jean e il secondo sarcofagoEl recuerdo de Jean y el segundo sarcófago
- In the amphitheatre, Examine Jean’s statue and Use the miniature on its Pedestal.Dans l’amphithéâtre, Examiner la statue de Jean et Utiliser la miniature sur son Socle.Examine im Amphitheater Jeans Statue und Use die Miniatur an ihrem Pedestal.Nell’anfiteatro, Examine la statua di Jean e Use la miniatura sul suo Pedestal.En el anfiteatro, Examine la estatua de Jean y Use la miniatura en su Pedestal.
- In the memory of Jean’s living room, say your vision is blurry and ask Can I sleep here? Hear him out, and you’re back on the island.Dans le souvenir du salon de Jean, dites que vous y voyez trouble et demandez Je peux dormir ici ? Écoutez-le, et vous revoilà sur l’île.Sag in der Erinnerung an Jeans Wohnzimmer, dass du verschwommen siehst, und frag Can I sleep here? Hör ihn an, und du bist zurück auf der Insel.Nel ricordo del salotto di Jean, di’ che ci vedi sfocato e chiedi Can I sleep here? Ascoltalo, e sei di nuovo sull’isola.En el recuerdo del salón de Jean, di que ves borroso y pregunta Can I sleep here? Escúchale, y estás de vuelta en la isla.
- Take the Dagger from Jean’s open music box.Prenez la Dague dans la Boite à musique ouverte de Jean.Nimm den Dagger aus Jeans offener music box.Prendi il Dagger dal music box aperto di Jean.Coge el Dagger de la music box abierta de Jean.
- Back in the temple’s Heart, inspect the closed male sarcophagus and Use the dagger on it. The dagger breaks, but the sarcophagus opens.De retour dans le Coeur du temple, inspectez le sarcophage masculin fermé et Utiliser la dague dessus. La dague se brise, mais le sarcophage s’ouvre.Untersuche zurück im Heart des Tempels den geschlossenen männlichen Sarkophag und Use den Dolch daran. Der Dolch bricht, aber der Sarkophag geht auf.Tornato nell’Heart del tempio, esamina il sarcofago maschile chiuso e Use il pugnale su di esso. Il pugnale si spezza, ma il sarcofago si apre.De vuelta en el Heart del templo, inspecciona el sarcófago masculino cerrado y Use la daga con él. La daga se rompe, pero el sarcófago se abre.
- Search inside and take the Doctor statue.Fouiller à l’intérieur et prenez la Statue Docteur.Search darin und nimm die Doctor statue.Search all’interno e prendi la Doctor statue.Search dentro y coge la Doctor statue.
- In the amphitheatre, Examine the doctor’s statue and Use the miniature on its Pedestal.Dans l’amphithéâtre, Examiner la statue du docteur et Utiliser la miniature sur son Socle.Examine im Amphitheater die Statue des Arztes und Use die Miniatur an ihrem Pedestal.Nell’anfiteatro, Examine la statua del dottore e Use la miniatura sul suo Pedestal.En el anfiteatro, Examine la estatua del doctor y Use la miniatura en su Pedestal.
- Go through the doctor’s yes-or-no test. Either answer is accepted at each of the six questions; finish them all to return to his open box.Passez le test du docteur, par oui ou par non. Les deux réponses sont acceptées à chacune des six questions ; terminez-les toutes pour revenir à sa boite ouverte.Geh den Ja-oder-Nein-Test des Arztes durch. Beide Antworten werden bei jeder der sechs Fragen akzeptiert; mach alle fertig, um zu seiner offenen Dose zurückzukehren.Affronta il test del dottore a risposta sì o no. Entrambe le risposte sono accettate a ognuna delle sei domande; finiscile tutte per tornare alla sua scatola aperta.Haz la prueba de sí o no del doctor. Se acepta cualquiera de las dos respuestas en cada una de las seis preguntas; termínalas todas para volver a su caja abierta.
- Take the Rope from the doctor’s music box.Prenez la Corde dans la Boite à musique du docteur.Nimm das Rope aus der music box des Arztes.Prendi la Rope dal music box del dottore.Coge la Rope de la music box del doctor.
Saint Arman’s miniature, and the stoneLa miniature de Saint Arman, et la pierreSaint Armans Miniatur und der SteinLa statuetta di Saint Arman e la pietraLa estatuilla de Saint Arman y la piedra
- Combine the rope with the hook to make a Grapnel.Combiner Avec : la corde avec le crochet pour obtenir un Grappin.Combine das Seil mit dem Haken zu einem Grapnel.Combine la corda con il gancio per ottenere un Grapnel.Combine la cuerda con el gancho para hacer un Grapnel.
- From the bridge, follow the route to the Mountain with the high stone table. Use the grapnel on the Table, then Climb up.Depuis le Pont, suivez le chemin jusqu’à la Montagne à la haute table de pierre. Utiliser le grappin sur la Table, puis Grimper.Folge von der bridge dem Weg zum Mountain mit dem hohen Steintisch. Use den Wurfanker am Table, dann Climb hinauf.Dal bridge, segui il percorso fino alla Mountain con l’alto tavolo di pietra. Use il rampino sul Table, poi Climb su.Desde el bridge, sigue la ruta hasta la Mountain con la alta mesa de piedra. Use el garfio con la Table, y luego Climb arriba.
- Take the Oil Lamp from the table close-up.Prenez la Lampe à huile dans le gros plan de la table.Nimm die Oil Lamp aus der Nahaufnahme des Tisches.Prendi la Oil Lamp dal primo piano del tavolo.Coge la Oil Lamp del primer plano de la mesa.
- On the landing beach, inspect the moss-covered dog statue and Use the oil lamp on the Moss. The moss burns away.Sur la Plage du débarcadère, inspectez la statue de chien couverte de mousse et Utiliser la lampe à huile sur la Mousse. La mousse brûle.Untersuche am Landestrand die moosbedeckte Hundestatue und Use die Öllampe am Moss (Moos). Das Moos brennt weg.Sulla spiaggia dell’approdo, esamina la statua del cane coperta di muschio e Use la lampada a olio sul Moss (muschio). Il muschio brucia.En la playa del embarcadero, inspecciona la estatua del perro cubierta de musgo y Use la lámpara de aceite con el Moss (musgo). El musgo se quema.
- Inspect the cleared statue and Search the Hole. Take the St Arman statue.Inspectez la statue dégagée et Fouiller le Trou. Prenez la Statue St Arman.Untersuche die freigelegte Statue und Search das Hole (Loch). Nimm die St Arman statue.Esamina la statua ripulita e Search nell’Hole (buco). Prendi la St Arman statue.Inspecciona la estatua despejada y Search en el Hole (agujero). Coge la St Arman statue.
- In the amphitheatre, Examine Saint Arman’s statue and Use the miniature on its Pedestal.Dans l’amphithéâtre, Examiner la statue de Saint Arman et Utiliser la miniature sur son Socle.Examine im Amphitheater Saint Armans Statue und Use die Miniatur an ihrem Pedestal.Nell’anfiteatro, Examine la statua di Saint Arman e Use la miniatura sul suo Pedestal.En el anfiteatro, Examine la estatua de Saint Arman y Use la miniatura en su Pedestal.
- In the memory of the fire at the EXIT, Talk to Saint Arman, then Take the Painting. This time Louis stays in the scene.Dans le souvenir de l’incendie de l’EXIT, Parler à Saint Arman, puis Prendre le Tableau. Cette fois, Louis reste dans la scène.Talk to in der Erinnerung an das Feuer im EXIT Saint Arman, dann Take das Painting. Diesmal bleibt Louis in der Szene.Nel ricordo dell’incendio all’EXIT, Talk to Saint Arman, poi Take il Painting. Questa volta Louis resta nella scena.En el recuerdo del incendio del EXIT, Talk to Saint Arman, y luego Take el Painting. Esta vez Louis se queda en la escena.
- Use the painting on the Flames. Read on as it burns, and you return to Saint Arman’s open box on the island.Utiliser le tableau sur les Flammes. Lisez la suite pendant qu’il brûle, et vous revenez à la boite ouverte de Saint Arman sur l’île.Use das Gemälde mit den Flames (Flammen). Lies weiter, während es brennt, und du kehrst zur offenen Dose von Saint Arman auf der Insel zurück.Use il quadro sulle Flames (fiamme). Continua a leggere mentre brucia, e torni alla scatola aperta di Saint Arman sull’isola.Use el cuadro con las Flames (llamas). Sigue leyendo mientras arde, y vuelves a la caja abierta de Saint Arman en la isla.
- Take the Stone, the talisman with a piece missing, from Saint Arman’s music box.Prenez la Pierre, le talisman auquel il manque un morceau, dans la Boite à musique de Saint Arman.Nimm den Stone, den Talisman, dem ein Stück fehlt, aus Saint Armans music box.Prendi la Stone, il talismano a cui manca un pezzo, dal music box di Saint Arman.Coge la Stone, el talismán al que le falta un trozo, de la music box de Saint Arman.
Reach Anne, and complete the talismanRejoindre Anne, et compléter le talismanAnne erreichen und den Talisman vollendenRaggiungere Anne e completare il talismanoLlegar hasta Anne y completar el talismán
- Go back to the Astrolab. Inspect the big Belleville statue and Use the stone on the Spot in his hand.Retournez à l’Astrolab. Inspectez la grande statue de Belleville et Utiliser la pierre sur l’Emplacement dans sa main.Geh zurück zum Astrolab. Untersuche die große Statue von Belleville und Use den Stein am Spot in his hand.Torna all’Astrolab. Esamina la grande statua di Belleville e Use la pietra sullo Spot in his hand.Vuelve al Astrolab. Inspecciona la gran estatua de Belleville y Use la piedra en el Spot in his hand.
- Go up to the central Hole. A lift is now waiting below its rim: choose Jump to step into it and go down.Approchez-vous du Trou central. Un ascenseur attend maintenant sous son rebord : choisissez Sauter pour y monter et descendre.Geh zum mittleren Hole. Unter seinem Rand wartet jetzt ein Aufzug: Wähle Jump, um hineinzusteigen und hinunterzufahren.Avvicinati all’Hole centrale. Sotto il suo bordo ora aspetta un ascensore: scegli Jump per salirci e scendere.Acércate al Hole central. Bajo su borde espera ahora un ascensor: elige Jump para subir y bajar.
- Follow the gallery to the Lava lake, then Climb towards the figures on the ridge.Suivez la Galerie jusqu’au Lac de lave, puis Grimper vers les silhouettes sur le promontoire.Folge der gallery (Galerie) zum Lava lake, dann Climb zu den Gestalten auf dem Grat.Segui la gallery (galleria) fino al Lava lake, poi Climb verso le figure sul crinale.Sigue la gallery (galería) hasta el Lava lake, y luego Climb hacia las figuras de la cresta.
- Talk to Mr Belleville and go through his replies, especially the last one about how absurd it all is. Go back to the ridge.Parler à M. Belleville et passez ses répliques, surtout la dernière sur l’absurdité de tout cela. Retournez au promontoire.Talk to Mr Belleville und geh seine Antworten durch, besonders die letzte darüber, wie absurd das alles ist. Geh zurück zum Grat.Talk to Mr Belleville e passa in rassegna le sue risposte, soprattutto l’ultima su quanto sia tutto assurdo. Torna al crinale.Talk to Mr Belleville y repasa sus respuestas, sobre todo la última sobre lo absurdo que es todo. Vuelve a la cresta.
- Talk to Anne Everett and hear her out about proving she didn’t betray you. Once you’ve had both conversations, the confrontation moves on.Parler à Anne Everett et écoutez-la parler de prouver qu’elle ne vous a pas trahi. Une fois les deux conversations faites, la confrontation avance.Talk to Anne Everett und hör sie an, wie sie beweisen soll, dass sie dich nicht verraten hat. Sobald du beide Gespräche geführt hast, geht die Konfrontation weiter.Talk to Anne Everett e ascoltala sul dimostrare che non ti ha tradito. Una volta fatte entrambe le conversazioni, il confronto va avanti.Talk to Anne Everett y escúchala sobre demostrar que no te ha traicionado. Una vez hechas las dos conversaciones, el enfrentamiento avanza.
- Read through the struggle and the shot. Talk to the wounded Anne, choose the reply offering to carry her to help, and promise to finish what she started.Lisez la lutte et le coup de feu. Parlez à Anne blessée, choisissez la réponse qui propose de la porter pour trouver de l’aide, et promettez de finir ce qu’elle a commencé.Lies den Kampf und den Schuss. Rede mit der verwundeten Anne, wähle die Antwort, in der du anbietest, sie zu Hilfe zu tragen, und versprich, zu Ende zu bringen, was sie begonnen hat.Leggi la colluttazione e lo sparo. Parla con Anne ferita, scegli la risposta che offre di portarla a cercare aiuto, e prometti di finire ciò che ha cominciato.Lee el forcejeo y el disparo. Habla con Anne herida, elige la respuesta que ofrece llevarla a buscar ayuda, y promete terminar lo que ella empezó.
- After her last words, Inspect Anne, then Take the Pendant from her hand in the close-up.Après ses dernières paroles, Inspecter Anne, puis Prendre le Pendentif dans sa main dans le gros plan.Inspect nach ihren letzten Worten Anne, dann Take in der Nahaufnahme den Pendant aus ihrer Hand.Dopo le sue ultime parole, Inspect Anne, poi Take il Pendant dalla sua mano nel primo piano.Tras sus últimas palabras, Inspect a Anne, y luego Take el Pendant de su mano en el primer plano.
- Go back through the gallery and the lift to the Astrolab.Repassez par la galerie et l’ascenseur jusqu’à l’Astrolab.Geh durch die Galerie und den Aufzug zurück zum Astrolab.Torna indietro per la galleria e l’ascensore fino all’Astrolab.Vuelve por la galería y el ascensor hasta el Astrolab.
- Inspect Belleville’s statue again and Use the pendant on the Stone already in his hand.Inspectez de nouveau la statue de Belleville et Utiliser le pendentif sur la Pierre déjà dans sa main.Untersuche noch einmal die Statue von Belleville und Use den Anhänger am Stone, der schon in ihrer Hand liegt.Esamina di nuovo la statua di Belleville e Use il ciondolo sulla Stone già nella sua mano.Inspecciona otra vez la estatua de Belleville y Use el colgante con la Stone que ya tiene en la mano.
- Read through the lightning and the memories until Louis wakes up beside the tubes.Lisez l’éclair et les souvenirs jusqu’à ce que Louis se réveille à côté des caissons.Lies den Blitz und die Erinnerungen, bis Louis neben den Röhren aufwacht.Leggi il lampo e i ricordi finché Louis non si sveglia accanto alle capsule.Lee el rayo y los recuerdos hasta que Louis despierte junto a los tubos.
Reach the endingAtteindre la finDas Ende erreichenRaggiungere il finaleLlegar al final
- In the tube room of the Damocles, Inspect the Screen by the door. It opens the controls close-up and counts as one discovery. Try Manipulate if you want its description; it isn’t a puzzle you need.Dans la salle des caissons du Damoclès, Inspecter l’Ecran près de la porte. Cela ouvre le gros plan des commandes et compte comme une découverte. Essayez Manipuler si vous voulez sa description ; ce n’est pas une énigme nécessaire.Inspect im Röhrenraum der Damokles den Screen bei der Tür. Das öffnet die Nahaufnahme der Steuerung und zählt als eine Entdeckung. Probier Manipulate, wenn du seine Beschreibung willst; ein nötiges Rätsel ist es nicht.Nella sala delle capsule della Damocle, Inspect lo Screen vicino alla porta. Apre il primo piano dei comandi e conta come una scoperta. Prova Manipulate se vuoi la sua descrizione; non è un enigma necessario.En la sala de los tubos de la Damocles, Inspect el Screen junto a la puerta. Abre el primer plano de los controles y cuenta como un descubrimiento. Prueba Manipulate si quieres su descripción; no es un puzle necesario.
- Back in the room, Inspect the other Screen, the one with the landscape. That’s the second discovery.De retour dans la salle, Inspecter l’autre Ecran, celui avec le paysage. C’est la deuxième découverte.Inspect zurück im Raum den anderen Screen, den mit der Landschaft. Das ist die zweite Entdeckung.Tornato nella sala, Inspect l’altro Screen, quello con il paesaggio. È la seconda scoperta.De vuelta en la sala, Inspect el otro Screen, el del paisaje. Es el segundo descubrimiento.
- Go to Anne’s tube, then Inspect Anne. That’s the third. Go back to the main room if the rescue doesn’t start straight away.S’approcher de le caisson d’Anne, puis Inspecter Anne. C’est la troisième. Retournez dans la salle principale si le sauvetage ne commence pas tout de suite.Go to Annes Röhre, dann Inspect Anne. Das ist die dritte. Geh zurück in den Hauptraum, wenn die Rettung nicht sofort beginnt.Go to la capsula di Anne, poi Inspect Anne. È la terza. Torna nella sala principale se il salvataggio non comincia subito.Go to el tubo de Anne, y luego Inspect a Anne. Es el tercero. Vuelve a la sala principal si el rescate no empieza enseguida.
- After those three, the door opens and the rescue begins.Après ces trois-là, la porte s’ouvre et le sauvetage commence.Nach diesen dreien öffnet sich die Tür, und die Rettung beginnt.Dopo questi tre, la porta si apre e inizia il salvataggio.Tras esas tres, la puerta se abre y empieza el rescate.
- Keep pressing the down arrow through the doctors’ explanation and the last conversation. These are story scenes, not another escape.Continuez à appuyer sur la flèche du bas pendant l’explication des médecins et la dernière conversation. Ce sont des scènes de l’histoire, pas une nouvelle évasion.Drück weiter den Pfeil nach unten durch die Erklärung der Ärzte und das letzte Gespräch. Das sind Szenen der Geschichte, keine weitere Flucht.Continua a premere la freccia giù durante la spiegazione dei medici e l’ultima conversazione. Sono scene della storia, non un’altra fuga.Sigue pulsando la flecha abajo durante la explicación de los médicos y la última conversación. Son escenas de la historia, no otra huida.
- After Louis’ final I HAVE TO WAKE UP!!!, the ending and the credits play. You have finished Fade.Après le dernier JE DOIS ME REVEILLER!!! de Louis, la fin et le générique défilent. Vous avez terminé Fade.Nach Louis’ letztem I HAVE TO WAKE UP!!! laufen das Ende und der Abspann. Du hast Fade durchgespielt.Dopo l’ultimo I HAVE TO WAKE UP!!! di Louis, partono il finale e i titoli di coda. Hai finito Fade.Tras el último I HAVE TO WAKE UP!!! de Louis, llegan el final y los créditos. Has terminado Fade.
If you’re stuckSi vous êtes bloquéWenn du feststeckstSe sei bloccatoSi te atascas
- The opening text won’t move onLe texte d’introduction n’avance pasDer Einleitungstext geht nicht weiterIl testo iniziale non va avantiEl texto inicial no avanza
- Press the down arrow beside the text.Appuyez sur la flèche vers le bas à côté du texte.Drück den Pfeil nach unten neben dem Text.Premi la freccia in giù accanto al testo.Pulsa la flecha hacia abajo junto al texto.
- A dialogue reply seems to be missingUne réponse de dialogue semble manquerEine Dialogantwort scheint zu fehlenSembra mancare una risposta nel dialogoParece que falta una respuesta del diálogo
- Scroll down through the rest of the choices.Faites défiler le reste des choix.Scrolle durch die übrigen Antworten nach unten.Scorri il resto delle scelte.Desplázate por el resto de opciones.
- The bedroom safe stays lockedLe coffre de la chambre reste ferméDer Safe im Schlafzimmer bleibt zuLa cassaforte della camera resta chiusaLa caja fuerte del dormitorio sigue cerrada
- Examine the diary, use it on the bathroom mirror, and take the key from the corridor plant.Examinez le journal, utilisez-le sur le miroir de la salle de bains, et prenez la clé dans la plante du couloir.Untersuche das Tagebuch, benutze es am Badezimmerspiegel und nimm den Schlüssel von der Pflanze im Flur.Esamina il diario, usalo sullo specchio del bagno, e prendi la chiave dalla pianta del corridoio.Examina el diario, úsalo con el espejo del baño, y coge la llave de la planta del pasillo.
- The car won’t startLa voiture ne démarre pasDas Auto springt nicht anL’auto non parteEl coche no arranca
- Open the envelope and combine the incomplete file with the antique picture.Ouvrez l’enveloppe et combinez le dossier incomplet avec la photo antiquité.Öffne den Umschlag und kombiniere die unvollständige Akte mit dem antiken Bild.Apri la busta e combina il fascicolo incompleto con la foto d’antiquariato.Abre el sobre y combina el expediente incompleto con la foto antigua.
- You can’t find the wallet at the hotelVous ne trouvez pas le portefeuille à l’hôtelDu findest die Brieftasche im Hotel nichtNon trovi il portafoglio in albergoNo encuentras la cartera en el hotel
- Try ordering at the café first, then search the hotel bed.Essayez d’abord de commander au café, puis fouillez le lit de l’hôtel.Versuche zuerst, im Café zu bestellen, und durchsuche dann das Hotelbett.Prova prima a ordinare al caffè, poi fruga nel letto dell’albergo.Intenta pedir primero en el café y luego registra la cama del hotel.
- You can’t get into Jean’s houseVous n’arrivez pas à entrer chez JeanDu kommst nicht in Jeans HausNon riesci a entrare in casa di JeanNo consigues entrar en casa de Jean
- Choose Think on the fuse at your cellar’s breaker, then inspect his flower pot for the key.Choisissez Réfléchir sur le fusible au disjoncteur de votre cave, puis inspectez son pot à fleurs pour la clé.Wähle Think an der Sicherung im Sicherungskasten deines Kellers, dann untersuche seinen Blumentopf nach dem Schlüssel.Scegli Think sul fusibile all’interruttore della tua cantina, poi esamina il suo vaso di fiori per la chiave.Elige Think en el fusible del cuadro de tu sótano, y luego inspecciona su maceta en busca de la llave.
- The bartender won’t let you take a bulbLe barman ne vous laisse pas prendre d’ampouleDer Barkeeper lässt dich keine Glühbirne nehmenIl barista non ti lascia prendere una lampadinaEl camarero no te deja coger una bombilla
- Use the Trankill 2000 on his beer first.Utilisez d’abord le Trankill 2000 sur sa bière.Benutze zuerst das Trankill 2000 an seinem Bier.Prima usa il Trankill 2000 sulla sua birra.Usa primero el Trankill 2000 en su cerveza.
- The police say evidence is missingLa police dit qu’il manque des preuvesDie Polizei sagt, es fehlen BeweiseLa polizia dice che mancano proveLa policía dice que faltan pruebas
- Develop both films, keep all five photographs, and record the hall phone. Open the camera only after taking both graffiti pictures.Développez les deux pellicules, gardez les cinq photos, et enregistrez le téléphone de l’entrée. N’ouvrez l’appareil qu’après avoir pris les deux photos des graffitis.Entwickle beide Filme, behalte alle fünf Fotos und nimm das Telefon im Flur auf. Öffne die Kamera erst, wenn beide Graffiti-Bilder gemacht sind.Sviluppa entrambi i rullini, tieni tutte e cinque le foto, e registra il telefono dell’ingresso. Apri la macchina solo dopo aver scattato entrambe le foto dei graffiti.Revela los dos carretes, quédate las cinco fotos, y graba el teléfono del recibidor. Abre la cámara solo después de hacer las dos fotos de las pintadas.
- The doctor never lets you goLe docteur ne vous laisse jamais partirDer Doktor lässt dich nie gehenIl dottore non ti lascia mai andareEl doctor nunca te deja marchar
- Take both tests. Failing them moves the story on.Passez les deux tests. Les rater fait avancer l’histoire.Mach beide Tests. Sie nicht zu bestehen, bringt die Geschichte voran.Fai entrambi i test. Fallirli manda avanti la storia.Haz las dos pruebas. Suspenderlas hace avanzar la historia.
- The asylum’s upstairs rooms stay shutLes pièces de l’étage de l’asile restent ferméesDie Räume im Obergeschoss der Anstalt bleiben zuLe stanze al piano di sopra del manicomio restano chiuseLas salas de arriba del manicomio siguen cerradas
- Finish the second test, sleep, and go to the next scene in the refectory.Terminez le second test, dormez, et allez à la scène suivante au réfectoire.Mach den zweiten Test fertig, schlaf und geh zur nächsten Szene im Speisesaal.Finisci il secondo test, dormi, e vai alla scena successiva nel refettorio.Termina la segunda prueba, duerme, y ve a la siguiente escena en el comedor.
- You can’t get the doctor out of the morgueVous n’arrivez pas à faire sortir le docteur de la morgueDu bekommst den Doktor nicht aus der LeichenhalleNon riesci a far uscire il dottore dall’obitorioNo consigues sacar al doctor de la morgue
- Ask Parx about escaping, carry the insults between Cell 1 and Cell 4, tell Zampano about the fight, then tell the doctor.Interrogez Parx sur l’évasion, portez les insultes entre la Cellule 1 et la Cellule 4, parlez de la bagarre à Zampano, puis au docteur.Frag Parx nach der Flucht, trag die Beleidigungen zwischen Cell 1 und Cell 4 hin und her, erzähl Zampano von der Schlägerei, dann dem Arzt.Chiedi a Parx della fuga, porta gli insulti tra la Cell 1 e la Cell 4, racconta della rissa a Zampano, poi al dottore.Pregunta a Parx por la fuga, lleva los insultos entre la Cell 1 y la Cell 4, cuéntale la pelea a Zampano, y luego al doctor.
- Zampano won’t leave the staff toiletsZampano ne veut pas quitter les toilettes du personnelZampano verlässt die Personaltoilette nichtZampano non esce dai bagni del personaleZampano no sale de los aseos del personal
- Use the broom to reach the attic, then tell Gelsomina all about the silent man.Utilisez le balai pour atteindre le grenier, puis racontez tout sur l’homme silencieux à Gelsomina.Benutze den Besen, um auf den Dachboden zu kommen, dann erzähl Gelsomina alles über den schweigenden Mann.Usa la scopa per raggiungere la soffitta, poi racconta tutto dell’uomo silenzioso a Gelsomina.Usa la escoba para llegar al desván, y luego cuéntale a Gelsomina todo sobre el hombre silencioso.
- The shed won’t burnLa cabane ne veut pas brûlerDer Schuppen brennt nichtIl capanno non bruciaEl cobertizo no arde
- Photograph it, combine the photo with the clothespins, and put it over the gate camera.Photographiez-la, combinez la photo avec les pinces à linge, et placez-la devant la caméra de la grille.Fotografiere ihn, kombiniere das Foto mit den Wäscheklammern und häng es vor die Kamera am Tor.Fotografalo, combina la foto con le mollette, e mettila davanti alla telecamera del cancello.Hazle una foto, combina la foto con las pinzas, y ponla delante de la cámara de la verja.
- You can’t read the late clues at the asylumVous n’arrivez pas à lire les derniers indices à l’asileDu kannst die späten Hinweise in der Anstalt nicht lesenNon riesci a leggere gli ultimi indizi al manicomioNo puedes leer las últimas pistas del manicomio
- Turn off the tape recorder at the empty reception.Éteignez le dictaphone à la réception vide.Schalte das Diktiergerät am leeren Empfang aus.Spegni il registratore alla reception vuota.Apaga la grabadora en la recepción vacía.
- The small key vanished after the padded cellLa petite clé a disparu après la cellule capitonnéeDer kleine Schlüssel ist nach der Gummizelle verschwundenLa chiavetta è sparita dopo la cella imbottitaLa llavecita desapareció tras la celda acolchada
- Inspect the bed in your old cell.Inspectez le lit de votre ancienne cellule.Untersuche das Bett in deiner alten Zelle.Ispeziona il letto della tua vecchia cella.Inspecciona la cama de tu antigua celda.
- The zodiac door won’t openLa porte du zodiaque ne s’ouvre pasDie Tierkreistür geht nicht aufLa porta dello zodiaco non si apreLa puerta del zodiaco no se abre
- Clear the failed attempt with the centre button, then push Gemini, Cancer, Lion, Libra and the centre.Effacez la tentative ratée avec le bouton central, puis appuyez sur Gémeaux, Cancer, Lion, Balance et le centre.Lösche den Fehlversuch mit dem mittleren Knopf, dann drück Gemini, Cancer, Lion, Libra und die Mitte.Cancella il tentativo fallito con il pulsante centrale, poi premi Gemini, Cancer, Lion, Libra e il centro.Borra el intento fallido con el botón central, y luego pulsa Gemini, Cancer, Lion, Libra y el centro.
- You can’t leave your mother’s apartmentVous ne pouvez pas quitter l’appartement de votre mèreDu kommst nicht aus der Wohnung deiner MutterNon riesci a lasciare l’appartamento di tua madreNo puedes salir del piso de tu madre
- Get the Key A.S. and the Trankill 6000, read notebook page 2, and call Montfort.Prenez la Clef A.S. et le Tranquill 6000, lisez la page 2 de l’agenda, et appelez Montfort.Hol dir den Key A.S. und das Trankill 6000, lies Seite 2 des Notizbuchs und ruf Montfort an.Prendi la Key A.S. e il Trankill 6000, leggi la pagina 2 del taccuino, e chiama Montfort.Consigue la Key A.S. y el Trankill 6000, lee la página 2 del cuaderno, y llama a Montfort.
- The doctor at Gisèle’s won’t let you inLe docteur chez Gisèle ne vous laisse pas entrerDer Doktor bei Gisèle lässt dich nicht hineinIl dottore da Gisèle non ti fa entrareEl doctor de casa de Gisèle no te deja entrar
- Ring Gradoux twice and Josephine twice, then try Doctor Ali Kafour again.Sonnez deux fois chez les Epoux Gradoux et deux fois chez Joséphine, puis réessayez le Docteur Ali Kafour.Klingle zweimal bei Gradoux und zweimal bei Josephine, dann versuch es noch einmal bei Doctor Ali Kafour.Suona due volte a Gradoux e due volte a Josephine, poi riprova con Doctor Ali Kafour.Llama dos veces a Gradoux y dos a Josephine, y luego vuelve a probar con Doctor Ali Kafour.
- You can’t change back out of the club clothesVous ne pouvez pas quitter la tenue du clubDu kannst die Clubkleidung nicht wieder ausziehenNon riesci a toglierti i vestiti del clubNo puedes quitarte la ropa del club
- See the note at the end of “Christine, and the way out”.Voir la note à la fin de « Christine, et la sortie ».Siehe die Anmerkung am Ende von „Christine und der Ausweg“.Vedi la nota alla fine di «Christine e l’uscita».Mira la nota al final de «Christine y la salida».
- You can’t leave Saint Arman’s secret passageVous ne pouvez pas quitter le passage secret de Saint ArmanDu kommst nicht aus Saint Armans GeheimgangNon riesci a uscire dal passaggio segreto di Saint ArmanNo puedes salir del pasadizo secreto de Saint Arman
- Read the desk notebook and inspect each of the four desk photographs.Lisez l’agenda du bureau et inspectez chacune des quatre photos du bureau.Lies das Notizbuch auf dem Schreibtisch und untersuche jedes der vier Fotos dort.Leggi il taccuino della scrivania ed esamina ognuna delle quattro foto sulla scrivania.Lee el cuaderno del escritorio e inspecciona cada una de las cuatro fotos del escritorio.
- You can’t leave Belleville’s houseVous ne pouvez pas quitter la maison de BellevilleDu kommst nicht aus Bellevilles HausNon riesci a lasciare la casa di BellevilleNo puedes salir de la casa de Belleville
- Search the shoes for the bank paper, take the notes from the trunk, and take the note from the glove compartment.Fouillez les chaussures pour le papier de la banque, prenez les notes dans le coffre, et prenez la note dans la boite à gants.Durchsuche die Schuhe nach dem Bankpapier, nimm die Notizen aus dem Kofferraum und den Zettel aus dem Handschuhfach.Fruga nelle scarpe per la carta della banca, prendi gli appunti dal bagagliaio, e prendi il biglietto dal cruscotto.Registra los zapatos en busca del papel del banco, coge las notas del maletero, y coge la nota de la guantera.
- The ritual says something is missingLe rituel dit qu’il manque quelque choseDas Ritual sagt, es fehlt etwasIl rituale dice che manca qualcosaEl ritual dice que falta algo
- Put the painting from Saint Arman’s altar in its place, load the incense, then light the brazier.Mettez le tableau de l’autel de Saint Arman à sa place, chargez l’encens, puis allumez le brasero.Häng das Gemälde vom Altar Saint Armans an seinen Platz, leg den Weihrauch ein und zünde dann das Kohlebecken an.Metti al suo posto il quadro dell’altare di Saint Arman, carica l’incenso, poi accendi il braciere.Pon en su sitio el cuadro del altar de Saint Arman, carga el incienso, y luego enciende el brasero.
- The temple disk buttons do nothingLes boutons des disques du temple ne font rienDie Knöpfe der Tempelscheiben tun nichtsI pulsanti dei dischi del tempio non fanno nienteLos botones de los discos del templo no hacen nada
- Put Christine’s Babylon battery in the device in the villa.Mettez la pile de Babylone de Christine dans le mécanisme de la villa.Setze Christines Batterie von Babylon in die Vorrichtung in der Villa.Metti la pila di Babilonia di Christine nel congegno della villa.Pon la pila de Bagdad de Christine en el mecanismo de la villa.
- The female sarcophagus stays shutLe sarcophage féminin reste ferméDer weibliche Sarkophag bleibt zuIl sarcofago femminile resta chiusoEl sarcófago femenino sigue cerrado
- Reset any wrong disks. Submit only Isis’s left symbol and Mnemosis’s upper-right symbol, once each.Remettez à zéro les disques erronés. Validez seulement le symbole de gauche d’Isis et celui en haut à droite de Mnemosis, une fois chacun.Setz falsche Scheiben zurück. Schick nur das linke Symbol von Isis und das obere rechte von Mnemosis ab, jedes einmal.Azzera i dischi sbagliati. Invia solo il simbolo di sinistra di Isis e quello in alto a destra di Mnemosis, una volta ciascuno.Reinicia los discos equivocados. Envía solo el símbolo izquierdo de Isis y el de arriba a la derecha de Mnemosis, una vez cada uno.
- The male sarcophagus stays shutLe sarcophage masculin reste ferméDer männliche Sarkophag bleibt zuIl sarcofago maschile resta chiusoEl sarcófago masculino sigue cerrado
- Use Jean’s dagger on it; the disks open the other sarcophagus.Utilisez dessus la dague de Jean ; les disques ouvrent l’autre sarcophage.Benutze Jeans Dolch daran; die Scheiben öffnen den anderen Sarkophag.Usa il pugnale di Jean su di esso; i dischi aprono l’altro sarcofago.Usa la daga de Jean con él; los discos abren el otro sarcófago.
- The tube room seems deadLa salle des tubes semble éteinteDer Röhrenraum scheint totLa sala dei tubi sembra spentaLa sala de los tubos parece muerta
- Inspect both screens, then go to Anne’s tube and inspect her.Inspectez les deux écrans, puis approchez-vous du caisson d’Anne et inspectez-la.Untersuche beide Bildschirme, dann geh zu Annes Röhre und untersuche sie.Esamina entrambi gli schermi, poi vai alla capsula di Anne ed esaminala.Inspecciona las dos pantallas, y luego ve al tubo de Anne e inspecciónala.