

This walkthrough follows Episode 03 from John’s toilet to the end of the episode. It was worked out from the game’s own data files: what every action needs before it works and what it changes, so each step says what it opens up.Cette solution suit l’épisode 03 des toilettes de John jusqu’à la fin de l’épisode. Elle a été établie à partir des fichiers de données du jeu : ce dont chaque action a besoin pour fonctionner et ce qu’elle change, chaque étape dit donc ce qu’elle débloque.Diese Komplettlösung begleitet Episode 03 von Johns Toilette bis zum Ende der Episode. Sie wurde aus den Datendateien des Spiels erarbeitet: was jede Aktion braucht, bevor sie funktioniert, und was sie verändert, sodass jeder Schritt sagt, was er freischaltet.Questa soluzione segue l’episodio 03 dal bagno di John alla fine dell’episodio. È stata ricavata dai file di dati del gioco: cosa serve a ogni azione per funzionare e cosa cambia, quindi ogni passo dice cosa sblocca.Esta guía sigue el episodio 03 desde el baño de John hasta el final del episodio. Se ha elaborado a partir de los archivos de datos del propio juego: lo que necesita cada acción para funcionar y lo que cambia, así que cada paso dice qué desbloquea.
Episode 03 is the most open of the three. It has two halves: first you question ten people about Anna until you know enough to go to the police; then, when they laugh you out, you gather six pieces of evidence to make them listen. Within each half you can do things in almost any order. The objectives list in the game’s menu keeps count, and the order below is one that never sends you anywhere twice for nothing.L’épisode 03 est le plus ouvert des trois. Il a deux moitiés : d’abord vous interrogez dix personnes sur Anna jusqu’à en savoir assez pour aller à la police ; puis, quand on vous rit au nez, vous rassemblez six preuves pour vous faire entendre. Dans chaque moitié, vous pouvez faire les choses presque dans n’importe quel ordre. La liste des objectifs du menu du jeu tient le compte, et l’ordre ci-dessous ne vous envoie jamais deux fois au même endroit pour rien.Episode 03 ist die offenste der drei. Sie hat zwei Hälften: Zuerst befragst du zehn Leute zu Anna, bis du genug weißt, um zur Polizei zu gehen; dann, wenn sie dich auslachen, sammelst du sechs Beweise, damit sie zuhören. Innerhalb jeder Hälfte kannst du fast alles in beliebiger Reihenfolge tun. Die Zielliste im Menü des Spiels zählt mit, und die Reihenfolge unten schickt dich nie zweimal umsonst irgendwohin.L’episodio 03 è il più aperto dei tre. Ha due metà: prima interroghi dieci persone su Anna finché non ne sai abbastanza per andare alla polizia; poi, quando ti ridono in faccia, raccogli sei prove per farti ascoltare. In ogni metà puoi fare le cose in quasi qualsiasi ordine. La lista degli obiettivi nel menu del gioco tiene il conto, e l’ordine qui sotto non ti manda mai due volte da qualche parte per niente.El episodio 03 es el más abierto de los tres. Tiene dos mitades: primero interrogas a diez personas sobre Anna hasta saber lo bastante para ir a la policía; luego, cuando se ríen de ti, reúnes seis pruebas para que te escuchen. Dentro de cada mitad puedes hacer las cosas casi en cualquier orden. La lista de objetivos del menú del juego lleva la cuenta, y el orden de abajo nunca te manda dos veces a ningún sitio para nada.
Video guideGuide vidéoVideo-AnleitungGuida videoGuía en vídeo
If you’d rather watch, this playthrough covers the whole episode, from the intro to the ending, in seven parts.Si vous préférez regarder, cette partie filmée couvre tout l’épisode, de l’intro à la fin, en sept parties.Wenn du lieber zuschaust: Dieser Durchlauf zeigt die ganze Episode, vom Intro bis zum Ende, in sieben Teilen.Se preferisci guardare, questa partita copre tutto l’episodio, dall’introduzione al finale, in sette parti.Si prefieres verlo, esta partida cubre el episodio entero, de la intro al final, en siete partes.
How to playComment jouerSo wird gespieltCome si giocaCómo se juega
- Hold a finger on the scene for the magnifying glass; move it over something to see its name, and let go to see what you can do with it.Gardez un doigt sur la scène pour la loupe ; déplacez-la sur quelque chose pour voir son nom, et relâchez pour voir ce que vous pouvez en faire.Halte einen Finger auf die Szene für die Lupe; bewege sie über etwas, um seinen Namen zu sehen, und lass los, um zu sehen, was du damit tun kannst.Tieni un dito sulla scena per la lente d’ingrandimento; spostala su qualcosa per vederne il nome, e lascia per vedere cosa puoi farci.Mantén un dedo sobre la escena para la lupa; muévela sobre algo para ver su nombre, y suelta para ver qué puedes hacer con ello.
- Pinch to zoom and drag to look around. Pull down the tab at the top for the inventory, where tapping an item shows it in 3D, and for the objectives, which list what Louis still has to do.Pincez pour zoomer et faites glisser pour regarder autour. Tirez l’onglet du haut pour l’inventaire, où toucher un objet le montre en 3D, et pour les objectifs, qui listent ce que Louis doit encore faire.Zoome mit zwei Fingern und zieh, um dich umzusehen. Zieh den Reiter oben herunter für das Inventar, wo ein angetippter Gegenstand in 3D erscheint, und für die Ziele, die auflisten, was Louis noch tun muss.Pizzica per zoomare e trascina per guardarti intorno. Tira giù la linguetta in alto per l’inventario, dove toccare un oggetto lo mostra in 3D, e per gli obiettivi, che elencano cosa deve ancora fare Louis.Pellizca para hacer zoom y arrastra para mirar alrededor. Baja la pestaña de arriba para el inventario, donde al tocar un objeto se ve en 3D, y para los objetivos, que enumeran lo que Louis aún tiene que hacer.
- Drag an item onto something in the scene to use it there, or onto another item to combine them.Faites glisser un objet sur quelque chose dans la scène pour l’y utiliser, ou sur un autre objet pour les combiner.Zieh einen Gegenstand auf etwas in der Szene, um ihn dort zu benutzen, oder auf einen anderen Gegenstand, um sie zu kombinieren.Trascina un oggetto su qualcosa nella scena per usarlo lì, o su un altro oggetto per combinarli.Arrastra un objeto sobre algo de la escena para usarlo allí, o sobre otro objeto para combinarlos.
- Tap the green words in a conversation to add topics. Some puzzles need you to type on the dialog keyboard.Touchez les mots en vert d’une conversation pour ajouter des sujets. Certaines énigmes demandent de taper sur le clavier du dialogue.Tippe in einem Gespräch die grünen Wörter an, um Themen hinzuzufügen. Manche Rätsel verlangen, dass du auf der Tastatur des Dialogs tippst.Tocca le parole verdi di una conversazione per aggiungere argomenti. Alcuni enigmi richiedono di digitare sulla tastiera del dialogo.Toca las palabras verdes de una conversación para añadir temas. Algunos puzles piden escribir en el teclado del diálogo.
- In the dark, a match or the lamp lights a circle you can drag around. Things only work inside the light, and a match goes out after ten seconds.Dans le noir, une allumette ou la lampe éclaire un cercle que vous pouvez déplacer. Les choses ne fonctionnent que dans la lumière, et une allumette s’éteint au bout de dix secondes.Im Dunkeln leuchtet ein Streichholz oder die Lampe einen Kreis aus, den du herumziehen kannst. Dinge funktionieren nur im Licht, und ein Streichholz geht nach zehn Sekunden aus.Al buio, un fiammifero o la lampada illumina un cerchio che puoi spostare. Le cose funzionano solo dentro la luce, e un fiammifero si spegne dopo dieci secondi.A oscuras, una cerilla o la lámpara ilumina un círculo que puedes arrastrar. Las cosas solo funcionan dentro de la luz, y una cerilla se apaga a los diez segundos.
- Several close-ups are played by hand: dials, a lock pick, a torn photo to piece together, nails to rock out with a hammer.Plusieurs gros plans se jouent à la main : des molettes, un crochet de serrurier, une photo déchirée à reconstituer, des clous à déloger au marteau.Mehrere Nahaufnahmen spielt man von Hand: Drehräder, ein Dietrich, ein zerrissenes Foto zum Zusammensetzen, Nägel, die man mit einem Hammer herauswackelt.Diversi primi piani si giocano a mano: manopole, un grimaldello, una foto strappata da ricomporre, chiodi da scalzare con un martello.Varios primeros planos se juegan a mano: diales, una ganzúa, una foto rota que recomponer, clavos que sacar con un martillo.
Back in JalonsvilleRetour à JalonsvilleZurück in JalonsvilleDi nuovo a JalonsvilleDe vuelta en Jalonsville
John’s houseLa maison de JohnJohns HausLa casa di JohnLa casa de John
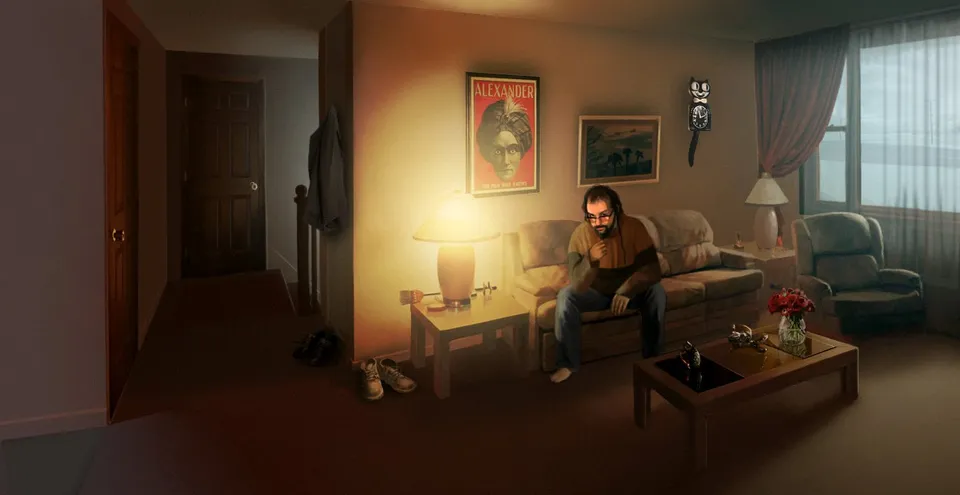
- Louis comes to in the toilet of John’s house, with John talking to him through the door. Consider the door, then Open it.Louis reprend connaissance dans les toilettes de la maison de John, avec John qui lui parle à travers la porte. Réfléchir sur la Porte, puis Ouvrir.Louis kommt in der Toilette von Johns Haus zu sich, während John durch die Tür mit ihm redet. Überlegen an der Tür, dann Öffnen.Louis rinviene nel bagno di casa di John, con John che gli parla attraverso la porta. Rifletti sulla Porta, poi Apri.Louis vuelve en sí en el baño de la casa de John, con John hablándole a través de la puerta. Reflexionar en la Puerta, y luego Abrir.
- In the lounge, Speak to John. Ask him all eight questions, tapping colleague to add the eighth. Louis has been back from New York for six months, and it’s the middle of winter. When you’re done, Louis goes to check on Anna.Dans le salon, Parler à John. Posez-lui les huit questions, en touchant collègue pour ajouter la huitième. Louis est rentré de New York depuis six mois, et on est en plein hiver. Quand c’est fait, Louis va voir comment va Anna.Sprechen im Wohnzimmer mit John. Stell ihm alle acht Fragen; tippe Kollege an, um die achte hinzuzufügen. Louis ist seit sechs Monaten aus New York zurück, und es ist mitten im Winter. Danach geht Louis nach Anna sehen.In salotto, Parla con John. Fagli tutte e otto le domande, toccando collega per aggiungere l’ottava. Louis è tornato da New York da sei mesi, ed è pieno inverno. Quando hai finito, Louis va a vedere come sta Anna.En el salón, Hablar con John. Hazle las ocho preguntas, tocando universidad (colleague) para añadir la octava. Louis lleva seis meses de vuelta de Nueva York, y es pleno invierno. Cuando acabes, Louis va a ver cómo está Anna.
HomeAccueilStartseiteInicio
- Leave by the front door and follow the path through Pineview Alley to the garden of your house.Sortez par la porte d’entrée et suivez le chemin par Pineview Alley jusqu’au jardin de votre maison.Geh durch die Haustür hinaus und folge dem Weg über die Pineview Alley zum Garten deines Hauses.Esci dalla porta d’ingresso e segui il sentiero per Pineview Alley fino al giardino di casa tua.Sal por la puerta principal y sigue el camino por Pineview Alley hasta el jardín de tu casa.
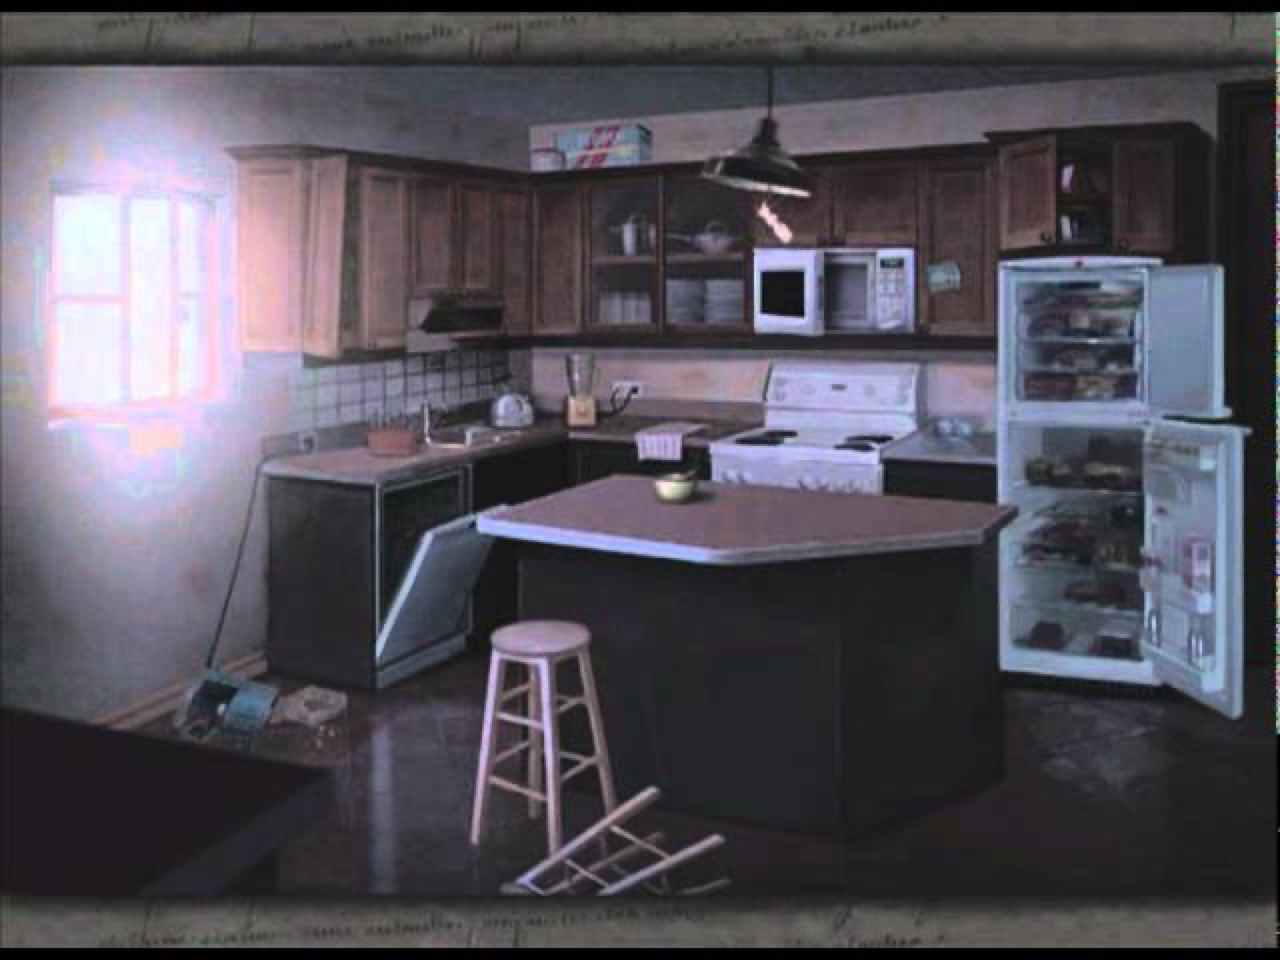
- The house has been broken into and covered in graffiti. In the Toilet off the hall, take the matches.La maison a été cambriolée et couverte de graffitis. Dans les Toilettes de l’entrée, prenez les allumettes.Ins Haus wurde eingebrochen, und es ist voller Graffiti. Nimm in der Toilette neben dem Flur die Streichhölzer.La casa è stata svaligiata e coperta di graffiti. Nel Bagno accanto all’ingresso, prendi i fiammiferi.Han entrado en la casa y la han llenado de pintadas. En el Baño junto a la entrada, coge las cerillas.
- Go through the Kitchen and the Lounge to the Corridor, and into the Bedroom. It’s wrecked, the alarm clock is playing a dreadful noise, and Anna is gone.Passez par la Cuisine et le Salon jusqu’au Couloir, et entrez dans la Chambre. Elle est saccagée, le réveil joue un bruit affreux, et Anna a disparu.Geh durch die Küche und das Wohnzimmer in den Gang und ins Schlafzimmer. Es ist verwüstet, der Wecker gibt ein grässliches Geräusch von sich, und Anna ist weg.Passa per la Cucina e il Salotto fino al Corridoio, ed entra in Letto (la camera). È devastata, la sveglia emette un rumore terribile, e Anna non c’è più.Pasa por la Cocina y el salón hasta el pasillo, y entra en el Dormitorio. Está destrozado, el despertador suena con un ruido espantoso, y Anna no está.
- Take your favourite hanger from the bedroom.Prenez votre cintre préféré dans la chambre.Nimm deinen Lieblings-Kleiderbügel aus dem Schlafzimmer.Prendi la tua gruccia preferita dalla camera.Coge tu percha favorita del dormitorio.
- Go back out to the Garden: something has happened to Anna. In Pineview Alley Louis decides to ask the neighbours and the townsfolk before going to the police, and the paths to town and to the woods open up.Ressortez dans le Jardin : il est arrivé quelque chose à Anna. Dans Pineview Alley, Louis décide d’interroger les voisins et les habitants avant d’aller à la police, et les chemins vers la ville et vers les bois s’ouvrent.Geh wieder hinaus in den Garten: Anna ist etwas zugestoßen. In der Pineview Alley beschließt Louis, die Nachbarn und die Leute in der Stadt zu befragen, bevor er zur Polizei geht, und die Wege in die Stadt und in den Wald öffnen sich.Riesci in Giardino: ad Anna è successo qualcosa. In Pineview Alley Louis decide di interrogare i vicini e gli abitanti prima di andare alla polizia, e si aprono i sentieri verso la città e verso il bosco.Vuelve a salir al Jardín: algo le ha pasado a Anna. En Pineview Alley Louis decide preguntar a los vecinos y a la gente del pueblo antes de ir a la policía, y se abren los caminos al pueblo y al bosque.
Don, and Astrid’s houseDon, et la maison d’AstridDon und Astrids HausDon e la casa di AstridDon y la casa de Astrid
In townEn villeIn der StadtIn cittàEn el pueblo
- Go to the city centre and into the pharmacy. Speak to Don Inotelli: ask about the Burglary, tap Anna, and ask about Anna. He saw her arguing with a man about the “Exit”. That’s one.Allez au centre-ville et entrez dans la pharmacie. Parler à Don Inotelli : demandez le Cambriolage, touchez Anna, et demandez Anna. Il l’a vue se disputer avec un homme à propos de l’« Exit ». Et d’un.Geh ins Stadtzentrum und in die Apotheke. Sprechen mit Don Inotelli: Frag nach dem Einbruch, tippe Anna an und frag nach Anna. Er hat sie mit einem Mann über den „Exit“ streiten sehen. Das ist einer.Vai in centro ed entra in farmacia. Parla con Don Inotelli: chiedi degli Atti vandalici, tocca Anna, e chiedi di Anna. L’ha vista litigare con un uomo a proposito dell’«Exit». E uno.Ve al centro y entra en la farmacia. Hablar con Don Inotelli: pregunta por el Robo, toca Anna y pregunta por Anna. La vio discutiendo con un hombre sobre el «Exit». Ya van uno.
- In the city centre, try to go into Anna’s grocery. Astrid comes out of it, doesn’t want to talk, and leaves. The shop is now locked; she still lives in the woods outside town.Au centre-ville, essayez d’entrer dans l’épicerie d’Anna. Astrid en sort, ne veut pas parler, et s’en va. La boutique est maintenant fermée ; elle vit toujours dans les bois à l’extérieur de la ville.Versuch im Stadtzentrum, in Annas Laden zu gehen. Astrid kommt heraus, will nicht reden und geht. Der Laden ist jetzt abgeschlossen; sie wohnt immer noch im Wald vor der Stadt.In centro, prova a entrare nella drogheria di Anna. Ne esce Astrid, che non vuole parlare e se ne va. Ora il negozio è chiuso a chiave; lei vive ancora nel bosco fuori città.En el centro, intenta entrar en la tienda de Anna. Sale Astrid, que no quiere hablar y se va. La tienda está ahora cerrada; ella sigue viviendo en el bosque a las afueras.
- In the antique shop’s office, take the paper from the desk. You’ll need it at Astrid’s.Dans le Bureau de la boutique d’antiquités, prenez la feuille sur la table. Vous en aurez besoin chez Astrid.Nimm im Büro des Antiquitätenladens das Papier vom Schreibtisch. Du brauchst es bei Astrid.Nell’Ufficio del negozio d’antiquariato, prendi il foglio dalla scrivania. Ti servirà da Astrid.En la Oficina de la tienda de antigüedades, coge el papel del escritorio. Lo necesitarás en casa de Astrid.
Breaking inL’effractionDer EinbruchL’irruzioneEl allanamiento
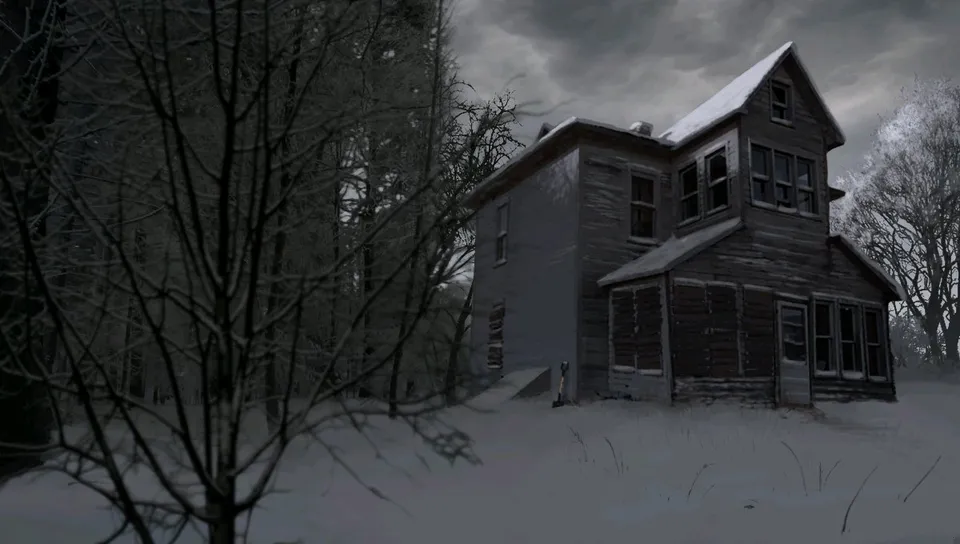
- From Pineview Alley, go through the woods to Astrid’s house. There’s a light upstairs, and a silhouette moving. Nobody answers the bell.Depuis Pineview Alley, traversez les bois jusqu’à la maison d’Astrid. Il y a de la lumière à l’étage, et une silhouette qui bouge. Personne ne répond à la sonnette.Geh von der Pineview Alley durch den Wald zu Astrids Haus. Oben brennt Licht, und eine Silhouette bewegt sich. Niemand öffnet auf das Klingeln.Da Pineview Alley, attraversa il bosco fino alla casa di Astrid. C’è una luce al piano di sopra, e una sagoma che si muove. Nessuno risponde al campanello.Desde Pineview Alley, atraviesa el bosque hasta la casa de Astrid. Hay luz arriba, y una silueta que se mueve. Nadie contesta al timbre.
- Take the shovel by the house; you’ll need it later.Prenez la pelle près de la maison ; vous en aurez besoin plus tard.Nimm die Schaufel neben dem Haus; du brauchst sie später.Prendi la pala accanto alla casa; ti servirà più avanti.Coge la pala junto a la casa; la necesitarás más tarde.
- Inspect the snow-covered trapdoor and rub the snow off it with your finger until it opens. Go down into the cellar.Inspecter la Trappe enneigée et frottez la neige du doigt jusqu’à ce qu’elle s’ouvre. Descendez dans la cave.Untersuchen an der verschneiten Falltür und reib den Schnee mit dem Finger weg, bis sie aufgeht. Geh hinunter in den Keller.Esamina la Botola innevata e strofina via la neve con il dito finché non si apre. Scendi in cantina.Inspeccionar en la Trampilla nevada y quita la nieve con el dedo hasta que se abra. Baja al sótano.
- It’s pitch dark. Use the matches to light one, and drag the light around: the door to the house is locked, with the key in the other side of the lock.Il fait nuit noire. Utiliser les allumettes pour en allumer une, et déplacez la lumière : la porte de la maison est fermée à clé, la clé dans la serrure de l’autre côté.Es ist stockdunkel. Benutzen: die Streichhölzer, um eines anzuzünden, und zieh das Licht herum: Die Tür zum Haus ist abgeschlossen, der Schlüssel steckt auf der anderen Seite im Schloss.È buio pesto. Usa i fiammiferi per accenderne uno, e sposta la luce: la porta della casa è chiusa a chiave, con la chiave nella serratura dall’altra parte.Está completamente oscuro. Utilizar las cerillas para encender una, y arrastra la luz: la puerta de la casa está cerrada, con la llave puesta por el otro lado.
- Use the paper on the door to slide it underneath.Utiliser la feuille sur la Porte pour la glisser dessous.Benutzen: das Papier an der Tür, um es darunterzuschieben.Usa il foglio sulla Porta per infilarlo sotto.Utilizar el papel con la Puerta para deslizarlo por debajo.
- With a match lit and the door inside its light, use the hanger on the door to push the key out. It falls onto the paper; Louis pulls it through and opens the door. The paper comes back to the inventory.Une allumette allumée et la porte dans sa lumière, utilisez le cintre sur la Porte pour pousser la clé. Elle tombe sur la feuille ; Louis la tire vers lui et ouvre la porte. La feuille revient dans l’inventaire.Mit brennendem Streichholz und der Tür im Licht: Benutze den Kleiderbügel an der Tür, um den Schlüssel hinauszudrücken. Er fällt aufs Papier; Louis zieht ihn durch und öffnet die Tür. Das Papier kommt zurück ins Inventar.Con un fiammifero acceso e la porta nella sua luce, usa la gruccia sulla Porta per spingere fuori la chiave. Cade sul foglio; Louis lo tira a sé e apre la porta. Il foglio torna nell’inventario.Con una cerilla encendida y la puerta dentro de su luz, utiliza la percha con la Puerta para empujar la llave. Cae sobre el papel; Louis tira de él y abre la puerta. El papel vuelve al inventario.
- In the lounge, Look inside the strange bird. It breaks: Take the key hidden in the pieces.Dans le salon, Fouiller l’étrange Oiseau. Il se casse : Prendre la clef cachée dans les morceaux.Im Wohnzimmer: Durchsuchen am seltsamen Vogel. Er zerbricht: Nehmen: den Schlüssel, der in den Scherben versteckt ist.In salotto, Guarda all’interno dello strano Uccello. Si rompe: Prendi la chiave nascosta tra i pezzi.En el salón, Revisar en el extraño Pájaro. Se rompe: Tomar la llave escondida entre los trozos.
- Use the key on the locked door of the room upstairs and go in.Utiliser la clef sur la Porte fermée de la chambre à l’étage et entrez.Benutzen: den Schlüssel an der verschlossenen Tür des Zimmers oben, und geh hinein.Usa la chiave sulla Porta chiusa della stanza al piano di sopra ed entra.Utilizar la llave con la Puerta cerrada de la habitación de arriba y entra.
- Speak to Astrid. She won’t talk until you show her “the symbol of the true path”, and “it all begins with the box of Hermes”.Parler à Astrid. Elle ne parlera pas tant que vous ne lui aurez pas montré « le symbole de la vraie voie », et « tout commence par la boîte d’Hermès ».Sprechen mit Astrid. Sie redet erst, wenn du ihr „das Symbol des wahren Pfades“ zeigst, und „alles beginnt mit der Kiste des Hermes“.Parla con Astrid. Non parlerà finché non le mostri «il simbolo della vera via», e «tutto comincia con la scatola di Hermes».Hablar con Astrid. No hablará hasta que le enseñes «el símbolo del verdadero camino», y «todo empieza con la caja de Hermes».
- You can Unlock the lounge’s front door to come and go that way from now on.Vous pouvez Déverrouiller la Porte d’entrée du salon pour aller et venir par là désormais.Du kannst mit Aufschließen die Haustür im Wohnzimmer öffnen, um ab jetzt dort ein- und auszugehen.Puoi scegliere Apri sulla Porta d’ingresso del salotto per entrare e uscire da lì d’ora in poi.Puedes Desbloquear la Puerta principal del salón para entrar y salir por ahí a partir de ahora.
The six cylindersLes six cylindresDie sechs ZylinderI sei cilindriLos seis cilindros
Each cylinder holds a riddle that leads to the next. Louis reads each one as he picks it up, and the riddles stay in the objectives.Chaque cylindre contient une énigme qui mène au suivant. Louis lit chacune en le ramassant, et les énigmes restent dans les objectifs.Jeder Zylinder enthält ein Rätsel, das zum nächsten führt. Louis liest jedes, wenn er ihn aufhebt, und die Rätsel bleiben in den Zielen.Ogni cilindro contiene un indovinello che porta al successivo. Louis li legge raccogliendoli, e gli indovinelli restano negli obiettivi.Cada cilindro guarda un acertijo que lleva al siguiente. Louis los lee al cogerlos, y los acertijos se quedan en los objetivos.
- Hermes is the messenger: the box of Hermes is your mailbox. Go to your Garden (the mail has come), Open the mailbox and take the first cylinder. “In the middle of the forest, two cubits from the fallen King…”Hermès est le messager : la boîte d’Hermès est votre Boîte aux lettres. Allez dans votre Jardin (le courrier est passé), Ouvrir la Boîte aux lettres et prenez le premier cylindre. « Au milieu de la forêt, à deux coudées du Roi déchu… »Hermes ist der Bote: Die Kiste des Hermes ist dein Briefkasten. Geh in deinen Garten (die Post war da), Öffnen am Briefkasten, und nimm den ersten Zylinder. „Mitten im Wald, zwei Ellen vom gefallenen König …“Hermes è il messaggero: la scatola di Hermes è la tua Buca delle lettere. Vai in Giardino (è arrivata la posta), Apri la Buca delle lettere e prendi il primo cilindro. «In mezzo alla foresta, a due cubiti dal Re caduto…»Hermes es el mensajero: la caja de Hermes es tu Buzón de correo. Ve a tu Jardín (ha llegado el correo), Abrir en el Buzón de correo y coge el primer cilindro. «En medio del bosque, a dos codos del Rey caído…»
- In the woods, use the shovel on the snow by the stump. Ten minutes later you find the second cylinder. Take the shovel back afterwards. “Seventy to port, ten to starboard, fifty to port and one hundred all sails up.”Dans les bois, utilisez la pelle sur la Neige près de la Souche. Dix minutes plus tard, vous trouvez le deuxième cylindre. Reprenez la pelle ensuite. « Soixante-dix à bâbord, dix à tribord, cinquante à bâbord et cent toutes voiles dehors. »Benutze im Wald die Schaufel am Schnee beim Stumpf. Zehn Minuten später findest du den zweiten Zylinder. Nimm die Schaufel danach wieder mit. „Siebzig nach Backbord, zehn nach Steuerbord, fünfzig nach Backbord und einhundert sind erreicht.“Nel bosco, usa la pala sulla Neve vicino al Tronco. Dieci minuti dopo trovi il secondo cilindro. Poi riprendi la pala. «70 a babordo, 10 a dritta, 50 a babordo e 100 issare le vele.»En el bosque, usa la pala con la Nieve junto a la Cepa. Diez minutos después encuentras el segundo cilindro. Luego vuelve a coger la pala. «Setenta a babor, diez a estribor, cincuenta a babor y cien se navega todo.»
- In your Bedroom, Open the safe. Your old code no longer works: turn the dial left to 70, right to 10, left to 50, then right to 0, the riddle’s “one hundred”. Take the third cylinder from the safe. “At the foot of the first you will be back on the trail.”Dans votre Chambre, Ouvrir le Coffre. Votre ancien code ne marche plus : tournez la molette à gauche jusqu’à 70, à droite jusqu’à 10, à gauche jusqu’à 50, puis à droite jusqu’à 0, le « cent » de l’énigme. Prenez le troisième cylindre dans le coffre. « Au pied du premier tu retrouveras la piste. »Öffnen in deinem Schlafzimmer am Safe. Dein alter Code funktioniert nicht mehr: Dreh das Rad links auf 70, rechts auf 10, links auf 50, dann rechts auf 0, das „einhundert“ des Rätsels. Nimm den dritten Zylinder aus dem Safe. „Am Fuße das Ersten wanderst du wieder auf rechtem Pfad.“In Letto (la camera), Apri la Cassaforte. Il vecchio codice non funziona più: gira la manopola a sinistra fino a 70, a destra fino a 10, a sinistra fino a 50, poi a destra fino a 0, il «100» dell’indovinello. Prendi il terzo cilindro dalla cassaforte. «Ai piedi del primo sarai tornato sul sentiero.»En tu Dormitorio, Abrir en la Caja fuerte. Tu antiguo código ya no funciona: gira el dial a la izquierda hasta 70, a la derecha hasta 10, a la izquierda hasta 50 y luego a la derecha hasta 0, el «cien» del acertijo. Coge el tercer cilindro de la caja fuerte. «A los pies de la primer y estarás de regreso en el camino.»
- In the Garden, use the shovel on the mailbox post, the place where the first cylinder was. Take the fourth cylinder. “The mysterious chimera will not let him go.”Dans le Jardin, utilisez la pelle sur le Pied boîte, l’endroit où était le premier cylindre. Prenez le quatrième cylindre. « L’étrange chimère ne veut pas le lâcher. »Benutze im Garten die Schaufel am Briefkastenhäuschen, dem Ort, wo der erste Zylinder war. Nimm den vierten Zylinder. „Die mysteröse Chimäre wird ihn nicht gehen lassen.“In Giardino, usa la pala sulla Posta, il punto dov’era il primo cilindro. Prendi il quarto cilindro. «La chimera misteriosa non lo lascerà andare.»En el Jardín, usa la pala con el Buzón (su poste), el lugar donde estaba el primer cilindro. Coge el cuarto cilindro. «La misteriosa quimera no lo dejará ir.»
- In the antique shop, Investigate the deer man, the stuffed stag with a man’s body. He’s holding the fifth cylinder: Take it. “Eire is the key.”Dans la boutique d’antiquités, Examiner l’Homme cerf, le cerf empaillé au corps d’homme. Il tient le cinquième cylindre : Prendre. « L’Eire est la clé. »Betrachten im Antiquitätenladen: den Hirschmann, den ausgestopften Hirsch mit Menschenkörper. Er hält den fünften Zylinder: Nehmen. „Irland ist der Schlüssel.“Nel negozio d’antiquariato, Esamina l’Uomo renna, il cervo impagliato con il corpo d’uomo. Tiene il quinto cilindro: Prendi. «La chiave è l’Eire.»En la tienda de antigüedades, Examinar en el Hombre venado, el ciervo disecado con cuerpo de hombre. Sostiene el quinto cilindro: Tomar. «Eire es la llave.»
- In your Lounge, Inspect the world map, the globe that turns into a bar, and press Ireland. The stuck mechanism opens: take the sixth cylinder. “The path of revelation is in the hands of the nativity.”Dans votre Salon, Inspecter la Mappemonde, le globe qui se transforme en bar, et appuyez sur l’Irlande. Le mécanisme coincé s’ouvre : prenez le sixième cylindre. « La voie de la révélation est entre les mains de la nativité. »Untersuchen in deinem Wohnzimmer: die Weltkarte, den Globus, der sich in eine Bar verwandelt, und drück auf Irland. Der klemmende Mechanismus öffnet sich: Nimm den sechsten Zylinder. „Der Pfad der Offenbarung liegt in der Hand Christi Geburt.“In Salotto, Esamina il Planetario, il mappamondo che diventa un bar, e premi l’Irlanda. Il meccanismo bloccato si apre: prendi il sesto cilindro. «La via della rivelazione è nelle mani della natività.»En tu salón, Inspeccionar en el Mapamundi, el globo que se convierte en mueble bar, y pulsa Irlanda. El mecanismo atascado se abre: coge el sexto cilindro. «El camino de la revelación está en las manos de la natividad.»
The preacher and the locketLe prêcheur et le médaillonDer Prediger und das MedaillonIl predicatore e il medaglioneEl predicador y el guardapelo
- Go up North Road to the police station. Speak to the preacher in the snow outside. She won’t let you near the “arms of the nativity” in her baby carriage until you bring her the Book of the Path.Remontez North Road jusqu’au commissariat. Parler à la prêcheuse dans la neige devant. Elle ne vous laissera pas approcher des « bras de la nativité » dans son landau tant que vous ne lui aurez pas apporté le Livre de la Voie.Geh die North Road hinauf zur Polizeiwache. Sprechen mit der Predigerin draußen im Schnee. Sie lässt dich nicht an die „Arme der Geburt“ in ihrem Kinderwagen, bis du ihr das Buch des Weges bringst.Risali North Road fino al commissariato. Parla con la predicatrice nella neve davanti. Non ti lascerà avvicinare alle «braccia della natività» nella sua carrozzina finché non le porti il Libro della Via.Sube por North Road hasta la comisaría. Hablar con la predicadora que está fuera en la nieve. No te dejará acercarte a los «brazos de la natividad» de su cochecito hasta que le lleves el Libro del Camino.
- In Astrid’s room upstairs, Take the Book of Prophecies from the vanity. Astrid lets you: “Take the oracle.”Dans la chambre d’Astrid à l’étage, Prendre le Livre des Prophéties sur la coiffeuse. Astrid vous laisse faire : « Prenez l’oracle. »Nehmen in Astrids Zimmer oben: das Buch der Prophezeiungen vom Schminktisch. Astrid lässt dich: „Nimm das Orakel an dich.“Nella camera di Astrid al piano di sopra, Prendi il Libro delle Profezie dalla toeletta. Astrid te lo lascia fare: «Prendi l’oracolo.»En la habitación de Astrid, arriba, Tomar el Libro de las Profecías del tocador. Astrid te deja: «Toma el oráculo.»
- Use the book on the preacher. Then Look inside the baby carriage: among dozens of dolls’ arms is the locket.Utiliser le livre sur la prêcheuse. Puis Fouiller le Landau : parmi des dizaines de bras de poupées se trouve le médaillon.Benutzen: das Buch an der Predigerin. Dann Durchsuchen am Kinderwagen: Zwischen Dutzenden Puppenarmen liegt das Medaillon.Usa il libro sulla predicatrice. Poi Guarda all’interno della Carrozzina: tra decine di braccia di bambole c’è il medaglione.Utilizar el libro con la predicadora. Luego Revisar en el Cochecito: entre docenas de brazos de muñecas está el guardapelo.
- Back in Astrid’s room, use the locket on Astrid. She reads your tarot: tap four of the cards on the table.De retour dans la chambre d’Astrid, utilisez le médaillon sur Astrid. Elle vous tire les tarots : touchez quatre des cartes sur la table.Benutze zurück in Astrids Zimmer das Medaillon an Astrid. Sie legt dir die Tarotkarten: Tippe vier der Karten auf dem Tisch an.Tornato nella camera di Astrid, usa il medaglione su Astrid. Ti legge i tarocchi: tocca quattro delle carte sul tavolo.De vuelta en la habitación de Astrid, usa el guardapelo con Astrid. Te echa el tarot: toca cuatro de las cartas de la mesa.
- Speak to Astrid again. Ask about the Boutique, tap Anna, and ask about Anna: Anna asked her to fetch a book from the shop. That’s another one.Parler de nouveau à Astrid. Demandez la Boutique, touchez Anna, et demandez Anna : Anna lui a demandé d’aller chercher un livre à la boutique. Et d’un de plus.Sprechen noch einmal mit Astrid. Frag nach dem Laden, tippe Anna an und frag nach Anna: Anna hat sie gebeten, ein Buch aus dem Laden zu holen. Noch einer.Parla di nuovo con Astrid. Chiedi della Boutique, tocca Anna, e chiedi di Anna: Anna le ha chiesto di prendere un libro dal negozio. Un altro.Hablar otra vez con Astrid. Pregunta por la Tienda, toca Anna y pregunta por Anna: Anna le pidió que fuera a buscar un libro a la tienda. Otro más.
The Vanpsychs and the RemingtonLes Vanpsych et le RemingtonDie Vanpsychs und die RemingtonI Vanpsych e il RemingtonLos Vanpsych y el Remington
Into the neighbours’ houseChez les voisinsIns Haus der NachbarnNella casa dei viciniEn casa de los vecinos
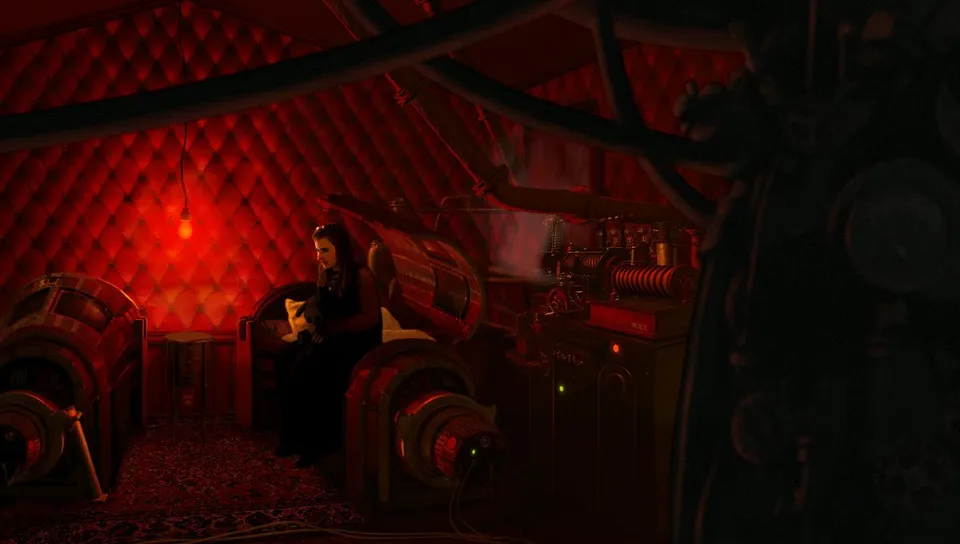
- In Pineview Alley, Investigate the windows of the Vanpsychs’ house. There’s a silhouette behind the red one, and the other window is open, but too high to reach.Dans Pineview Alley, Examiner les Fenêtres de la maison des Vanpsych. Il y a une silhouette derrière la rouge, et l’autre fenêtre est ouverte, mais trop haute.Betrachten in der Pineview Alley: die Fenster vom Haus der Vanpsychs. Hinter dem roten ist eine Silhouette, und das andere Fenster ist offen, aber zu hoch.In Pineview Alley, Esamina le Finestra della casa dei Vanpsych. C’è una sagoma dietro quella rossa, e l’altra finestra è aperta, ma troppo alta.En Pineview Alley, Examinar en las Ventanas de la casa de los Vanpsych. Hay una silueta detrás de la roja, y la otra ventana está abierta, pero demasiado alta.
- In the antique shop, go into the storage room and take the stepladder. (John’s garden chair breaks under you.)Dans la boutique d’antiquités, entrez dans la Remise et prenez l’escabeau. (La chaise de jardin de John casse sous vous.)Geh im Antiquitätenladen in den Lagerraum und nimm die Trittleiter. (Johns Gartenstuhl bricht unter dir zusammen.)Nel negozio d’antiquariato, entra nel Magazzino e prendi la scaletta. (La sedia da giardino di John si rompe sotto di te.)En la tienda de antigüedades, entra en el Cobertizo y coge la escalera de mano. (La silla de jardín de John se rompe bajo tu peso.)
- Use the stepladder on the open window, then Climb up and go in.Utiliser l’escabeau sur la Fenêtre ouverte, puis Monter et entrez.Benutzen: die Trittleiter am Offenen Fenster, dann Hochsteigen und hineingehen.Usa la scaletta sulla finestra aperta, poi Sali ed entra.Utilizar la escalera de mano con la ventana abierta, luego Subirse y entrar.
- You have only a few actions before Igmar comes home. Dump out the flower pot on the table: he’s back already. Look inside what’s left of it and take the key.Vous n’avez que quelques actions avant le retour d’Igmar. Renverser le Pot de fleur sur la table : il est déjà de retour. Fouiller ce qu’il en reste et prenez la clef.Du hast nur ein paar Aktionen, bevor Igmar heimkommt. Auskippen: die Blumenvase auf dem Tisch; er ist schon zurück. Durchsuchen, was davon übrig ist, und nimm den Schlüssel.Hai solo qualche azione prima che Igmar torni a casa. Leva di mezzo il Vaso da fiori sul tavolo: è già tornato. Guarda all’interno di ciò che ne resta e prendi la chiave.Solo tienes unas pocas acciones antes de que Igmar vuelva. Volcar el Florero de la mesa: ya ha vuelto. Revisar lo que queda de él y coge la llave.
- Quickly use the key on the door to the cellar, and hide there.Vite, utilisez la clef sur la Porte de la cave, et cachez-vous-y.Benutze schnell den Schlüssel an der Tür zum Keller und versteck dich dort.Presto, usa la chiave sulla Porta della cantina, e nasconditi lì.Rápido, usa la llave con la Puerta del sótano, y escóndete allí.
- Igmar talks to his wife next door. Wait at the cellar door; opening it now gets you caught. When he says he’ll be back in an hour, the coast is clear.Igmar parle à sa femme à côté. Attendre à la porte de la cave ; l’ouvrir maintenant vous fait prendre. Quand il dit qu’il sera de retour dans une heure, la voie est libre.Igmar redet nebenan mit seiner Frau. Warten an der Kellertür; sie jetzt zu öffnen, lässt dich erwischen. Wenn er sagt, er sei in einer Stunde zurück, ist die Luft rein.Igmar parla con la moglie nella stanza accanto. Aspetta alla porta della cantina; aprirla ora ti fa scoprire. Quando dice che tornerà tra un’ora, la via è libera.Igmar habla con su mujer en la habitación de al lado. Esperar en la puerta del sótano; abrirla ahora hace que te pillen. Cuando dice que volverá en una hora, hay vía libre.
Cloe
- Igmar has left the red room’s door open. Go in and Speak to Cloe.Igmar a laissé ouverte la porte de la pièce rouge. Entrez et Parler à Cloe.Igmar hat die Tür zum roten Zimmer offen gelassen. Geh hinein und Sprechen mit Cloe.Igmar ha lasciato aperta la porta della stanza rossa. Entra e Parla con Cloe.Igmar ha dejado abierta la puerta de la habitación roja. Entra y Hablar con Cloe.
- Ask her all ten questions. Tap suspicious people and strange dream to add the last two. She saw a man stand in your garden for three hours, and Anna whisper in his ear. That’s another one.Posez-lui les dix questions. Touchez gens suspects et rêve étrange pour ajouter les deux dernières. Elle a vu un homme rester trois heures dans votre jardin, et Anna lui chuchoter à l’oreille. Et d’un de plus.Stell ihr alle zehn Fragen. Tippe verdächtige Leute und seltsamer Traum an, um die letzten beiden hinzuzufügen. Sie hat einen Mann drei Stunden in deinem Garten stehen sehen, und Anna, die ihm ins Ohr flüsterte. Noch einer.Falle tutte e dieci le domande. Tocca persone sospette e strano sogno per aggiungere le ultime due. Ha visto un uomo restare tre ore nel tuo giardino, e Anna sussurrargli all’orecchio. Un altro.Hazle las diez preguntas. Toca gente sospechosa y el cuarto extraño (strange dream) para añadir las dos últimas. Vio a un hombre plantado tres horas en tu jardín, y a Anna susurrándole al oído. Otro más.
- Leave the red room. Igmar is coming back, and Louis slips out through the window.Quittez la pièce rouge. Igmar revient, et Louis s’éclipse par la fenêtre.Verlass das rote Zimmer. Igmar kommt zurück, und Louis schlüpft durchs Fenster hinaus.Esci dalla stanza rossa. Igmar sta tornando, e Louis sgattaiola fuori dalla finestra.Sal de la habitación roja. Igmar vuelve, y Louis se escabulle por la ventana.
Igmar and the RemingtonIgmar et le RemingtonIgmar und die RemingtonIgmar e il RemingtonIgmar y el Remington
- Igmar is now standing guard in Pineview Alley. Speak to him: the maniac from the gas station has escaped and been seen in New Jersey. He won’t say more without a rifle.Igmar monte maintenant la garde dans Pineview Alley. Parler avec lui : le fou de la station-service s’est évadé et a été vu dans le New Jersey. Il n’en dira pas plus sans un fusil.Igmar hält jetzt in der Pineview Alley Wache. Sprechen mit ihm: Der Irre von der Tankstelle ist ausgebrochen und wurde in New Jersey gesehen. Ohne Gewehr sagt er nicht mehr.Igmar ora fa la guardia in Pineview Alley. Parla con lui: il maniaco della stazione di servizio è evaso ed è stato visto nel New Jersey. Senza un fucile non dirà altro.Igmar monta ahora guardia en Pineview Alley. Hablar con él: el maníaco de la gasolinera se ha escapado y lo han visto en Nueva Jersey. No dirá más sin un rifle.
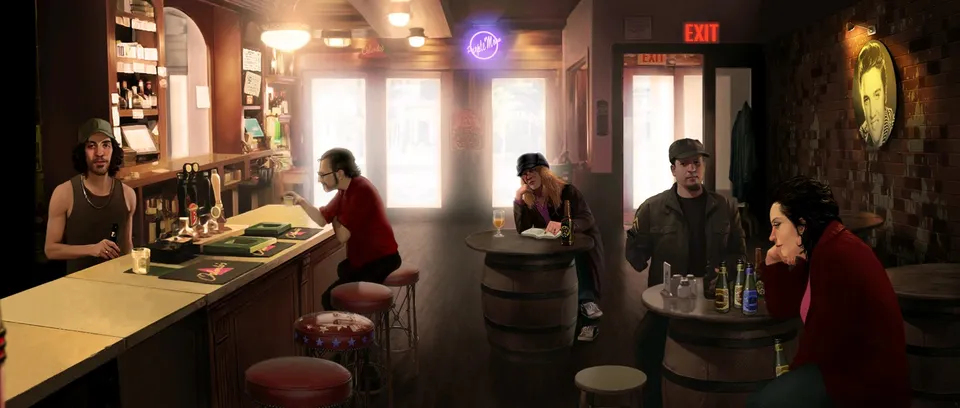
- Go to Orlando’s and Speak to Todd Corman. Ask about Anna (another one), then about how Tensions run high in Jalonsville. Tap maniac on the loose, ask about it, then tap Remington and ask about the Remington. He shows you his grand-uncle’s shotgun, but won’t lend it.Allez chez Orlando’s et Parler à Todd Corman. Demandez Anna (et d’un de plus), puis les Tensions à Jalonsville. Touchez fou en cavale, posez la question, puis touchez Remington et demandez le Remington. Il vous montre le fusil de son grand-oncle, mais refuse de le prêter.Geh ins Orlando’s und Sprechen mit Todd Corman. Frag nach Anna (noch einer), dann nach Spannungen in Jalonsville. Tippe Irrer auf der Flucht an, frag danach, dann tippe Remington an und frag nach dem Remington. Er zeigt dir das Gewehr seines Großonkels, leiht es aber nicht aus.Vai da Orlando’s e Parla con Todd Corman. Chiedi di Anna (un altro), poi dell’Alta tensione a Jalonsville. Tocca il maniaco a piede libero, chiedi, poi tocca Remington e chiedi del Remington. Ti mostra il fucile del prozio, ma non te lo presta.Ve a Orlando’s y Hablar con Todd Corman. Pregunta por Anna (otro más) y luego por las Tensiones en Jalonsville. Toca el maniático fugitivo, pregunta, y luego toca Remington y pregunta por el Remington. Te enseña la escopeta de su tío abuelo, pero no te la presta.
- In the antique shop’s office, Speak to Felicity Archer, who is crying. She needs a hug.Dans le Bureau de la boutique d’antiquités, Parler à Felicity Archer, qui pleure. Elle a besoin d’un câlin.Sprechen im Büro des Antiquitätenladens mit Felicity Archer, die weint. Sie braucht eine Umarmung.Nell’Ufficio del negozio d’antiquariato, Parla con Felicity Archer, che piange. Ha bisogno di un abbraccio.En la Oficina de la tienda de antigüedades, Hablar con Felicity Archer, que está llorando. Necesita un abrazo.
- Back at Orlando’s, ask Todd about Felicity. He rushes off to comfort her.De retour chez Orlando’s, demandez à Todd Felicity. Il file la réconforter.Frag Todd zurück im Orlando’s nach Felicity. Er eilt los, um sie zu trösten.Tornato da Orlando’s, chiedi a Todd di Felicity. Corre a consolarla.De vuelta en Orlando’s, pregúntale a Todd por Felicity. Sale corriendo a consolarla.
- With Todd away, Open the trapdoor behind the bar and take the Remington.Todd parti, Ouvrir la Trappe derrière le bar et prenez le Remington.Während Todd weg ist: Öffnen an der Falltür hinter der Bar, und nimm den Remington.Con Todd via, Apri la Botola dietro il bancone e prendi il Remington.Sin Todd, Abrir en la Trampilla de detrás de la barra y coge el Remington.
- In Pineview Alley, use the Remington on Igmar. Delighted, he talks: Speak to him and ask about Anna. Another one.Dans Pineview Alley, utilisez le Remington sur Igmar. Ravi, il parle : Parler avec lui et demandez Anna. Et d’un de plus.Benutze in der Pineview Alley den Remington an Igmar. Begeistert redet er: Sprechen mit ihm und frag nach Anna. Noch einer.In Pineview Alley, usa il Remington su Igmar. Felicissimo, parla: Parla con lui e chiedi di Anna. Un altro.En Pineview Alley, usa el Remington con Igmar. Encantado, habla: Hablar con él y pregunta por Anna. Otro más.
Felicity, and the regulars at Orlando’sFelicity, et les habitués d’Orlando’sFelicity und die Stammgäste im Orlando’sFelicity e i clienti abituali di Orlando’sFelicity y los habituales de Orlando’s
Felicity’s pillsLes cachets de FelicityFelicitys TablettenLe pillole di FelicityLas pastillas de Felicity
- In the antique shop’s office, Speak to Felicity. She’s in a daze and wants her usual pills from Don.Dans le Bureau de la boutique d’antiquités, Parler à Felicity. Elle est dans les vapes et veut ses cachets habituels de chez Don.Sprechen im Büro des Antiquitätenladens mit Felicity. Sie ist benommen und will ihre üblichen Pillen von Don.Nell’Ufficio del negozio d’antiquariato, Parla con Felicity. È intontita e vuole le sue solite pasticche da Don.En la Oficina de la tienda de antigüedades, Hablar con Felicity. Está aturdida y quiere sus pastillas de siempre de lo de Don.
- In the pharmacy, ask Don about Felicity, tap usual pills, and ask about the Usual pills: fifty dollars, cash.À la pharmacie, demandez à Don Felicity, touchez cachets habituels, et demandez les Cachets habituels : cinquante dollars, en liquide.Frag Don in der Apotheke nach Felicity, tippe übliche Pillen an und frag nach den Üblichen Pillen: fünfzig Dollar, bar.In farmacia, chiedi a Don di Felicity, tocca solite pasticche, e chiedi delle Solite pasticche: cinquanta dollari, in contanti.En la farmacia, pregúntale a Don por Felicity, toca píldoras habituales y pregunta por las Píldoras habituales: cincuenta dólares, en efectivo.
- Use your 50 dollars on Don. He gives you the antidepressants.Utiliser vos 50 dollars sur Don. Il vous donne les antidépresseurs.Benutzen: deine 50 Dollar an Don. Er gibt dir die Antidepressiva.Usa i tuoi 50 dollari su Don. Ti dà gli antidepressivi.Utilizar tus 50 dólares con Don. Te da los antidepresivos.
- Use them on Felicity, then Speak to her. Ask about the Burglary, tap shop, ask about the Boutique, tap Anna, and ask about Anna. Everyone knows she’s taken a lover. Another one.Utiliser sur Felicity, puis Parler avec elle. Demandez le Cambriolage, touchez boutique, demandez la Boutique, touchez Anna, et demandez Anna. Tout le monde sait qu’elle a pris un amant. Et d’un de plus.Benutzen: sie an Felicity, dann Sprechen mit ihr. Frag nach dem Einbruch, tippe Laden an, frag nach dem Laden, tippe Anna an und frag nach Anna. Jeder weiß, dass sie einen Liebhaber hat. Noch einer.Usali su Felicity, poi Parla con lei. Chiedi degli Atti vandalici, tocca negozio, chiedi della Boutique, tocca Anna, e chiedi di Anna. Tutti sanno che ha un amante. Un altro.Utilizar con Felicity, y luego Hablar con ella. Pregunta por el Robo, toca tienda, pregunta por la Tienda, toca Anna y pregunta por Anna. Todo el mundo sabe que tiene un amante. Otro más.
Gordon and the bourbonGordon et le bourbonGordon und der BourbonGordon e il bourbonGordon y el bourbon
- Now the four regulars at Orlando’s will talk. Speak to Gordon: the whiskey Todd serves is a disgrace, and he wants a real Kerbeci Bourbon.Maintenant les quatre habitués d’Orlando’s vont parler. Parler à Gordon : le whisky que sert Todd est une honte, et il veut un vrai Kerbeci Bourbon.Jetzt reden die vier Stammgäste im Orlando’s. Sprechen mit Gordon: Der Whiskey, den Todd ausschenkt, ist eine Schande, und er will einen echten Kerbeci Bourbon.Ora i quattro habitué di Orlando’s parleranno. Parla con Gordon: il whisky che serve Todd è una vergogna, e vuole un vero Kerbeci Bourbon.Ahora hablarán los cuatro habituales de Orlando’s. Hablar con Gordon: el whisky que sirve Todd es una vergüenza, y quiere un Kerbeci Bourbon de verdad.
- Ask Todd about the Kerbeci Bourbon. Tap reserve and ask about the Reserve, tap favor and ask about the Favor, then tap flower and ask about the Flower: he wants one for Felicity, in the middle of winter.Demandez à Todd le Kerbeci Bourbon. Touchez réserve et demandez la Réserve, touchez service et demandez le Service, puis touchez fleur et demandez la Fleur : il en veut une pour Felicity, en plein hiver.Frag Todd nach dem Kerbeci Bourbon. Tippe Reserve an und frag nach der Reserve, tippe Gefallen an und frag nach dem Gefallen, dann tippe Blume an und frag nach der Blume: Er will eine für Felicity, mitten im Winter.Chiedi a Todd del Kerbeci Bourbon. Tocca magazzino e chiedi del Magazzino, tocca favore e chiedi del Favore, poi tocca fiore e chiedi del Fiore: ne vuole uno per Felicity, in pieno inverno.Pregúntale a Todd por el Kerbeci Bourbon. Toca reserva y pregunta por la Reserva, toca favor y pregunta por el Favor, y luego toca flor y pregunta por la Flor: quiere una para Felicity, en pleno invierno.
- In John’s lounge, Take one of the flowers: the flower. John doesn’t mind.Dans le salon de John, Prendre une des Fleurs : la fleur. John n’y voit pas d’inconvénient.Nehmen in Johns Wohnzimmer: eine der Blumen, die Blume. John hat nichts dagegen.Nel salotto di John, Prendi uno dei Fiori: il fiore. A John non dispiace.En el salón de John, Tomar una de las Flores: la flor. A John no le importa.
- Use the flower on Todd. He lets you into his reserve.Utiliser la fleur sur Todd. Il vous laisse entrer dans sa réserve.Benutzen: die Blume an Todd. Er lässt dich in seine Reserve.Usa il fiore su Todd. Ti fa entrare nel suo magazzino.Utilizar la flor con Todd. Te deja entrar en su reserva.
- In the reserve, take both bottles: a broken bottle of real Kerbeci Bourbon, and a full bottle of Krick Bourbon, a knock-off.Dans la réserve, prenez les deux bouteilles : une bouteille cassée de vrai Kerbeci Bourbon, et une bouteille pleine de Krick Bourbon, une copie bas de gamme.Nimm in der Reserve beide Flaschen: eine zerbrochene Flasche echten Kerbeci Bourbon und eine volle Flasche Krick Bourbon, ein Imitat.Nel magazzino, prendi entrambe le bottiglie: una bottiglia rotta di vero Kerbeci Bourbon, e una bottiglia piena di Krick Bourbon, una contraffazione.En la reserva, coge las dos botellas: una botella rota de Kerbeci Bourbon auténtico, y una botella llena de Krick Bourbon, una imitación.
- In Astrid’s lounge, use each bottle on the teakettle. The steam takes the label off the broken bottle in one piece (you keep the label), and the label off the full one (you keep the unlabeled bottle).Dans le salon d’Astrid, utilisez chaque bouteille sur la Bouilloire. La vapeur décolle l’étiquette de la bouteille cassée d’un seul tenant (vous gardez l’étiquette), et celle de la pleine (vous gardez la bouteille sans étiquette).Benutze in Astrids Wohnzimmer jede Flasche am Teekessel. Der Dampf löst das Etikett der zerbrochenen Flasche in einem Stück (du behältst das Etikett) und das der vollen (du behältst die Flasche ohne Etikett).Nel salotto di Astrid, usa ogni bottiglia sul Bollitore per il tè. Il vapore stacca intera l’etichetta della bottiglia rotta (tieni l’etichetta), e quella della piena (tieni la bottiglia senza etichetta).En el salón de Astrid, usa cada botella con la Caldera (el hervidor). El vapor despega entera la etiqueta de la botella rota (te quedas la etiqueta), y la de la llena (te quedas la botella sin etiqueta).
- In the woods, take the mistletoe from the tree. In your Kitchen, take the pestle.Dans les bois, prenez le gui sur l’arbre. Dans votre Cuisine, prenez le pilon.Nimm im Wald die Mistel vom Baum. Nimm in deiner Küche den Stößel.Nel bosco, prendi il vischio dall’albero. Nella tua Cucina, prendi il pestello.En el bosque, coge el muérdago del árbol. En tu Cocina, coge el mortero.
- Combine the pestle with the mistletoe to make glue, the glue with the label, then the glued label with the unlabeled bottle. You now have a bottle of Kerbeci Bourbon.Combinez le pilon avec le gui pour faire de la colle, la colle avec l’étiquette, puis l’étiquette encollée avec la bouteille sans étiquette. Vous avez maintenant une bouteille de Kerbeci Bourbon.Kombiniere den Stößel mit der Mistel zu Leim, den Leim mit dem Etikett, dann das beleimte Etikett mit der Flasche ohne Etikett. Jetzt hast du eine Flasche Kerbeci Bourbon.Combina il pestello con il vischio per fare la colla, la colla con l’etichetta, poi l’etichetta incollata con la bottiglia senza etichetta. Ora hai una bottiglia di Kerbeci Bourbon.Combina el mortero con el muérdago para hacer pegamento, el pegamento con la etiqueta, y luego la etiqueta engomada con la botella sin etiqueta. Ya tienes una botella de Kerbeci Bourbon.
- Use it on Gordon, then Speak to him and ask about Anna. He’s noticed her on the bus from New York. Another one.Utiliser sur Gordon, puis Parler avec lui et demandez Anna. Il l’a remarquée dans le bus en provenance de New York. Et d’un de plus.Benutzen: sie an Gordon, dann Sprechen mit ihm und frag nach Anna. Er hat sie im Bus aus New York bemerkt. Noch einer.Usala su Gordon, poi Parla con lui e chiedi di Anna. L’ha notata sull’autobus da New York. Un altro.Utilizar con Gordon, y luego Hablar con él y pregunta por Anna. Se fijó en ella en el autobús desde Nueva York. Otro más.
Lesly and her catLesly et son chatLesly und ihre KatzeLesly e il suo gattoLesly y su gato
- Speak to Lesly. Her cat, Sparky, has been gone a week.Parler à Lesly. Son chat, Sparky, a disparu depuis une semaine.Sprechen mit Lesly. Ihre Katze Sparky ist seit einer Woche weg.Parla con Lesly. Il suo gatto, Sparky, è sparito da una settimana.Hablar con Lesly. Su gato, Sparky, lleva una semana desaparecido.
- In Astrid’s cellar, among the mounted animals, there’s a cat. Look inside: Louis takes Sparky’s collar.Dans la cave d’Astrid, parmi les animaux empaillés, il y a un Chat. Fouiller : Louis prend le collier de Sparky.In Astrids Keller ist unter den ausgestopften Tieren eine Katze. Durchsuchen: Louis nimmt Sparkys Halsband.Nella cantina di Astrid, tra gli animali impagliati, c’è un Gatto. Guarda all’interno: Louis prende il collare di Sparky.En el sótano de Astrid, entre los animales disecados, hay un Gato. Revisar: Louis coge el collar de Sparky.
- Use the collar on Lesly, then Speak to her and ask about Anna. She saw her arguing with Astrid. Another one.Utiliser le collier sur Lesly, puis Parler avec elle et demandez Anna. Elle l’a vue se disputer avec Astrid. Et d’un de plus.Benutzen: das Halsband an Lesly, dann Sprechen mit ihr und frag nach Anna. Sie hat sie mit Astrid streiten sehen. Noch einer.Usa il collare su Lesly, poi Parla con lei e chiedi di Anna. L’ha vista litigare con Astrid. Un altro.Utilizar el collar con Lesly, y luego Hablar con ella y pregunta por Anna. La vio discutiendo con Astrid. Otro más.
Kyril’s riddlesLes énigmes de KyrilKyrils RätselGli indovinelli di KyrilLos acertijos de Kyril
- Speak to Kyril and ask about Anna. The game first: tap it and ask about the Game.Parler à Kyril et demandez Anna. Le jeu d’abord : touchez-le et demandez le Jeu.Sprechen mit Kyril und frag nach Anna. Erst das Spiel: Tippe es an und frag nach dem Spiel.Parla con Kyril e chiedi di Anna. Prima il gioco: toccalo e chiedi del Gioco.Hablar con Kyril y pregunta por Anna. Primero el juego: tócalo y pregunta por el Juego.
- After a joke about a sudoku, Kyril asks four riddles. Ask about each one and type the answer on the dialog keyboard: SECRET, FEET, LIFE, then SILENCE.Après une blague sur un sudoku, Kyril pose quatre énigmes. Demandez chacune et tapez la réponse sur le clavier du dialogue : SECRET, PIEDS, VIE, puis SILENCE.Nach einem Witz über ein Sudoku stellt Kyril vier Rätsel. Frag nach jedem und tippe die Antwort auf der Dialogtastatur: GEHEIMNIS, FÜẞE, LEBEN, dann STILLE.Dopo una battuta su un sudoku, Kyril pone quattro indovinelli. Chiedi di ognuno e digita la risposta sulla tastiera del dialogo: SEGRETO, PIEDI, VITA, poi SILENZIO.Tras un chiste sobre un sudoku, Kyril plantea cuatro acertijos. Pregunta por cada uno y escribe la respuesta en el teclado del diálogo: SECRETO, PIES, VIDA y luego SILENCIO.
- Ask about Anna again. He doesn’t know her, but Mev will now talk to you.Redemandez Anna. Il ne la connaît pas, mais Mev va maintenant vous parler.Frag noch einmal nach Anna. Er kennt sie nicht, aber Mev redet jetzt mit dir.Chiedi di nuovo di Anna. Non la conosce, ma ora Mev ti parlerà.Vuelve a preguntar por Anna. No la conoce, pero ahora Mev hablará contigo.
Mev’s drinksLes verres de MevMevs DrinksI drink di MevLas copas de Mev
- Speak to Mev. She’ll only talk if you keep the local specialities coming.Parler à Mev. Elle ne parlera que si vous enchaînez les spécialités locales.Sprechen mit Mev. Sie redet nur, wenn die örtlichen Spezialitäten weiter fließen.Parla con Mev. Parlerà solo se continui a offrirle le specialità locali.Hablar con Mev. Solo hablará si sigues pidiendo especialidades locales.
- Try all nine drinks with her: the vodka, the whiskey, the Picon Bière, the tequila, the absinthe, the rum, the moonshine, the chartreuse and the viperine. Then try the unidentified beverage, and finally Try Mev.Goûtez les neuf boissons avec elle : la vodka, le whisky, le Picon Bière, la tequila, l’absinthe, le rhum, la gnôle, la chartreuse et la vipérine. Puis goûtez la boisson non identifiée, et enfin Tester Mev.Probier mit ihr alle neun Getränke: den Wodka, den Whiskey, das Picon Bière, den Tequila, den Absinth, den Rum, den Schwarzgebrannten, den Chartreuse und den Vipernschnaps. Dann probier das unbekannte Getränk, und zum Schluss Von Mev probieren.Prova con lei tutte e nove le bevande: la vodka, il whisky, il Picon Bière, la tequila, l’assenzio, il rum, la grappa clandestina, la chartreuse e la viperina. Poi prova la bevanda non identificata, e infine Prova Mev.Prueba con ella las nueve bebidas: el vodka, el whisky, el Picon Bière, el tequila, la absenta, el ron, el licor casero, el chartreuse y la viperina. Luego prueba la bebida no identificada, y por último Prueba Mev.
- Louis is drunk, and she sends him for an aspirin. Don gives him a hangover pill on the house.Louis est ivre, et elle l’envoie chercher une aspirine. Don lui offre un cachet contre la gueule de bois.Louis ist betrunken, und sie schickt ihn nach einer Aspirin. Don gibt ihm eine Katerpille aufs Haus.Louis è ubriaco, e lei lo manda a prendere un’aspirina. Don gli offre una pillola contro i postumi.Louis está borracho, y ella lo manda a por una aspirina. Don le regala una pastilla para la resaca.
- Back at Orlando’s, Speak to Mev: Anna was a childhood friend who no longer remembers her. That’s the tenth.De retour chez Orlando’s, Parler à Mev : Anna était une amie d’enfance qui ne se souvient plus d’elle. Et de dix.Sprechen zurück im Orlando’s mit Mev: Anna war eine Kindheitsfreundin, die sich nicht mehr an sie erinnert. Das ist die zehnte.Tornato da Orlando’s, Parla con Mev: Anna era un’amica d’infanzia che non si ricorda più di lei. Ed è la decima.De vuelta en Orlando’s, Hablar con Mev: Anna era una amiga de la infancia que ya no se acuerda de ella. Es la décima.
The policeLa policeDie PolizeiLa poliziaLa policía
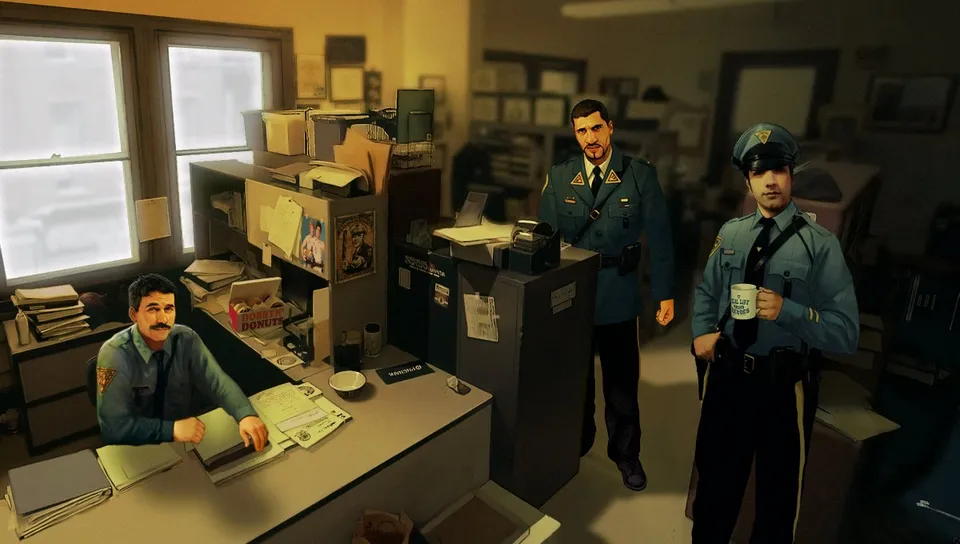
- Go up North Road to the police station and go in.Remontez North Road jusqu’au Poste de police et entrez.Geh die North Road hinauf zur Polizeistation und geh hinein.Risali North Road fino alla Stazione di polizia ed entra.Sube por North Road hasta la Estación de policía y entra.
- The three officers, Joe, Kurt and Steeve, don’t take Louis seriously and send him away. Outside, he decides to give them proof.Les trois policiers, Joe, Kurt et Steeve, ne prennent pas Louis au sérieux et le renvoient. Dehors, il décide de leur apporter des preuves.Die drei Beamten, Joe, Kurt und Steeve, nehmen Louis nicht ernst und schicken ihn weg. Draußen beschließt er, ihnen Beweise zu bringen.I tre agenti, Joe, Kurt e Steeve, non prendono Louis sul serio e lo mandano via. Fuori, decide di portare loro delle prove.Los tres agentes, Joe, Kurt y Steeve, no se toman en serio a Louis y lo echan. Fuera, decide llevarles pruebas.
Fish and his skeleton keyFish et son passe-partoutFish und sein DietrichFish e il suo grimaldelloFish y su llave maestra
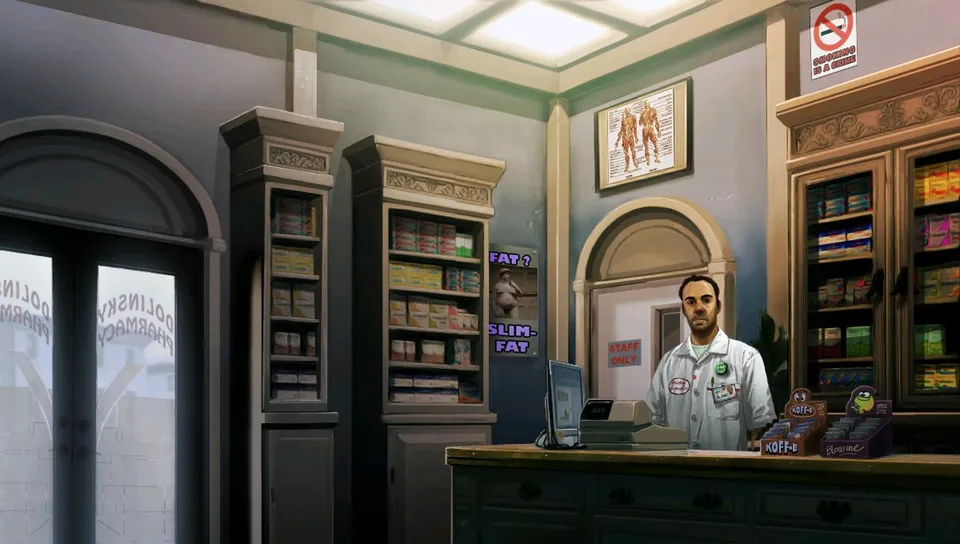
- Go to the city centre. Don leaves for a snack, and Fish picks the pharmacy’s lock behind him.Allez au centre-ville. Don part grignoter, et Fish crochète la serrure de la pharmacie derrière lui.Geh ins Stadtzentrum. Don geht kurz essen, und Fish knackt hinter ihm das Schloss der Apotheke.Vai in centro. Don esce per uno spuntino, e Fish scassina la serratura della farmacia dietro di lui.Ve al centro. Don sale a picar algo, y Fish fuerza la cerradura de la farmacia tras él.
- Go into the pharmacy and Speak to Fish. He runs off, daring you to catch him.Entrez dans la pharmacie et Parler à Fish. Il s’enfuit en vous mettant au défi de l’attraper.Geh in die Apotheke und Sprechen mit Fish. Er rennt davon und fordert dich heraus, ihn zu fangen.Entra in farmacia e Parla con Fish. Scappa, sfidandoti a prenderlo.Entra en la farmacia y Hablar con Fish. Sale corriendo, retándote a atraparlo.
- Find him in each of his hiding places in turn, and Speak to him each time: on North Road, at Orlando’s, up a tree in the woods, posing as a statue in Astrid’s cellar, by John’s front door, and in the storage room of the antique shop.Trouvez-le dans chacune de ses cachettes l’une après l’autre, et Parler avec lui à chaque fois : sur North Road, chez Orlando’s, en haut d’un arbre dans les bois, en statue dans la cave d’Astrid, près de la porte d’entrée de John, et dans la remise de la boutique d’antiquités.Finde ihn nacheinander in jedem seiner Verstecke und Sprechen jedes Mal mit ihm: auf der North Road, im Orlando’s, auf einem Baum im Wald, als Statue in Astrids Keller, an Johns Haustür und im Lagerraum des Antiquitätenladens.Trovalo in ciascuno dei suoi nascondigli, uno dopo l’altro, e Parla con lui ogni volta: su North Road, da Orlando’s, in cima a un albero nel bosco, in posa da statua nella cantina di Astrid, vicino alla porta d’ingresso di John, e nel magazzino del negozio d’antiquariato.Encuéntralo en cada uno de sus escondites por turno, y Hablar con él cada vez: en North Road, en Orlando’s, subido a un árbol del bosque, haciéndose pasar por estatua en el sótano de Astrid, junto a la puerta de John y en el cobertizo de la tienda de antigüedades.
- Caught at last in the storage room, he gives you his skeleton key to keep you quiet.Enfin coincé dans la remise, il vous donne son passe-partout pour acheter votre silence.Endlich im Lagerraum erwischt, gibt er dir seinen Dietrich, damit du schweigst.Preso finalmente nel magazzino, ti dà il suo grimaldello per comprare il tuo silenzio.Atrapado por fin en el cobertizo, te da su llave maestra para que no digas nada.
- While you’re on North Road, a bus to New York pulls away, and a tourist has left a camera on the seat. Take it.Pendant que vous êtes sur North Road, un bus pour New York démarre, et un touriste a oublié un appareil photo sur le banc. Prendre.Während du auf der North Road bist, fährt ein Bus nach New York ab, und ein Tourist hat eine Kamera auf der Bank liegen lassen. Nehmen.Mentre sei su North Road, un autobus per New York parte, e un turista ha lasciato una macchina fotografica sulla panchina. Prendi.Mientras estás en North Road, sale un autobús a Nueva York, y un turista se ha dejado una cámara en el banco. Tomar.
Anna’s phone and the groceryLe téléphone d’Anna et l’épicerieAnnas Handy und der LadenIl cellulare di Anna e la drogheriaEl móvil de Anna y la tienda
- Astrid has gone. In her room upstairs, Take the telephone from the table: it’s Anna’s phone, with a small key, the grocery key.Astrid est partie. Dans sa chambre à l’étage, Prendre le Téléphone sur la table : c’est le téléphone d’Anna, avec une petite clef, la clé de l’épicerie.Astrid ist weg. Nehmen in ihrem Zimmer oben: das Telefon vom Tisch; es ist Annas Handy, mit einem kleinen Schlüssel, dem Ladenschlüssel.Astrid se n’è andata. Nella sua camera al piano di sopra, Prendi il Telefono dal tavolo: è il cellulare di Anna, con una chiavetta, la chiave della drogheria.Astrid se ha ido. En su habitación de arriba, Tomar el Teléfono de la mesa: es el móvil de Anna, con una llave pequeña, la llave de la tienda.
- The phone opens. Her voicemail is full of the same strange sound, dozens of times: one piece of evidence. Open her messages too: “Remember, my password is my old license plate number.”Le téléphone s’ouvre. Sa messagerie est pleine du même son étrange, des dizaines de fois : une preuve. Ouvrez aussi ses messages : « Rappel, mon mot de passe est mon ancienne plaque d’immatriculation. »Das Handy öffnet sich. Ihr Anrufbeantworter ist voll vom selben seltsamen Geräusch, Dutzende Male: ein Beweis. Öffne auch ihre Nachrichten: „Denk daran, mein Passwort ist mein altes Kennzeichen.“Il cellulare si apre. La segreteria è piena dello stesso strano suono, decine di volte: una prova. Apri anche i suoi messaggi: «Non dimenticarti che la mia password è il numero della mia vecchia targa.»El móvil se abre. Su buzón de voz está lleno del mismo sonido extraño, docenas de veces: una prueba. Abre también sus mensajes: «Recuerda, mi contraseña es mi antiguo número de matrícula.»
- In the city centre, use the grocery key on the grocery’s door (or pick the lock) and go in.Au centre-ville, utilisez la clé de l’épicerie sur sa porte (ou crochetez la serrure) et entrez.Benutze im Stadtzentrum den Ladenschlüssel an der Tür des Ladens (oder knack das Schloss) und geh hinein.In centro, usa la chiave della drogheria sulla sua porta (o scassina la serratura) ed entra.En el centro, usa la llave de la tienda con su puerta (o fuerza la cerradura) y entra.
- Take the can left on the counter. In the inventory, take its lid off: inside is the cash register key.Prenez la boîte laissée sur le comptoir. Dans l’inventaire, enlevez son couvercle : à l’intérieur se trouve la clé de la caisse.Nimm die Dose, die auf der Theke steht. Nimm im Inventar ihren Deckel ab: Darin ist der Kassenschlüssel.Prendi il barattolo lasciato sul bancone. Nell’inventario, togli il coperchio: dentro c’è la chiave del registratore di cassa.Coge la lata que hay en el mostrador. En el inventario, quítale la tapa: dentro está la llave de la caja registradora.
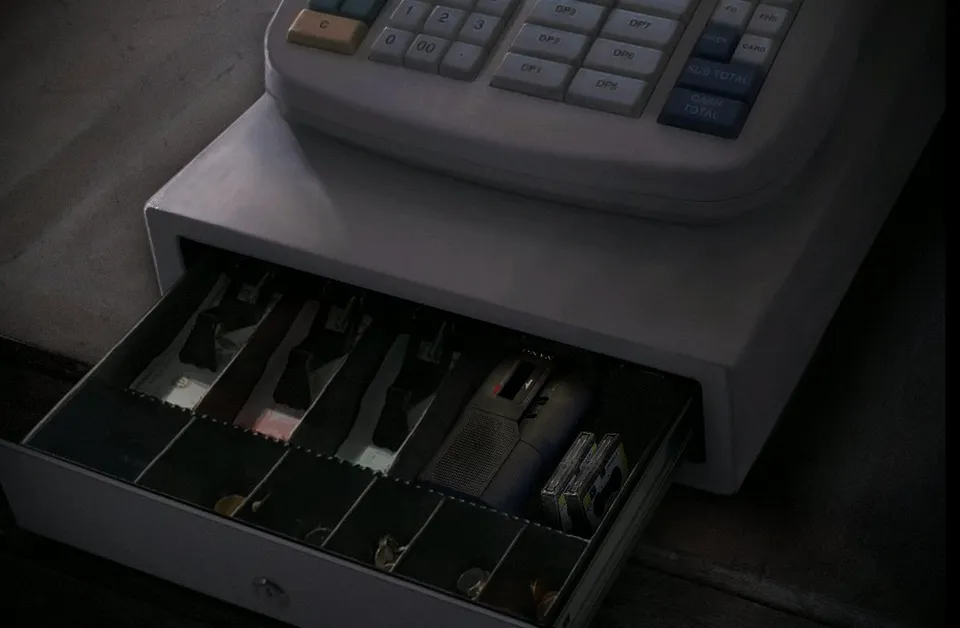
- Use it on the cash register. Inside are your old dictaphone, a blank tape and Anna’s tape, which plays a conversation between Anna and a stranger. A second piece of evidence.Utiliser sur la Caisse. À l’intérieur se trouvent votre vieux dictaphone, une cassette vierge et la cassette d’Anna, qui fait entendre une conversation entre Anna et un inconnu. Une deuxième preuve.Benutzen: ihn an der Kasse. Darin sind dein altes Diktiergerät, eine leere Kassette und Annas Kassette, auf der ein Gespräch zwischen Anna und einem Fremden zu hören ist. Ein zweiter Beweis.Usala sul Registratore di cassa. Dentro ci sono il tuo vecchio dittafono, una cassetta vergine e la cassetta di Anna, con una conversazione tra Anna e uno sconosciuto. Una seconda prova.Utilizar con la Registradora. Dentro están tu viejo dictáfono, una cinta virgen y la cinta de Anna, con una conversación entre Anna y un desconocido. Una segunda prueba.
- Note the old Illinois license plate on the wall: BTK68W.Notez la vieille Plaque de l’Illinois au mur : BTK68W.Merk dir das alte Nummernschild aus Illinois an der Wand: BTK68W.Annota la vecchia Targa dell’Illinois sul muro: BTK68W.Apunta la vieja Matrícula de Illinois de la pared: BTK68W.
- Open the trapdoor into the storeroom and take the film for your camera. Come back later for the string: Louis only takes it once he has a lamp.Ouvrir la Trappe de la réserve et prenez la pellicule pour votre appareil. Revenez plus tard pour la ficelle : Louis ne la prend qu’une fois qu’il a une lampe.Öffnen an der Falltür zum Lager, und nimm den Film für deine Kamera. Komm später wegen der Schnur wieder: Louis nimmt sie erst, wenn er eine Lampe hat.Apri la Botola del magazzino e prendi la pellicola per la macchina fotografica. Torna più tardi per lo spago: Louis lo prende solo quando ha una lampada.Abrir en la Trampilla del almacén y coge el carrete para tu cámara. Vuelve luego a por el cordel: Louis solo lo coge cuando tiene una lámpara.
Light in the cellarDe la lumière dans la caveLicht im KellerLuce in cantinaLuz en el sótano
A lampUne lampeEine LampeUna lampadaUna lámpara
- In your Garden, use the skeleton key on the padlocked basement trapdoor and pick it. Go down.Dans votre Jardin, utilisez le passe-partout sur la trappe cadenassée de la Cave et crochetez-la. Descendez.Benutze in deinem Garten den Dietrich an der mit Vorhängeschloss gesicherten Falltür zum Keller und knack sie. Geh hinunter.In Giardino, usa il grimaldello sulla botola col lucchetto del Seminterrato e scassinala. Scendi.En tu Jardín, usa la llave maestra con la trampilla con candado del Sótano y fuérzala. Baja.
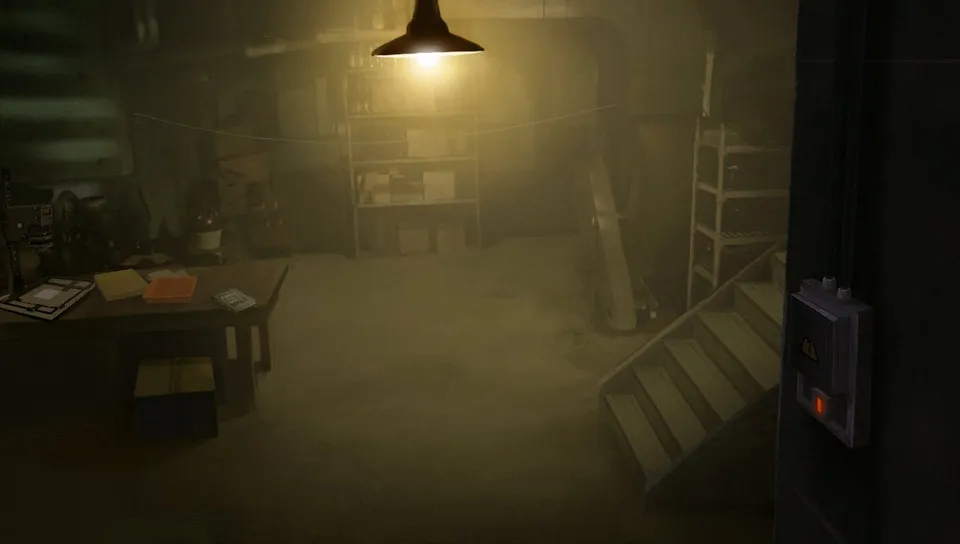
- It’s pitch dark. Use the matches: that was the last one. Louis needs a better light.Il fait nuit noire. Utiliser les allumettes : c’était la dernière. Louis a besoin d’une meilleure lumière.Es ist stockdunkel. Benutzen: die Streichhölzer; das war das letzte. Louis braucht ein besseres Licht.È buio pesto. Usa i fiammiferi: era l’ultimo. Louis ha bisogno di una luce migliore.Está completamente oscuro. Utilizar las cerillas: era la última. Louis necesita una luz mejor.
- In the antique shop’s storage room, take the old kerosene gas lamp. It needs fuel and a wick.Dans la Remise de la boutique d’antiquités, prenez la vieille lampe à gaz à pétrole. Il lui faut du combustible et une mèche.Nimm im Lagerraum des Antiquitätenladens die alte Petroleum-Gaslampe. Sie braucht Brennstoff und einen Docht.Nel Magazzino del negozio d’antiquariato, prendi la vecchia lampada a gas a petrolio. Le servono combustibile e stoppino.En el Cobertizo de la tienda de antigüedades, coge la vieja lámpara de gas de queroseno. Necesita combustible y una mecha.
- In the grocery’s storeroom, take the string, and combine it with the lamp.Dans la réserve de l’épicerie, prenez la ficelle, et combinez-la avec la lampe.Nimm im Lager des Ladens die Schnur und kombiniere sie mit der Lampe.Nel magazzino della drogheria, prendi lo spago, e combinalo con la lampada.En el almacén de la tienda, coge el cordel y combínalo con la lámpara.
Don’s safeLe coffre de DonDons SafeLa cassaforte di DonLa caja fuerte de Don
- Don is out. In the pharmacy, use the skeleton key on the storage area door and pick the lock.Don est sorti. Dans la pharmacie, utilisez le passe-partout sur la porte de la Remise et crochetez la serrure.Don ist weg. Benutze in der Apotheke den Dietrich an der Tür zum Lagerraum und knack das Schloss.Don è fuori. In farmacia, usa il grimaldello sulla porta del Magazzino e scassina la serratura.Don ha salido. En la farmacia, usa la llave maestra con la puerta del Cobertizo (el almacén) y fuerza la cerradura.
- Open the left cabinet, then try to Open the safe in it. Louis can’t hear the tumblers: he needs to amplify them.Ouvrir le Placard de gauche, puis essayez d’Ouvrir le Coffre à l’intérieur. Louis n’entend pas le mécanisme : il faut l’amplifier.Öffnen am linken Schrank, dann versuch Öffnen am Safe darin. Louis hört die Zuhaltungen nicht: Er muss sie verstärken.Apri l’Armadietto di sinistra, poi prova ad Aprire la Cassaforte al suo interno. Louis non sente il meccanismo: deve amplificarlo.Abrir en la Alacena de la izquierda, y luego intenta Abrir la Caja fuerte de dentro. Louis no oye el mecanismo: necesita amplificarlo.
- Back in the shop, take the stethoscope from the counter.De retour dans la boutique, prenez le stéthoscope sur le comptoir.Nimm zurück im Laden das Stethoskop von der Theke.Tornato in negozio, prendi lo stetoscopio dal bancone.De vuelta en la tienda, coge el estetoscopio del mostrador.
- Take the receipt in the storage area: the arrows scribbled on its back are the safe’s combination.Prenez le ticket de caisse dans la remise : les flèches griffonnées au dos sont la combinaison du coffre.Nimm den Kassenbon im Lagerraum: Die Pfeile auf seiner Rückseite sind die Kombination des Safes.Prendi lo scontrino nel magazzino: le frecce scarabocchiate sul retro sono la combinazione della cassaforte.Coge el recibo del almacén: las flechas garabateadas en el dorso son la combinación de la caja fuerte.
- Use the stethoscope on the safe. The dial clicks loudly on each number of the code: right to 50, left to 30, right to 70, left to 10.Utiliser le stéthoscope sur le coffre. La molette claque fort sur chaque chiffre du code : à droite jusqu’à 50, à gauche jusqu’à 30, à droite jusqu’à 70, à gauche jusqu’à 10.Benutzen: das Stethoskop am Safe. Das Rad klickt laut bei jeder Zahl des Codes: rechts auf 50, links auf 30, rechts auf 70, links auf 10.Usa lo stetoscopio sulla cassaforte. La manopola scatta forte su ogni numero del codice: a destra fino a 50, a sinistra fino a 30, a destra fino a 70, a sinistra fino a 10.Utilizar el estetoscopio con la caja fuerte. El dial chasquea fuerte en cada número del código: a la derecha hasta 50, a la izquierda hasta 30, a la derecha hasta 70, a la izquierda hasta 10.
- Take the gasoline from the safe and combine it with the lamp. The lamp works.Prenez l’essence dans le coffre et combinez-la avec la lampe. La lampe fonctionne.Nimm das Benzin aus dem Safe und kombiniere es mit der Lampe. Die Lampe funktioniert.Prendi la benzina dalla cassaforte e combinala con la lampada. La lampada funziona.Coge la gasolina de la caja fuerte y combínala con la lámpara. La lámpara funciona.
The fuseLe fusibleDie SicherungIl fusibileEl fusible
- In the cellar, use the lamp on the darkness. Open the circuit breaker and Remove the fuse: it’s fried.Dans la cave, utilisez la lampe sur l’obscurité. Ouvrir le Disjoncteur et Retirer le fusible : il est grillé.Benutze im Keller die Lampe an der Dunkelheit. Öffnen am Hauptschalter und Entfernen: die Sicherung; sie ist durchgebrannt.In cantina, usa la lampada sul buio. Apri l’Interruttore generale e Rimuovi il fusibile: è bruciato.En el sótano, usa la lámpara en la oscuridad. Abrir en el Disyuntor y Remover el fusible: está fundido.
- John isn’t home any more. At his front door, Look inside the flowerpot for John’s key, and let yourself in.John n’est plus chez lui. À sa porte d’entrée, Fouiller le Pot de fleur pour trouver la clé de John, et entrez.John ist nicht mehr zu Hause. Durchsuchen an seiner Haustür: den Blumenkübel, nach Johns Schlüssel, und lass dich selbst hinein.John non è più in casa. Alla sua porta d’ingresso, Guarda all’interno del Vaso da fiori per trovare la chiave di John, ed entra.John ya no está en casa. En su puerta, Revisar el Jarro de flores para encontrar la llave de John, y entra.
- In John’s kitchen, take the carpenter’s hammer.Dans la cuisine de John, prenez le marteau à clou.Nimm in Johns Küche den Zimmermannshammer.Nella cucina di John, prendi il martello da carpentiere.En la cocina de John, coge el martillo de carpintero.
- John’s bedroom is full of crates of cigarettes. Use the hammer on a crate and rock out its twelve nails: drag up and down until each one comes out.La chambre de John est pleine de caisses de cigarettes. Utiliser le marteau sur une Caisse et délogez ses douze clous : faites glisser de haut en bas jusqu’à ce que chacun sorte.Johns Schlafzimmer ist voller Kisten mit Zigaretten. Benutzen: den Hammer an einer Kiste, und wackle ihre zwölf Nägel heraus: Zieh auf und ab, bis jeder herauskommt.La camera di John è piena di casse di sigarette. Usa il martello su una cassa e scalza i suoi dodici chiodi: trascina su e giù finché ognuno non esce.El dormitorio de John está lleno de cajas de cigarrillos. Utilizar el martillo con una caja y saca sus doce clavos: arrastra arriba y abajo hasta que salga cada uno.
- Take a pack of cigarettes. In the inventory, look at it: Louis takes the aluminium foil out.Prenez un paquet de Cigarettes. Dans l’inventaire, regardez-le : Louis en sort la feuille d’aluminium.Nimm eine Schachtel Zigaretten. Sieh sie dir im Inventar an: Louis nimmt die Aluminiumfolie heraus.Prendi un pacchetto di Sigarette. Nell’inventario, guardalo: Louis tira fuori la carta d’alluminio.Coge un paquete de cigarrillos. En el inventario, míralo: Louis saca el papel de aluminio.
- Combine the fuse with the aluminium to make a repaired fuse, and use it on the circuit breaker in your cellar.Combinez le fusible avec l’aluminium pour obtenir un fusible réparé, et utilisez-le sur le Disjoncteur de votre cave.Kombiniere die Sicherung mit dem Aluminium zu einer reparierten Sicherung und benutze sie am Hauptschalter in deinem Keller.Combina il fusibile con l’alluminio per fare un fusibile riparato, e usalo sull’Interruttore generale della tua cantina.Combina el fusible con el aluminio para hacer un fusible reparado, y úsalo en el Disyuntor de tu sótano.
- Turn on the light switch. The electricity is back on, and a telephone starts ringing somewhere upstairs.Allumer l’Interrupteur. L’électricité revient, et un téléphone se met à sonner quelque part à l’étage.Einschalten am Lichtschalter. Der Strom ist wieder da, und irgendwo oben beginnt ein Telefon zu klingeln.Accendi l’Interruttore. La corrente torna, e da qualche parte al piano di sopra comincia a squillare un telefono.Encender el Interruptor. Vuelve la luz, y en algún lugar de arriba empieza a sonar un teléfono.
In the lightÀ la lumièreIm LichtAlla luceA la luz
- Read the book on the shelf, Camera Obscura: to develop film you need a developer, a fixing agent and a red light.Lire le livre sur l’étagère, Camera Obscura : pour développer une pellicule, il faut un révélateur, un fixateur et une lumière rouge.Lesen: das Buch im Regal, Camera Obscura; um einen Film zu entwickeln, braucht man Entwickler, Fixierer und Rotlicht.Leggi il libro sullo scaffale, Camera Obscura: per sviluppare una pellicola servono uno sviluppo, un fissaggio e una luce rossa.Leer el libro de la estantería, Camera Obscura: para revelar un carrete hace falta revelador, fijador y luz roja.
- Upstairs, past the Hall, go up the Stairs. The study door’s knob is missing. Louis remembers the box of door handles a seller once palmed off on him.En haut, après le Couloir, montez l’Escalier. Il manque la poignée de la porte du bureau. Louis se souvient de la boîte de poignées qu’un vendeur lui avait refilée.Oben, hinter dem Flur, geh die Treppe hinauf. An der Tür zum Arbeitszimmer fehlt die Klinke. Louis erinnert sich an die Kiste mit Türklinken, die ihm ein Verkäufer einmal angedreht hat.Di sopra, oltre la Sala, sali le Scale. Alla porta dello studio manca la maniglia. Louis si ricorda della scatola di maniglie che un venditore gli aveva rifilato.Arriba, pasado el pasillo, sube la escalera. A la puerta del estudio le falta la manilla. Louis recuerda la caja de manillas que un vendedor le endosó una vez.
- In the cellar, Open the cardboard box and take a door handle.Dans la cave, Ouvrir le Carton et prenez une poignée de porte.Öffnen im Keller: den Karton, und nimm eine Türklinke.In cantina, Apri la Scatola di cartone e prendi una maniglia.En el sótano, Abrir en la Caja de cartón y coge una manilla.
- In the pharmacy’s storage area, Open the right cabinet now that you know what you’re looking for, and take the developer and the fixative.Dans la remise de la pharmacie, Ouvrir le Placard de droite maintenant que vous savez ce que vous cherchez, et prenez le révélateur et le fixateur.Öffnen im Lagerraum der Apotheke: den rechten Schrank, jetzt, wo du weißt, was du suchst, und nimm den Entwickler und den Fixierer.Nel magazzino della farmacia, Apri l’Armadietto di destra ora che sai cosa cerchi, e prendi lo sviluppo e il fissaggio.En el almacén de la farmacia, Abrir en la Alacena de la derecha ahora que sabes lo que buscas, y coge el revelador y el fijador.
Anna’s studyLe bureau d’AnnaAnnas ArbeitszimmerLo studio di AnnaEl estudio de Anna
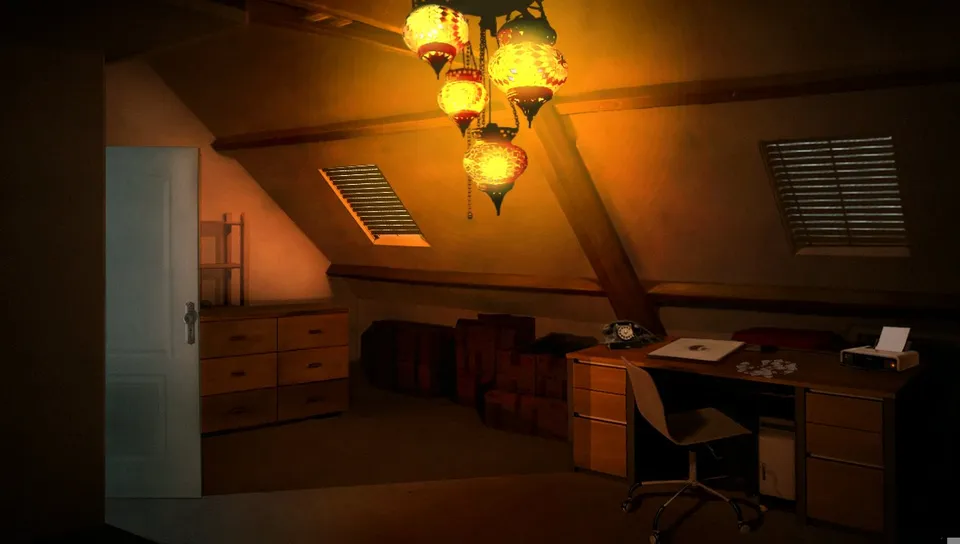
- Use the door handle on the study door and go in. Turn on the light switch: Anna has turned the room into her office.Utiliser la poignée sur la Porte du bureau et entrez. Allumer l’Interrupteur : Anna a fait de la pièce son bureau.Benutzen: die Türklinke an der Tür des Arbeitszimmers, und geh hinein. Einschalten am Lichtschalter: Anna hat das Zimmer zu ihrem Büro gemacht.Usa la maniglia sulla Porta dello studio ed entra. Accendi l’Interruttore: Anna ha trasformato la stanza nel suo ufficio.Utilizar la manilla con la Puerta del estudio y entra. Encender el Interruptor: Anna ha convertido la habitación en su despacho.
- Answer the telephone. The line carries voices and something like gunfire, over and over.Décrocher le Téléphone. On entend sur la ligne des voix et quelque chose comme des coups de feu, encore et encore.Abheben am Telefon. In der Leitung sind Stimmen und etwas wie Schüsse zu hören, immer wieder.Rispondi al Telefono. Sulla linea si sentono voci e qualcosa di simile a spari, ancora e ancora.Contestar el Teléfono. En la línea se oyen voces y algo parecido a disparos, una y otra vez.
- Combine the dictaphone with the blank tape, then use the dictaphone on the telephone. A third piece of evidence.Combinez le dictaphone avec la cassette vierge, puis utilisez le dictaphone sur le Téléphone. Une troisième preuve.Kombiniere das Diktiergerät mit der leeren Kassette, dann benutze das Diktiergerät am Telefon. Ein dritter Beweis.Combina il dittafono con la cassetta vergine, poi usa il dittafono sul Telefono. Una terza prova.Combina el dictáfono con la cinta virgen, y luego usa el dictáfono con el Teléfono. Una tercera prueba.
- Investigate the papers on the desk, then Inspect them: two photos torn into pieces. Put each back together, dragging every piece into place; the second photo’s pieces also have to be turned upright with the ring around them. A fourth piece of evidence: they show Anna in the scene from Louis’ nightmare.Examiner les Papiers sur le bureau, puis Inspecter : deux photos déchirées en morceaux. Reconstituez chacune en faisant glisser chaque morceau à sa place ; les morceaux de la seconde doivent aussi être redressés avec l’anneau qui les entoure. Une quatrième preuve : elles montrent Anna dans la scène du cauchemar de Louis.Betrachten: die Papiere auf dem Schreibtisch, dann Untersuchen: zwei in Stücke zerrissene Fotos. Setz jedes wieder zusammen, indem du jedes Stück an seinen Platz ziehst; die Stücke des zweiten Fotos müssen außerdem mit dem Ring um sie herum aufgerichtet werden. Ein vierter Beweis: Sie zeigen Anna in der Szene aus Louis’ Albtraum.Esamina le Scartoffie sulla scrivania, poi Esamina di nuovo: due foto strappate a pezzi. Ricomponile, trascinando ogni pezzo al suo posto; i pezzi della seconda foto vanno anche raddrizzati con l’anello intorno. Una quarta prova: mostrano Anna nella scena dell’incubo di Louis.Examinar en los Papeles del escritorio, y luego Inspeccionar: dos fotos rotas en pedazos. Recompón cada una arrastrando cada trozo a su sitio; los trozos de la segunda también hay que enderezarlos con el anillo que los rodea. Una cuarta prueba: muestran a Anna en la escena de la pesadilla de Louis.
- Turn on the computer, then Consult it. Type the password BTK68W. (Read Anna’s messages first: the laptop knows if you didn’t.)Allumer l’Ordinateur, puis Consulter. Tapez le mot de passe BTK68W. (Lisez d’abord les messages d’Anna : l’ordinateur sait si vous ne l’avez pas fait.)Einschalten: den Computer, dann Nachsehen. Tippe das Passwort BTK68W. (Lies zuerst Annas Nachrichten: Der Laptop weiß, wenn du es nicht getan hast.)Accendi il Computer, poi Consulta. Digita la password BTK68W. (Prima leggi i messaggi di Anna: il portatile sa se non l’hai fatto.)Encender el Ordenador, y luego Consultar. Escribe la contraseña BTK68W. (Lee antes los mensajes de Anna: el portátil sabe si no lo has hecho.)
- Open the mailbox and read both emails. Press print in each one, then go back.Ouvrez la messagerie et lisez les deux emails. Appuyez sur imprimer dans chacun, puis revenez.Öffne das Postfach und lies beide E-Mails. Drück in jeder auf Drucken, dann geh zurück.Apri la posta e leggi entrambe le email. Premi stampa in ognuna, poi torna indietro.Abre el correo y lee los dos mensajes. Pulsa imprimir en cada uno, y luego vuelve.
- Take Anna’s emails from the printer: a bank statement and a letter signed by a certain Antony. A fifth piece of evidence.Prenez les emails d’Anna sur l’Imprimante : un relevé bancaire et une lettre signée par un certain Antony. Une cinquième preuve.Nimm Annas E-Mails aus dem Drucker: ein Kontoauszug und ein Brief, unterzeichnet von einem gewissen Antony. Ein fünfter Beweis.Prendi le email di Anna dalla Stampante: un estratto conto e una lettera firmata da un certo Antony. Una quinta prova.Coge los correos de Anna de la impresora: un extracto bancario y una carta firmada por un tal Antony. Una quinta prueba.
The graffiti photosLes photos des graffitisDie Graffiti-FotosLe foto dei graffitiLas fotos de las pintadas
Seven photosSept photosSieben FotosSette fotoSiete fotos
- Combine the camera with the film.Combinez l’appareil photo avec la pellicule.Kombiniere die Kamera mit dem Film.Combina la macchina fotografica con il rullino.Combina la cámara con el carrete.
- Photograph all seven graffiti by using the camera on each one: behind the painting in your Hall (Lift it first), on the fridge in the Kitchen (Close it first), behind the painting in the Lounge (Take it down), under the bathmat in the Bathroom (Lift it), on the Bedroom door, behind the painting in the antique shop (Push it), and on the wall of John’s bedroom.Photographiez les sept graffitis en utilisant l’appareil photo sur chacun : derrière le Tableau de votre Couloir (Soulever d’abord), sur le Frigo de la Cuisine (Fermer d’abord), derrière le Tableau du Salon (Décrocher), sous le Tapis de la Salle de bain (Soulever), sur la porte de la Chambre, derrière le Tableau de la boutique d’antiquités (Pousser), et sur le mur de la chambre de John.Fotografiere alle sieben Graffiti, indem du die Kamera an jedem benutzt: hinter dem Gemälde in deinem Flur (vorher Anheben), am Kühlschrank in der Küche (vorher Schließen), hinter dem Gemälde im Wohnzimmer (Abnehmen), unter der Badematte im Badezimmer (Anheben), an der Tür vom Schlafzimmer, hinter dem Gemälde im Antiquitätenladen (Drücken) und an der Wand von Johns Schlafzimmer.Fotografa tutti e sette i graffiti usando la macchina fotografica su ognuno: dietro il Quadro della tua Sala (prima Alza), sul Frigorifero in Cucina (prima Chiudi), dietro il Quadro del Salotto (Leva), sotto il Tappeto del bagno in bagno (Alza), sulla porta della camera, dietro il Quadro del negozio d’antiquariato (Premi), e sul muro della camera di John.Fotografía las siete pintadas usando la cámara en cada una: detrás del Cuadro del pasillo (antes Levantar), en la Nevera de la Cocina (antes Cerrar), detrás del Cuadro del salón (Descolgar), bajo la Alfombra del Baño (Levantar), en la puerta del Dormitorio, detrás del Cuadro de la tienda de antigüedades (Empujar) y en la pared del dormitorio de John.
- After the seventh, Louis takes the film out of the camera.Après la septième, Louis retire la pellicule de l’appareil.Nach dem siebten nimmt Louis den Film aus der Kamera.Dopo la settima, Louis toglie il rullino dalla macchina.Tras la séptima, Louis saca el carrete de la cámara.
The darkroomLa chambre noireDie DunkelkammerLa camera oscuraEl cuarto oscuro
- Go back to the Vanpsychs’ house through the window. Once you’ve read Camera Obscura, Igmar is no longer on guard. In the empty red room, Look inside the piece of furniture and take a red lightbulb.Retournez chez les Vanpsych par la fenêtre. Une fois Camera Obscura lu, Igmar ne monte plus la garde. Dans la pièce rouge vide, Fouiller le Meuble et prenez une ampoule rouge.Geh durchs Fenster zurück ins Haus der Vanpsychs. Hast du Camera Obscura gelesen, hält Igmar keine Wache mehr. Durchsuchen im leeren roten Zimmer: das Möbelstück, und nimm eine rote Glühbirne.Torna a casa dei Vanpsych dalla finestra. Dopo aver letto Camera Obscura, Igmar non fa più la guardia. Nella stanza rossa vuota, Guarda all’interno del Mobile e prendi una lampadina rossa.Vuelve a la casa de los Vanpsych por la ventana. Una vez leído Camera Obscura, Igmar ya no monta guardia. En la habitación roja vacía, Revisar en el Mueble y coge una bombilla roja.
- In your cellar, Turn off the light. Unscrew the hot lamp to take out the white lightbulb, use the red lightbulb on the lamp, and turn the light back on.Dans votre cave, Eteindre la lumière. Dévisser la Lampe chaude pour sortir l’ampoule blanche, utilisez l’ampoule rouge sur la lampe, et rallumez.Ausschalten in deinem Keller: das Licht. Herausschrauben an der heißen Lampe, um die weiße Glühbirne herauszunehmen, benutze die rote Glühbirne an der Lampe und schalte das Licht wieder ein.Nella tua cantina, Spegni la luce. Svita la Lampada calda per togliere la lampadina bianca, usa la lampadina rossa sulla lampada, e riaccendi la luce.En tu sótano, Apagar la luz. Desatornillar la Lámpara caliente para sacar la bombilla blanca, usa la bombilla roja con la lámpara, y vuelve a encender la luz.
- Use the developer and the fixative on the basin.Utiliser le révélateur et le fixateur sur le Bac.Benutzen: den Entwickler und den Fixierer am Becken.Usa lo sviluppo e il fissaggio sul Contenitore.Utilizar el revelador y el fijador con la Bandeja.
- Use the film on the enlarger. An hour later, the photos are hanging up to dry: Take the photos. The sixth piece of evidence.Utiliser la pellicule sur l’Agrandisseur. Une heure plus tard, les photos sèchent, suspendues : Prendre les photos. La sixième preuve.Benutzen: den Film am Vergrößerer. Eine Stunde später hängen die Fotos zum Trocknen: Nehmen: die Fotos. Der sechste Beweis.Usa la pellicola sull’Ingranditore. Un’ora dopo, le foto sono appese ad asciugare: Prendi le foto. La sesta prova.Utilizar el carrete con la Ampliadora. Una hora después, las fotos están colgadas secándose: Tomar las fotos. La sexta prueba.
Back to the policeRetour à la policeZurück zur PolizeiDi nuovo dalla poliziaDe vuelta a la policía

- Go to the police station and Speak to any of the officers.Allez au commissariat et Parler à l’un des policiers.Geh zur Polizeiwache und Sprechen mit einem der Beamten.Vai al commissariato e Parla con uno qualsiasi degli agenti.Ve a la comisaría y Hablar con cualquiera de los agentes.
- Louis lays it all out: the photos of his house, his shop and John’s crates, Anna’s emails and her torn photos, her voicemail and the recordings. The noise on the tapes is strangely familiar to them… and it gives one of them a headache.Louis étale tout : les photos de sa maison, de sa boutique et des caisses de John, les emails d’Anna et ses photos déchirées, sa messagerie et les enregistrements. Le bruit sur les bandes leur est étrangement familier… et il donne mal à la tête à l’un d’eux.Louis legt alles auf den Tisch: die Fotos von seinem Haus, seinem Laden und Johns Kisten, Annas E-Mails und ihre zerrissenen Fotos, ihren Anrufbeantworter und die Aufnahmen. Das Geräusch auf den Bändern kommt ihnen seltsam bekannt vor … und einem von ihnen bereitet es Kopfschmerzen.Louis mette tutto in tavola: le foto della sua casa, del suo negozio e delle casse di John, le email di Anna e le sue foto strappate, la sua segreteria e le registrazioni. Il rumore sui nastri è stranamente familiare per loro… e a uno di loro fa venire il mal di testa.Louis lo expone todo: las fotos de su casa, de su tienda y de las cajas de John, los correos de Anna y sus fotos rotas, su buzón de voz y las grabaciones. El ruido de las cintas les resulta extrañamente familiar… y a uno de ellos le da dolor de cabeza.
- Louis wakes up on a beach, being told to stay calm and that he’ll be taken back to his room. “But… this is a NIGHTMARE!!” The episode ends.Louis se réveille sur une plage, où on lui dit de rester calme et qu’on va le ramener dans sa chambre. « Mais… c’est un CAUCHEMAR !! » L’épisode se termine.Louis wacht an einem Strand auf, man sagt ihm, er solle ruhig bleiben, man bringe ihn zurück in sein Zimmer. „Aber … das ist ein ALBTRAUM!!“ Die Episode endet.Louis si sveglia su una spiaggia, dove gli dicono di stare calmo e che lo riporteranno nella sua stanza. «Ma… è un INCUBO!!» L’episodio finisce.Louis despierta en una playa, donde le dicen que se calme y que lo llevarán de vuelta a su habitación. «Pero… ¡¡esto es una PESADILLA!!» El episodio termina.
If you’re stuckSi vous êtes bloquéWenn du feststeckstSe sei bloccatoSi te atascas
- Louis won’t leave John’s houseLouis ne veut pas quitter la maison de JohnLouis will Johns Haus nicht verlassenLouis non vuole uscire dalla casa di JohnLouis no quiere salir de la casa de John
- Ask John all eight questions; tap “colleague” for the last one.Posez à John les huit questions ; touchez « collègue » pour la dernière.Stell John alle acht Fragen; tippe für die letzte „Kollege“ an.Fai a John tutte e otto le domande; tocca «collega» per l’ultima.Hazle a John las ocho preguntas; toca «universidad» (colleague) para la última.
- The paths to town and the woods are closedLes chemins vers la ville et les bois sont fermésDie Wege in die Stadt und in den Wald sind gesperrtI sentieri per la città e il bosco sono chiusiLos caminos al pueblo y al bosque están cerrados
- Go home, see the bedroom, and come back out through the garden.Rentrez chez vous, voyez la chambre, et ressortez par le jardin.Geh nach Hause, sieh dir das Schlafzimmer an und komm durch den Garten wieder heraus.Vai a casa, guarda la camera, ed esci dal giardino.Ve a casa, mira el dormitorio y vuelve a salir por el jardín.
- Astrid’s house seems emptyLa maison d’Astrid semble videAstrids Haus scheint leerLa casa di Astrid sembra vuotaLa casa de Astrid parece vacía
- Try to go into the grocery in the city centre first: Astrid comes out of it.Essayez d’abord d’entrer dans l’épicerie du centre-ville : Astrid en sort.Versuch zuerst, in den Laden im Stadtzentrum zu gehen: Astrid kommt heraus.Prova prima a entrare nella drogheria in centro: ne esce Astrid.Intenta primero entrar en la tienda del centro: sale Astrid.
- The key won’t fall out of Astrid’s cellar doorLa clé ne tombe pas de la porte de la cave d’AstridDer Schlüssel fällt nicht aus Astrids KellertürLa chiave non cade dalla porta della cantina di AstridLa llave no cae de la puerta del sótano de Astrid
- Slide the paper under the door first, and have a match lit with the door in its light when you use the hanger.Glissez d’abord la feuille sous la porte, et ayez une allumette allumée avec la porte dans sa lumière quand vous utilisez le cintre.Schieb zuerst das Papier unter die Tür, und hab ein brennendes Streichholz mit der Tür im Licht, wenn du den Kleiderbügel benutzt.Infila prima il foglio sotto la porta, e tieni un fiammifero acceso con la porta nella sua luce quando usi la gruccia.Desliza primero el papel bajo la puerta, y ten una cerilla encendida con la puerta dentro de su luz al usar la percha.
- You don’t know where the box of Hermes isVous ne savez pas où est la boîte d’HermèsDu weißt nicht, wo die Kiste des Hermes istNon sai dov’è la scatola di ErmesNo sabes dónde está la caja de Hermes
- It’s your mailbox: look in it after Astrid has asked for the symbol.C’est votre boîte aux lettres : regardez dedans après qu’Astrid vous a demandé le symbole.Es ist dein Briefkasten: Sieh hinein, nachdem Astrid nach dem Symbol gefragt hat.È la tua buca delle lettere: guardaci dentro dopo che Astrid ti ha chiesto il simbolo.Es tu buzón: mira dentro después de que Astrid te pida el símbolo.
- The bedroom safe says the code doesn’t workLe coffre de la chambre dit que le code ne marche pasDer Safe im Schlafzimmer sagt, der Code stimmt nichtLa cassaforte della camera dice che il codice non funzionaLa caja fuerte del dormitorio dice que la combinación no funciona
- Use the second cylinder’s riddle: 70 left, 10 right, 50 left, then right to 0 (its “one hundred”).Utilisez l’énigme du deuxième cylindre : 70 à gauche, 10 à droite, 50 à gauche, puis à droite jusqu’à 0 (son « cent »).Nimm das Rätsel des zweiten Zylinders: 70 links, 10 rechts, 50 links, dann rechts auf 0 (sein „einhundert“).Usa l’indovinello del secondo cilindro: 70 a sinistra, 10 a destra, 50 a sinistra, poi a destra fino a 0 (il suo «100»).Usa el acertijo del segundo cilindro: 70 a la izquierda, 10 a la derecha, 50 a la izquierda y luego a la derecha hasta 0 (su «cien»).
- The preacher won’t let you near the carriageLe prêcheur ne vous laisse pas approcher du landauDer Prediger lässt dich nicht an den KinderwagenIl predicatore non ti lascia avvicinare alla carrozzinaEl predicador no te deja acercarte al cochecito
- Bring her the Book of Prophecies from Astrid’s room.Apportez-lui le Livre des prophéties de la chambre d’Astrid.Bring ihr das Buch der Prophezeiungen aus Astrids Zimmer.Portale il Libro delle profezie dalla camera di Astrid.Llévale el Libro de las Profecías de la habitación de Astrid.
- Igmar catches you in his houseIgmar vous surprend chez luiIgmar erwischt dich in seinem HausIgmar ti sorprende in casa suaIgmar te pilla en su casa
- Dump the flower pot, take the key, and hide in the cellar at once. Wait there; don’t open the door.Renversez le pot de fleur, prenez la clef, et cachez-vous aussitôt dans la cave. Attendez-y ; n’ouvrez pas la porte.Kipp die Blumenvase aus, nimm den Schlüssel und versteck dich sofort im Keller. Warte dort; öffne die Tür nicht.Rovescia il vaso da fiori, prendi la chiave, e nasconditi subito in cantina. Aspetta lì; non aprire la porta.Vuelca el florero, coge la llave y escóndete enseguida en el sótano. Espera allí; no abras la puerta.
- Todd won’t leave the barTodd ne veut pas quitter le barTodd geht nicht von der Bar wegTodd non lascia il banconeTodd no se aparta de la barra
- Ask him about the Remington, then talk to Felicity in the shop, then ask Todd about Felicity.Demandez-lui le Remington, puis parlez à Felicity dans la boutique, puis demandez à Todd Felicity.Frag ihn nach dem Remington, dann rede mit Felicity im Laden, dann frag Todd nach Felicity.Chiedigli del Remington, poi parla con Felicity in negozio, poi chiedi a Todd di Felicity.Pregúntale por el Remington, luego habla con Felicity en la tienda, y luego pregúntale a Todd por Felicity.
- The regulars at Orlando’s won’t talkLes habitués d’Orlando’s ne veulent pas parlerDie Stammgäste im Orlando’s reden nichtI clienti abituali di Orlando’s non parlanoLos habituales de Orlando’s no hablan
- Give Igmar the Remington first, so Todd comes back and Felicity is waiting.Donnez d’abord le Remington à Igmar, pour que Todd revienne et que Felicity attende.Gib Igmar zuerst den Remington, damit Todd zurückkommt und Felicity wartet.Prima dai il Remington a Igmar, così Todd torna e Felicity aspetta.Dale primero el Remington a Igmar, para que Todd vuelva y Felicity esté esperando.
- Gordon refuses the bottleGordon refuse la bouteilleGordon lehnt die Flasche abGordon rifiuta la bottigliaGordon rechaza la botella
- Only real-looking Kerbeci Bourbon will do: steam both labels off at Astrid’s kettle, glue the good label onto the knock-off bottle.Seul un Kerbeci Bourbon d’apparence authentique fera l’affaire : décollez les deux étiquettes à la vapeur de la bouilloire d’Astrid, collez la bonne étiquette sur la bouteille contrefaite.Nur echt aussehender Kerbeci Bourbon reicht: Lös beide Etiketten mit dem Dampf von Astrids Wasserkessel, klebe das gute Etikett auf die Imitat-Flasche.Va bene solo un Kerbeci Bourbon dall’aspetto autentico: stacca entrambe le etichette col vapore del bollitore di Astrid, incolla l’etichetta buona sulla bottiglia contraffatta.Solo vale un Kerbeci Bourbon de aspecto auténtico: despega las dos etiquetas con el vapor del hervidor de Astrid, pega la buena en la botella de imitación.
- You can’t find enough to drink with MevVous ne trouvez pas assez à boire avec MevDu findest nicht genug zu trinken mit MevNon trovi abbastanza da bere con MevNo encuentras suficiente para beber con Mev
- Try all nine named drinks, then the unidentified beverage, then Try Mev.Goûtez les neuf boissons nommées, puis la boisson non identifiée, puis Tester Mev.Probier alle neun benannten Getränke, dann das unbekannte Getränk, dann Von Mev probieren.Prova tutte e nove le bevande con un nome, poi la bevanda non identificata, poi Prova Mev.Prueba las nueve bebidas con nombre, luego la bebida no identificada, y luego Prueba Mev.
- The police won’t see youLa police ne veut pas vous recevoirDie Polizei will dich nicht sehenLa polizia non ti riceveLa policía no quiere verte
- You need to have talked to all ten people. Check the objectives for who’s missing.Il faut avoir parlé aux dix personnes. Consultez les objectifs pour voir qui manque.Du musst mit allen zehn Leuten geredet haben. Sieh in den Zielen nach, wer fehlt.Devi aver parlato con tutte e dieci le persone. Controlla gli obiettivi per vedere chi manca.Tienes que haber hablado con las diez personas. Mira en los objetivos quién falta.
- You can’t find FishVous ne trouvez pas FishDu findest Fish nichtNon trovi FishNo encuentras a Fish
- He moves on each time: North Road, Orlando’s, the woods, Astrid’s cellar, John’s front door, the shop’s storage room.Il change de place à chaque fois : North Road, Orlando’s, les bois, la cave d’Astrid, la porte d’entrée de John, la remise de la boutique.Er zieht jedes Mal weiter: North Road, Orlando’s, der Wald, Astrids Keller, Johns Haustür, der Lagerraum des Ladens.Si sposta ogni volta: North Road, Orlando’s, il bosco, la cantina di Astrid, la porta d’ingresso di John, il magazzino del negozio.Se mueve cada vez: North Road, Orlando’s, el bosque, el sótano de Astrid, la puerta de John, el cobertizo de la tienda.
- Don’s safe won’t openLe coffre de Don ne s’ouvre pasDons Safe geht nicht aufLa cassaforte di Don non si apreLa caja fuerte de Don no se abre
- Use the stethoscope on it: 50 right, 30 left, 70 right, 10 left.Utilisez le stéthoscope dessus : 50 à droite, 30 à gauche, 70 à droite, 10 à gauche.Benutze das Stethoskop daran: 50 rechts, 30 links, 70 rechts, 10 links.Usaci sopra lo stetoscopio: 50 a destra, 30 a sinistra, 70 a destra, 10 a sinistra.Usa el estetoscopio con ella: 50 a la derecha, 30 a la izquierda, 70 a la derecha, 10 a la izquierda.
- The cellar light won’t come onLa lumière de la cave ne s’allume pasDas Kellerlicht geht nicht anLa luce della cantina non si accendeLa luz del sótano no se enciende
- Repair the fuse with the aluminium from John’s cigarettes, put it back in the breaker, then use the switch.Réparez le fusible avec l’aluminium des cigarettes de John, remettez-le dans le disjoncteur, puis utilisez l’interrupteur.Repariere die Sicherung mit dem Aluminium aus Johns Zigaretten, setz sie wieder in den Hauptschalter ein, dann benutze den Lichtschalter.Ripara il fusibile con l’alluminio delle sigarette di John, rimettilo nell’interruttore generale, poi usa l’interruttore.Repara el fusible con el aluminio de los cigarrillos de John, vuelve a ponerlo en el disyuntor y luego usa el interruptor.
- The laptop calls you a cheaterL’ordinateur portable vous traite de tricheurDer Laptop nennt dich einen SchummlerIl portatile ti dà dell’imbroglioneEl portátil te llama tramposo
- Read the messages on Anna’s phone first, then type BTK68W.Lisez d’abord les messages du téléphone d’Anna, puis tapez BTK68W.Lies zuerst die Nachrichten auf Annas Handy und tippe dann BTK68W.Leggi prima i messaggi sul cellulare di Anna, poi digita BTK68W.Lee primero los mensajes del móvil de Anna y teclea BTK68W.
- The film won’t developLa pellicule ne se développe pasDer Film lässt sich nicht entwickelnIl rullino non si sviluppaEl carrete no se revela
- Read Camera Obscura, put the red bulb in the cellar lamp, fill the basin with developer and fixative, and use the film on the enlarger.Lisez Camera Obscura, mettez l’ampoule rouge dans la lampe de la cave, remplissez le bac de révélateur et de fixateur, et utilisez la pellicule sur l’agrandisseur.Lies Camera Obscura, setz die rote Birne in die Kellerlampe, füll das Becken mit Entwickler und Fixierer und benutze den Film am Vergrößerer.Leggi Camera Obscura, metti la lampadina rossa nella lampada della cantina, riempi il contenitore di sviluppo e fissaggio, e usa la pellicola sull’ingranditore.Lee Camera Obscura, pon la bombilla roja en la lámpara del sótano, llena la bandeja de revelador y fijador, y usa el carrete con la ampliadora.